メインコンテンツにスキップ

Panasonic KX-TGA600M Speaker Replacement

必要な工具と部品

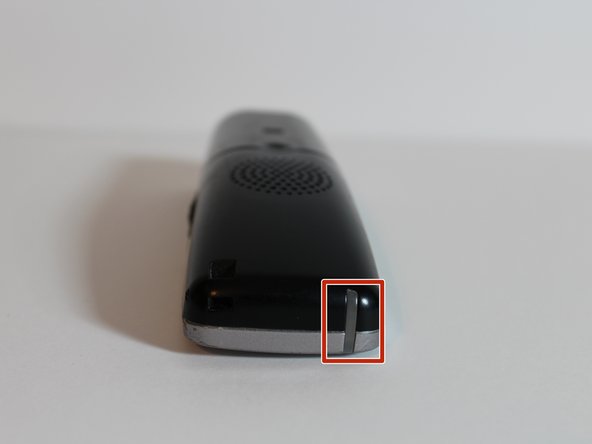
  1. Panasonic KX-TGA600M Speaker Replacement, Battery: 手順 1、 2の画像 1 Panasonic KX-TGA600M Speaker Replacement, Battery: 手順 1、 2の画像 2
    • On the back of the phone, remove battery cover.

    • Push down on the marked indentation and pull downwards.

  2. Panasonic KX-TGA600M Speaker Replacement: 手順 2、 1の画像 1
    • Pull out to remove the battery.

  3. Panasonic KX-TGA600M Speaker Replacement, Speaker: 手順 3、 1の画像 1
    • Unscrew the two screws on the bottom left and right.

  4. Panasonic KX-TGA600M Speaker Replacement: 手順 4、 2の画像 1 Panasonic KX-TGA600M Speaker Replacement: 手順 4、 2の画像 2
    • Separate the front and back of the phone.

    • Store loose pieces for later replacement.

  5. Panasonic KX-TGA600M Speaker Replacement: 手順 5、 1の画像 1
    • Remove the speaker housing.

    • During reassembly, solder the wires onto the speaker housing. For information on soldering, please refer to iFixit's soldering technique guide.

終わりに

To reassemble your device, follow these instructions in reverse order.

作成者

3人の作成者と共同で作成されました。

Kaleb Barquera

メンバー登録日: 01/31/17

101 ポイント

1ガイドが承認済み

チーム

University of North Texas, Team 1-4, Campbell Spring 2017 University of North Texas, Team 1-4, Campbell Spring 2017人のメンバー

UNT-CAMPBELL-S17S1G4

4 メンバー

6のガイドは作成済み

0 件のコメント

コメントを追加

統計データ:

過去 24時間: 0

過去 7 日: 4

過去 30 日: 13

今までの合計 639