メインコンテンツにスキップ

Panasonic KX-TG6641 Wire Replacement

必要な工具と部品

  1. Panasonic KX-TG6641 Wire Replacement, Battery: 手順 1、 2の画像 1 Panasonic KX-TG6641 Wire Replacement, Battery: 手順 1、 2の画像 2
    • Remove the battery cover by sliding the cover piece down

  2. Panasonic KX-TG6641 Wire Replacement: 手順 2、 2の画像 1 Panasonic KX-TG6641 Wire Replacement: 手順 2、 2の画像 2
    • Remove the two AAA batteries.

  3. Panasonic KX-TG6641 Wire Replacement, Damaged Wire: 手順 3、 1の画像 1
    • Unscrew the two screw at the bottom of the device.

  4. Panasonic KX-TG6641 Wire Replacement: 手順 4、 1の画像 1
    • Using the iFixit opening tool, pry open the back of the phone.

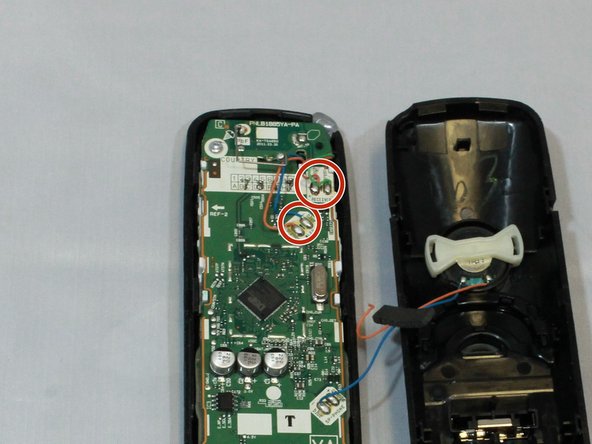
  5. Panasonic KX-TG6641 Wire Replacement: 手順 5、 2の画像 1 Panasonic KX-TG6641 Wire Replacement: 手順 5、 2の画像 2
    • Identify damaged or loose wires. If loose, adjust till properly placed. If damaged, solder the new wire(s) to the mother board or desired location.

終わりに

To reassemble your device, follow these instructions in reverse order.

作成者

2人の作成者と共同で作成されました。

Joseph Byrne

メンバー登録日: 04/08/19

472 ポイント

4のガイドは作成済み

チーム

0 件のコメント

コメントを追加

統計データ:

過去 24時間: 0

過去 7 日: 0

過去 30 日: 3

今までの合計 292