メインコンテンツにスキップ

このバージョンは誤った内容を含んでいる可能性があります。最新の承認済みスナップショットに切り替えてください。

必要な工具と部品

  1. この手順は未翻訳です。 翻訳を手伝う。

    : 手順 1、 3の画像 1 : 手順 1、 3の画像 2 : 手順 1、 3の画像 3
    • Remove Strap and battery

    • Remove bottom 3 screws.

    • Remove side panel screws from both sides of the unit. Total of 4 screws.

  2. この手順は未翻訳です。 翻訳を手伝う。

    : 手順 2、 2の画像 1 : 手順 2、 2の画像 2
    • Remove both side panels. You can use your fingernails or a spudger.

  3. この手順は未翻訳です。 翻訳を手伝う。

    : 手順 3、 3の画像 1 : 手順 3、 3の画像 2 : 手順 3、 3の画像 3
    • Pry off rear cover. Make sure LCD remains in place.

    • There is a thin film of adhesive attaching the LCD to the rear cover. It releases easily with a little pressure. If necessary hold the LCD in place while removing the rear cover.

    • Remove front cover.

  4. この手順は未翻訳です。 翻訳を手伝う。

    : 手順 4、 3の画像 1 : 手順 4、 3の画像 2 : 手順 4、 3の画像 3
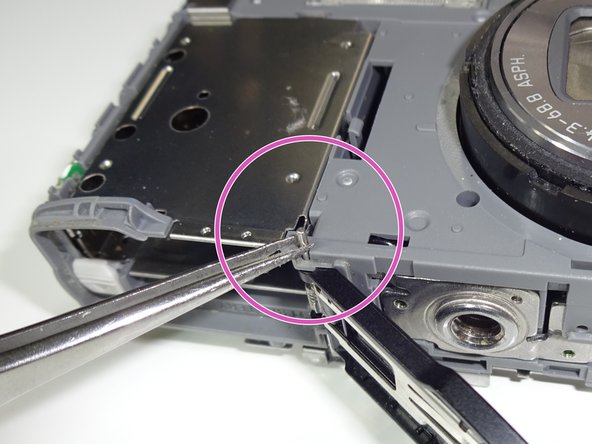
    • Use tweezers to push the rod Up a bit.

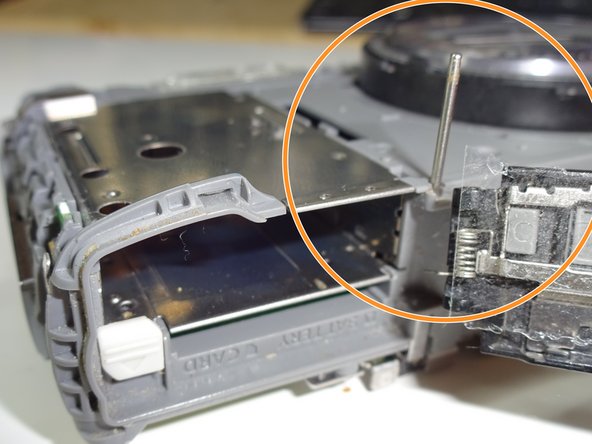
    • Use tweezers to pull the rod all the way up until the door releases. Do not remove the rod.. let the end remain in the hole.

    • To install the new door use a small piece of tape to hold the spring in place on the door. Make sure it is positioned as shown in the picture. Make sure none of the tape interferes with the doors operation during installment.

  5. この手順は未翻訳です。 翻訳を手伝う。

    : 手順 5、 2の画像 1 : 手順 5、 2の画像 2
    • Install the new door Part # VYK4T91. Line up the spring tongue with the groove inside the battery compartment.

    • Line up the spring with the rod and push down the rod. You are done!! Reverse the steps to put the camera back together.

ゴール

作成者

2人の作成者と共同で作成されました。

Sales Cameraparts4you

メンバー登録日: 07/01/16

3,150 ポイント

20のガイドは作成済み

0 件のコメント

コメントを追加

統計データ:

過去 24時間: 1

過去 7 日: 7

過去 30 日: 7

今までの合計 74