メインコンテンツにスキップ

Nokia Lumia 920 Screen Replacement

必要な工具と部品

  1. Nokia Lumia 920 Screen Replacement, Display: 手順 1、 2の画像 1 Nokia Lumia 920 Screen Replacement, Display: 手順 1、 2の画像 2
    • Today i will explain how to replace the screen from a Nokia Lumia 920

    • Specs:

    • Storage: 32GB

    • Camera Resolution: 8.7 megapixel

    • Battery talk time: a little more than 18 and a half hours

    • Screen resolution: 1280 X 768

    • CPU: Dual core 1.5 GHz Krait chip

  2. Nokia Lumia 920 Screen Replacement, Bottom screws & sim card reader: 手順 2、 3の画像 1 Nokia Lumia 920 Screen Replacement, Bottom screws & sim card reader: 手順 2、 3の画像 2 Nokia Lumia 920 Screen Replacement, Bottom screws & sim card reader: 手順 2、 3の画像 3
    • Turn off your device BEFORE STARTING disassembly!

    • Remove the SIM tray on the top of the Lumia 920.

    • Remove both Torx T5 screws on the bottom

  3. Nokia Lumia 920 Screen Replacement, Back cover: 手順 3、 3の画像 1 Nokia Lumia 920 Screen Replacement, Back cover: 手順 3、 3の画像 2 Nokia Lumia 920 Screen Replacement, Back cover: 手順 3、 3の画像 3
    • Try to make a little gap between the screen and the back cover. If needed, use the iSesamo Opening Tool.

    • Once there's a gap, put your plastic opening tool between the screen and the back cover and then slowly slide to the bottom. This way you should be able to pry off the back cover without using too much force.

  4. Nokia Lumia 920 Screen Replacement, Connectors: 手順 4、 3の画像 1 Nokia Lumia 920 Screen Replacement, Connectors: 手順 4、 3の画像 2 Nokia Lumia 920 Screen Replacement, Connectors: 手順 4、 3の画像 3
    • Don't remove the back cover completely yet because it's still attached with a ribbon cable which you can easily rip apart.

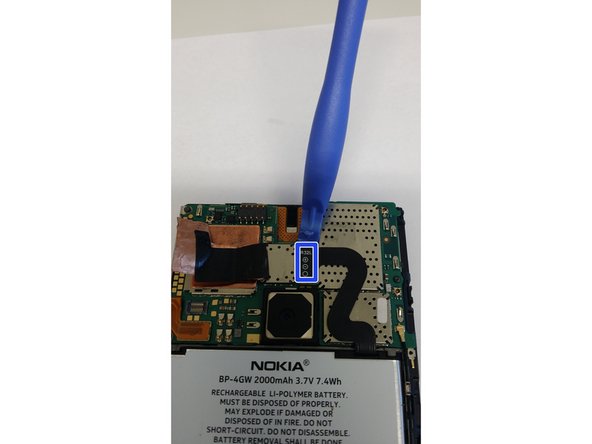
    • First remove the metal shield holding the cable in place, then disconnect the connector that attaches the back cover to the motherboard. Then remove the cable. This works best using a plastic tool or a spudger.

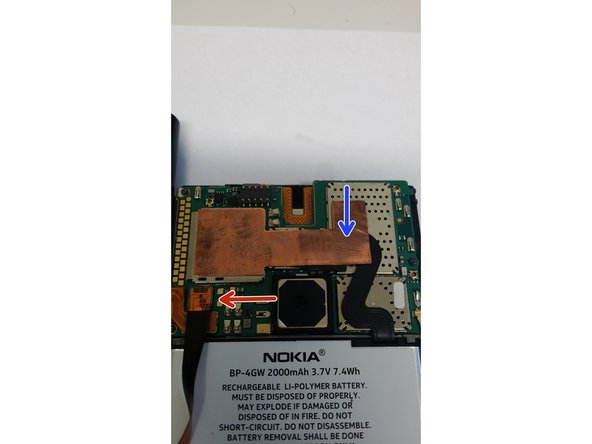
    • Remove the copper tape and disconnect the battery.

  5. Nokia Lumia 920 Screen Replacement, Screws: 手順 5、 3の画像 1 Nokia Lumia 920 Screen Replacement, Screws: 手順 5、 3の画像 2 Nokia Lumia 920 Screen Replacement, Screws: 手順 5、 3の画像 3
    • We're going to remove all screws in one step now. Please make sure to place them in a way that you know how to screw them back in place when reassembling the device. If you interchange the screws this might cause damage to your device.

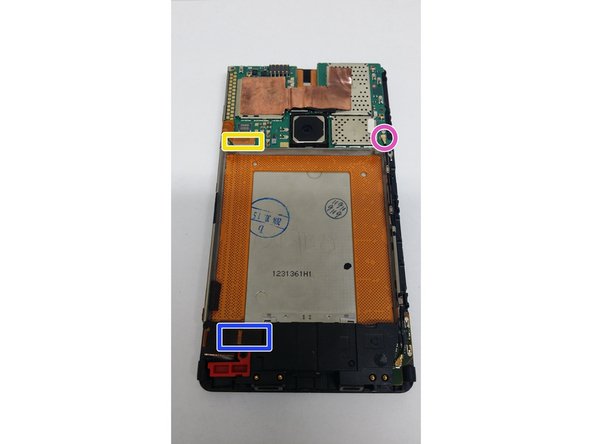
    • First, remove the 3 torx screws holding down the logic board. Keep these apart so as to prevent damage to the motherboard.

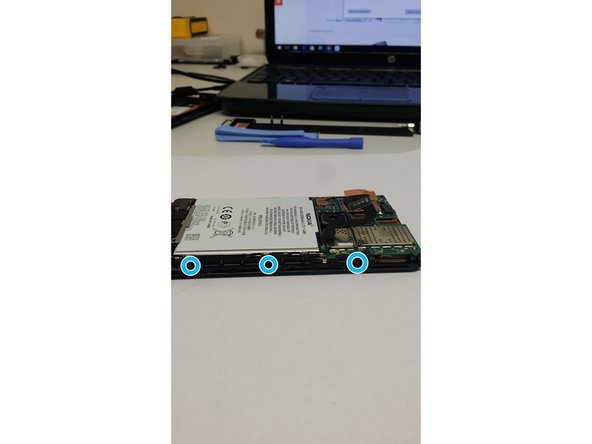
    • Remove all 3 torx screws at the right side of the device. (They're all the same size)

    • Remove the last torx screw located at the bottom left of the device.

    • Once again, when you lay the screws aside, please make sure that you know how to screw them back in place.

  6. Nokia Lumia 920 Screen Replacement: 手順 6、 3の画像 1 Nokia Lumia 920 Screen Replacement: 手順 6、 3の画像 2 Nokia Lumia 920 Screen Replacement: 手順 6、 3の画像 3
    • Remove the metal plate at the bottom of the battery.

    • Disconnect the volume / power switch.

    • Carefully disconnect the RF cable from the motherboard.

    • And disconnect the digitizer cable (Touch / LCD connector).

  7. Nokia Lumia 920 Screen Replacement, Touch connector: 手順 7、 3の画像 1 Nokia Lumia 920 Screen Replacement, Touch connector: 手順 7、 3の画像 2 Nokia Lumia 920 Screen Replacement, Touch connector: 手順 7、 3の画像 3
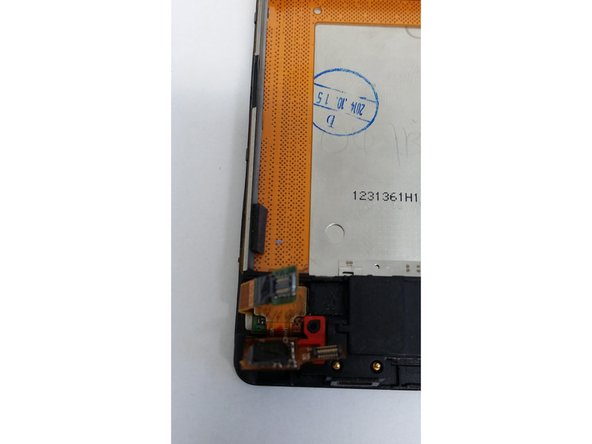
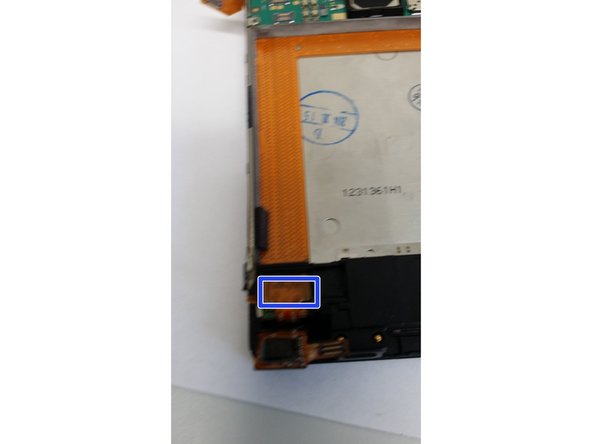
    • Push up the touch array cable to disconnect it.

    • Don't use brute force to remove it, just wiggle it lose with a plastic tool. If this is difficult, use a heathen (a hair dryer should also work).

    • Disconnect the LCD connector using a plastic tool.

  8. Nokia Lumia 920 Screen Replacement, Remove the cover of the motherboard: 手順 8、 3の画像 1 Nokia Lumia 920 Screen Replacement, Remove the cover of the motherboard: 手順 8、 3の画像 2 Nokia Lumia 920 Screen Replacement, Remove the cover of the motherboard: 手順 8、 3の画像 3
    • During this step, some components may fall out of their place, such as the speaker or SIM card cover, but you can easily put them back by slightly lifting up the logic board.

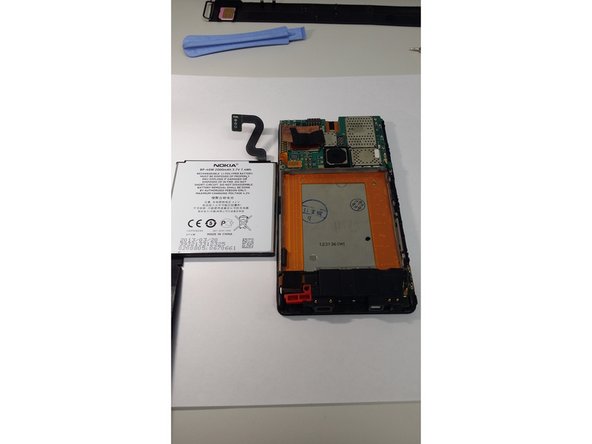
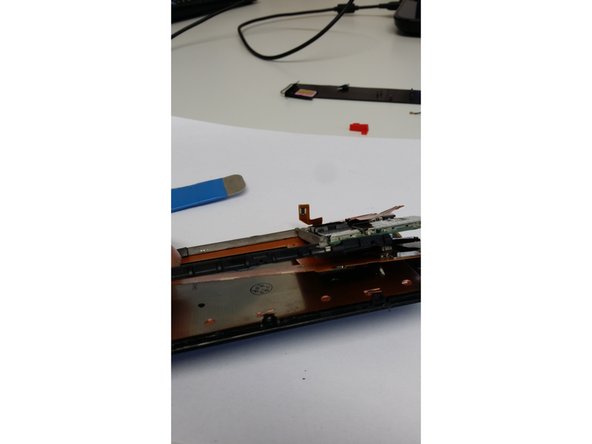
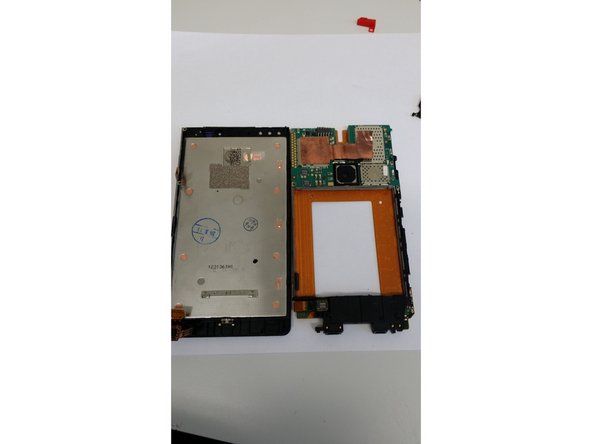
    • Insert your iSesamo between the cover of the motherboard and the cover of the LCD which is very brittle.

    • Unclick the cover of the motherboard (which should be very easy to do).

    • On picture 3 you can see that you also have to remove the camera AND the proximity sensor.

終わりに

To reassemble the phone, follow the instructions in reverse order

7 の人々がこのガイドを完成させました。

以下の翻訳者の皆さんにお礼を申し上げます:

nl en

100%

これらの翻訳者の方々は世界を修理する私たちのサポートをしてくれています。 あなたも貢献してみませんか?
翻訳を始める ›

作成者

1人の作成者と共同作成されました。

Brian ifikske

メンバー登録日: 09/10/15

696 ポイント

1ガイドが承認済み

チーム

OPEN OPEN人のメンバー

Community

82 メンバー

25のガイドは作成済み

コメント 1 件

Touch screen not working Nokia lumia 920

Sankar Muthaiyan - 返信

コメントを追加

統計データ:

過去 24時間: 0

過去 7 日: 2

過去 30 日: 16

今までの合計 5,751