はじめに
このガイドを参照して、SDカードボードケーブルと一緒にトリガーボタンを交換しましょう。
必要な工具と部品
-
-
スパッジャー(もしくは指の爪)を使って、バッテリーを上側から持ち上げます。
-
バッテリーを掴み、DSiから取り出します。
-
-
-
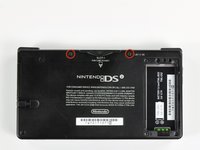
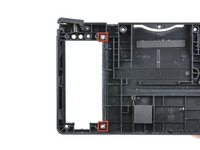
画像中の赤い円で囲まれた2つのゴム足の下に2本のネジが隠れています。
-
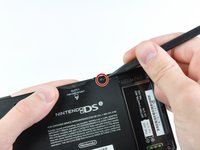
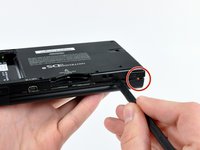
スパッジャーの先端を使って、下部ケースからゴム足を持ち上げます。
One of the feet did break on me, tweezers came in handy for picking it out
I unfolded and sharpened a paperclip. You can use that to stab and hook the rubber without tearing it, as the rubber is thick enough to reseal when reinserted.
-
-
-
下部ケースをDSi本体に固定している次のネジを外します:
-
5.2mmプラスネジ #00 6本
-
2.7mmプラスネジ #00 1本
Impossible d'enlever les vises… trop serré! comment faire?
evrobert03 - 返信
same problem here. maybe try a JIS?
-
-
-
-
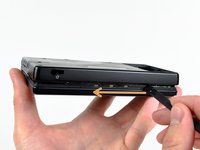
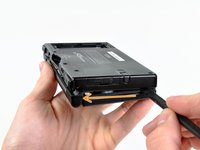
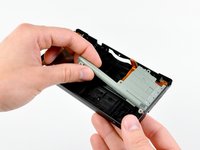
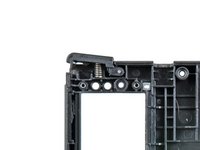
底部端から下部ケースを注意深く持ち上げます。
-
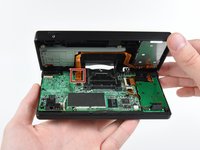
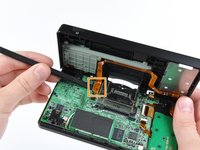
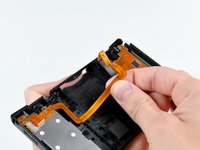
ボリュームとSDボードのケーブルをマザーボード上のソケットからスパッジャーで引き抜きます。
-
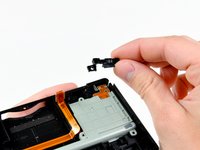
ケーブルが完全に取り外せたら、外箱全体を取り外します。
-


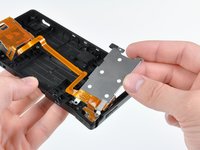
デバイスを再度組み立てるには、この説明書の逆の順番で組み立ててください。
デバイスを再度組み立てるには、この説明書の逆の順番で組み立ててください。
30 の人々がこのガイドを完成させました。
以下の翻訳者の皆さんにお礼を申し上げます:
100%

これらの翻訳者の方々は世界を修理する私たちのサポートをしてくれています。 あなたも貢献してみませんか?
翻訳を始める ›

3 件のコメント
I noticed some pencil marks on the inside of the lower shell that must have come from the factory. There is an m/ to the right of the foam pad, an ax to the right of that, and some kind of numeric marking that says 1T7 12 above the ribbon cable. I'm wondering if it has any significance.
Hi! I accidentally stripped the screws above the game slot , any ideas how to unscrew it without breaking my dsi?