Use your plastic opening tool to wedge between the seams around the sides of the device. Pry open each side, one at a time. For some a finger nail may be best. The case comes up quite high to the glass.
Do not pry near the USB port at the base of the device as you may crack the rear panel.
Work fingers around the seam between device and back cover. Use your plastic opening tool and fingers to separate each side until device and back cover are completely apart.
Be careful around the corners. The body of the device can be fragile.
Use the flat end of a spudger or your fingernail to flip up the clear protective flap on the ribbon cable ZIF socket.
Using the flat end of a spudger or your fingernail, flip up the thin portion of the connector (the white part, opposite of the side where the cable inserts) to release the cable from its socket.
DO NOT PRY the socket on the side where the cable inserts, or you may break the entire socket off the motherboard.
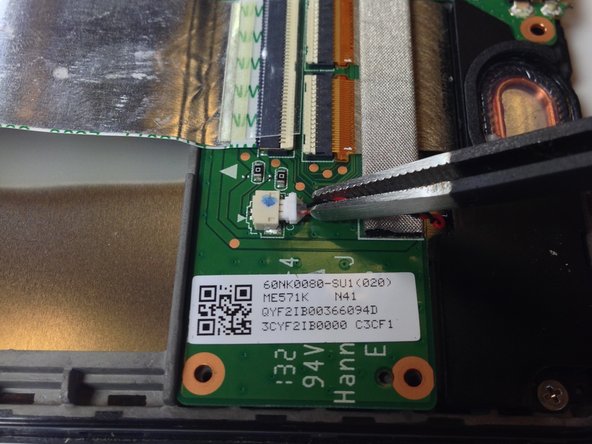
Now that the two main ribbons are disconnected, fold and hold them back with your fingers, or place the tweezers or a light object on the ribbons to keep them in place.
The daughterboard will now lift easily up and out of the device.
Use care during reassembly. This daughter board is a very sensitive part. It is easy to fry the digitizer part of this board if connections are made in the wrong order. Complete all other cable connections before connecting battery power.
Carefully lift the motherboard up from its edge and remove it from the tablet casing.
While the camera is connected directly to the motherboard from the bottom and might lift out of the tablet with the motherboard, it also might not. In this case, as shown, you'll need to use the tweezers to pry the camera out of its spot.
Removing the motherboard will reveal the top speaker that was being held down. If you are planning on replacing the top speaker, you may now simply pick it up out of the device.
Once you have removed the back cover, battery, daughterboard, motherboard, and speakers, the LCD assembly will remain.
Depending on your replacement, you may need to separate the housing frame from the LCD/digitizer.
To remove the LCD/digitizer, carefully heat the edge with a heat gun and use a thin blade to separate from the adhesive. Go slowly, and heat often, as the glass cracks very easily. Work around all of the edges and carefully pull the LCD/digitizer from the housing.
Some replacements do not include the foil switch assembly (top right in photo). If this is the case you will have to pry it gently off the old LCD assembly frame. On the new assembly watch the shape and the plastic guide pin. Alignment is important for the switches to work, once reassembled.
This provided a nice overview to replace the front panel assembly, but there were a couple items not covered or that could have been more clear (see my comments on Steps 3, 10, 14, 16, and 18).
As far as "Flipping up the White part"....the author HAS clearly included links for this if you are unfamiliar....To me....Very well written!!...and no...I'm not the author, nor do I know him....Nice job!