メインコンテンツにスキップ

この翻訳は、ソースガイドの最新の更新を反映していない可能性があります。 翻訳の更新に協力してください。 または ソースガイドを参照してください

必要な工具と部品

  1. この手順は未翻訳です。 翻訳を手伝う。

    : 手順 1、 2の画像 1 : 手順 1、 2の画像 2
    この手順で使用する道具:
    SIM Card Eject Tool
    $2.99
    購入する
    • Power off the phone, by long-pressing the power button and touching Power off.

    • Remove the SIM tray using the SIM Card Eject Tool.

    • This step is required in order to remove the back case.

  2. : 手順 2、 1の画像 1
    この手順で使用する道具:
    T5 Torx Screwdriver
    $5.49
    購入する
  3. この手順は未翻訳です。 翻訳を手伝う。

    : 手順 3、 3の画像 1 : 手順 3、 3の画像 2 : 手順 3、 3の画像 3
    • Gently open the back case by prying along the edge of the cover, starting at a corner of the phone and circling around the phone using a plastic opening tool.

    • The opening process may take a few minutes. The plastic will make a light snapping noise as the back cover separates from the rest of the phone.

  4. : 手順 4、 2の画像 1 : 手順 4、 2の画像 2
    • バッテリーコネクタに留められた1.8mmプラスネジを2本外します。

    • プラスチック製開口ツールを使って、マザーボード上のソケットからバッテリーケーブルの接続を外します。

  5. この手順は未翻訳です。 翻訳を手伝う。

    : 手順 5、 2の画像 1 : 手順 5、 2の画像 2
    この手順で使用する道具:
    Plastic Cards
    $2.99
    購入する
    • Remove the blue tape that secures the white antenna cable to the battery.

    • Using a spudger, carefully disconnect the white antenna cable.

    • Carefully pry the battery out with a Plastic Opening Tool, starting at the top left-hand corner and working down towards the bottom right-hand corner.

    • If necessary, you can also use a plastic card to separate the battery from the metal midframe.

    • The battery is securely glued to the phone. When reinstalling the battery, press the battery firmly against the adhesive strip.

  6. この手順は未翻訳です。 翻訳を手伝う。

    : 手順 6、 3の画像 1 : 手順 6、 3の画像 2 : 手順 6、 3の画像 3
    • Remove the nine 4.6 mm Phillips #000 screws. Gently lift out the plastic cover.

    • The midframe is held in with two clips, one at either side. Use a plastic spudger to release each side and gently lift up and away.

  7. : 手順 7、 3の画像 1 : 手順 7、 3の画像 2 : 手順 7、 3の画像 3
    • スパッジャーを使って、マザーボードの右上にあるグレーのコネクタを取り外します。

  8. この手順は未翻訳です。 翻訳を手伝う。

    : 手順 8、 3の画像 1 : 手順 8、 3の画像 2 : 手順 8、 3の画像 3
    • Gently lift the audio jack upwards and to the left to remove it from the motherboard.

  9. この手順は未翻訳です。 翻訳を手伝う。

    : 手順 9、 2の画像 1 : 手順 9、 2の画像 2
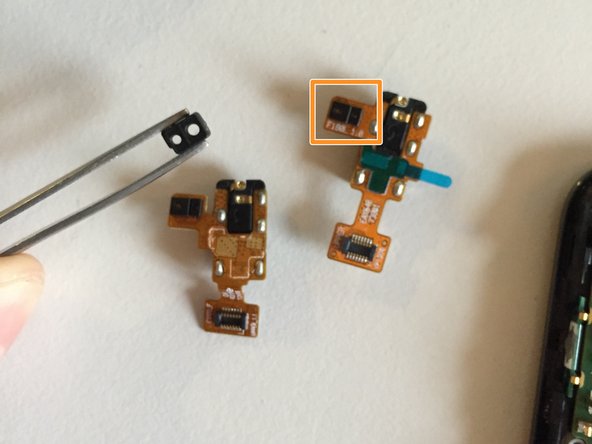
    • The audio port will likely lift out together with the ambient light sensor rubber cap.

    • Remove the cap from the old part and move it to the new one. Ensure the cap stays in place when installing the new audio port into the phone.

ゴール

26 の人々がこのガイドを完成させました。

以下の翻訳者の皆さんにお礼を申し上げます:

en jp

14%

railgunさんは世界中で修理する私たちを助けてくれています! あなたも貢献してみませんか?
翻訳を始める ›

作成者

6人の作成者と共同で作成されました。

Kaitlyn Jones

メンバー登録日: 01/27/13

4,952 ポイント

8のガイドは作成済み

チーム

Cal Poly, Team 3-32, Amido Winter 2013 Cal Poly, Team 3-32, Amido Winter 2013人のメンバー

CPSU-AMIDO-W13S3G32

4 メンバー

8のガイドは作成済み

コメント 1 件

where can I order the original connector on my Nexus 4? With delivery to the Crimea.

Grateful for the answer in advance.

Konstantin - 返信

コメントを追加

統計データ:

過去 24時間: 2

過去 7 日: 11

過去 30 日: 18

今までの合計 23,000