メインコンテンツにスキップ

Nextbook NX008HD8G Speaker Replacement

必要な工具と部品

  1. Nextbook NX008HD8G Speaker Replacement, Back Panel: 手順 1、 2の画像 1 Nextbook NX008HD8G Speaker Replacement, Back Panel: 手順 1、 2の画像 2
    • Using your finger, open the plastic tab to the right of the rear-facing camera.

    • Wedge your fingernail in between the back panel and the plastic tab and pull the plastic tab towards your body.

  2. Nextbook NX008HD8G Speaker Replacement: 手順 2、 3の画像 1 Nextbook NX008HD8G Speaker Replacement: 手順 2、 3の画像 2 Nextbook NX008HD8G Speaker Replacement: 手順 2、 3の画像 3
    • Using your finger, remove the SD card by pressing down on top of it (toward the bottom of the device) until you hear a clicking sound.

    • Once the card pops out, use your finger to pull the card completely out of the SD card slot.

  3. Nextbook NX008HD8G Speaker Replacement: 手順 3、 3の画像 1 Nextbook NX008HD8G Speaker Replacement: 手順 3、 3の画像 2 Nextbook NX008HD8G Speaker Replacement: 手順 3、 3の画像 3
    • Remove the 5 mm screw using the Phillips PH00 bit in the iFixit metal Screwdriver.

  4. Nextbook NX008HD8G Speaker Replacement: 手順 4、 3の画像 1 Nextbook NX008HD8G Speaker Replacement: 手順 4、 3の画像 2 Nextbook NX008HD8G Speaker Replacement: 手順 4、 3の画像 3
    • Use the plastic opening tool to separate the back panel by carefully sliding the narrow end of the tool between the front glass and back panel.

    • Use a second plastic opening tool to help pry the front glass from the back panel.

    • You will hear some cracking sounds when separating the front glass from the back panel. That is okay! That is the back panel latches releasing the front glass.

  5. Nextbook NX008HD8G Speaker Replacement: 手順 5、 2の画像 1 Nextbook NX008HD8G Speaker Replacement: 手順 5、 2の画像 2
    • Use your hands to completely separate the rest of the front glass from the back panel.

    • Do not to pull the device apart with too much force. If you do, you may break or bend the back panel.

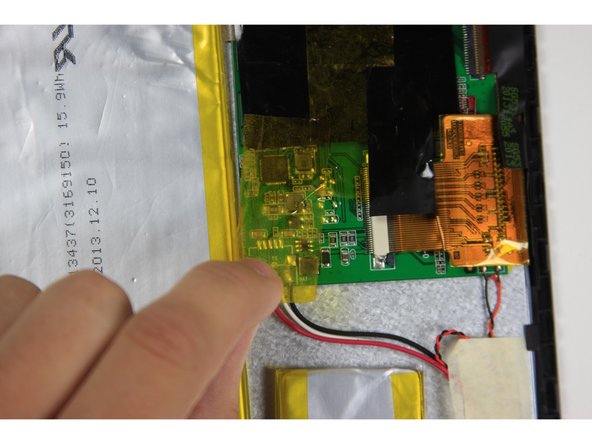
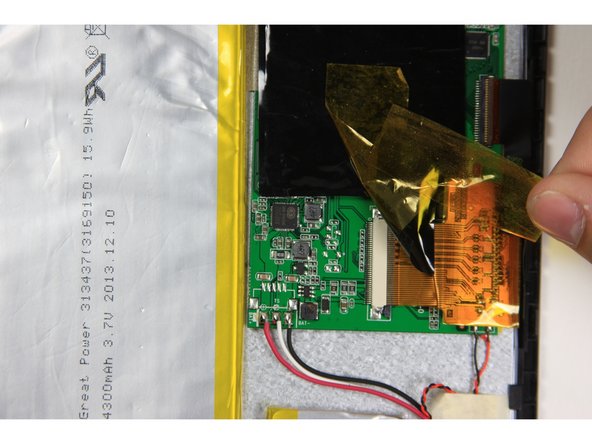
  6. Nextbook NX008HD8G Speaker Replacement, Speaker: 手順 6、 3の画像 1 Nextbook NX008HD8G Speaker Replacement, Speaker: 手順 6、 3の画像 2 Nextbook NX008HD8G Speaker Replacement, Speaker: 手順 6、 3の画像 3
    • Remove yellow tape with a black edge that covers the red, white and black wires.

    • The yellow tape with a black edge is safe to remove completely.

  7. Nextbook NX008HD8G Speaker Replacement: 手順 7、 3の画像 1 Nextbook NX008HD8G Speaker Replacement: 手順 7、 3の画像 2 Nextbook NX008HD8G Speaker Replacement: 手順 7、 3の画像 3
    • Using the sharp end of the spudger, release the black latches on both sides of the white ribbon connector by pushing them to the right (out away from the center of the device).

    • Using your finger, disconnect the gold ribbon from the white ribbon connector.

  8. Nextbook NX008HD8G Speaker Replacement: 手順 8、 1の画像 1
    • Remove the masking tape covering black and red wires that connect the speaker to the right side of the bottom of the motherboard.

  9. Nextbook NX008HD8G Speaker Replacement: 手順 9、 1の画像 1
    • Desolder the red and black wires on the right side of the motherboard that connect the speaker to the motherboard.

  10. Nextbook NX008HD8G Speaker Replacement: 手順 10、 3の画像 1 Nextbook NX008HD8G Speaker Replacement: 手順 10、 3の画像 2 Nextbook NX008HD8G Speaker Replacement: 手順 10、 3の画像 3
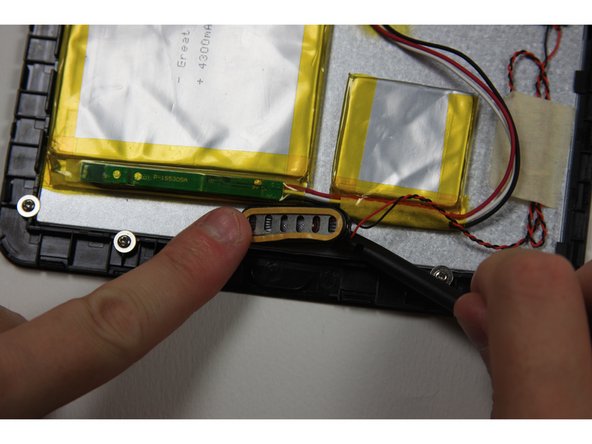
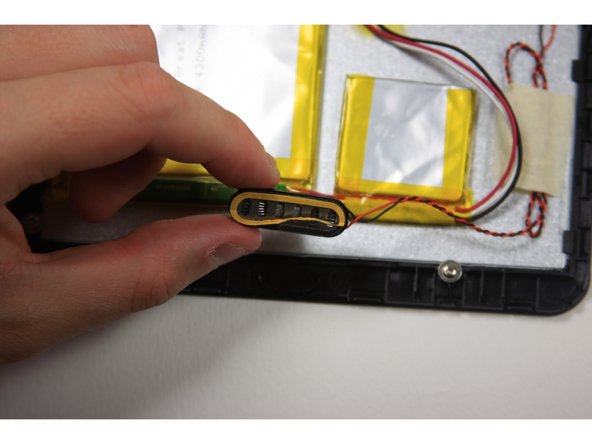
    • Using the flat end of the spudger, remove the speaker from the device by sliding the spudger underneath the speaker.

終わりに

To reassemble your device, follow these instructions in reverse order.

ある他の人がこのガイドを完成しました。

作成者

2人の作成者と共同で作成されました。

Philip Gai

メンバー登録日: 09/22/15

777 ポイント

3のガイドは作成済み

チーム

Baylor, Team 10-15, Williams Fall 2015 Baylor, Team 10-15, Williams Fall 2015人のメンバー

BU-WILLIAMS-F15S10G15

3 メンバー

8のガイドは作成済み

0 件のコメント

コメントを追加

統計データ:

過去 24時間: 0

過去 7 日: 3

過去 30 日: 4

今までの合計 323