メインコンテンツにスキップ

Nest x Yale Lock Keypad Replacement

必要な工具と部品

  1. Nest x Yale Lock Keypad Replacement, Keypad: 手順 1、 1の画像 1
    • Unscrew all available screws that you can see from the back.

    • The screws are 0.25 inches phillips screws.

    • Make sure to not lose any of the screws, and keep track of them.

  2. Nest x Yale Lock Keypad Replacement: 手順 2、 1の画像 1
    • Once you have unscrewed all the screws carefully remove the metal covering.

    • Make sure that the wire safely goes through the hole.

  3. Nest x Yale Lock Keypad Replacement: 手順 3、 1の画像 1
    • Then once again unscrew the two screws that you see.

    • The screws have a height of 0.2 inches phillips screws.

    • Make sure to not lose any of the screws, and keep track of them.

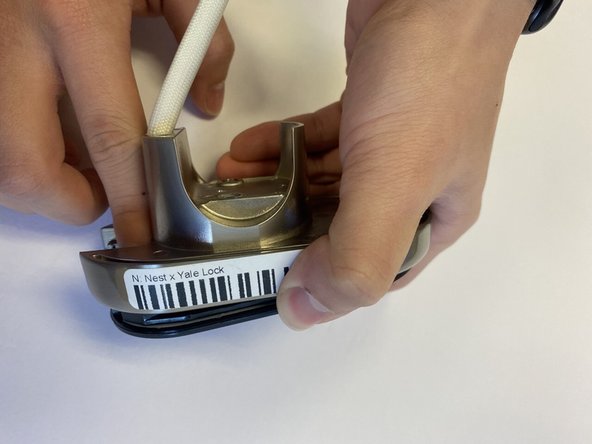
  4. Nest x Yale Lock Keypad Replacement: 手順 4、 2の画像 1 Nest x Yale Lock Keypad Replacement: 手順 4、 2の画像 2
    • Once all screws are unscrewed proceed to tap the screen out of the metal casing.

終わりに

To reassemble your device, follow these instructions in reverse order.

作成者

3人の作成者と共同で作成されました。

Christopher Gonzalez

メンバー登録日: 09/26/22

313 ポイント

3のガイドは作成済み

チーム

CSU Los Angeles, Team 5-3, Adachi Fall 2022 CSU Los Angeles, Team 5-3, Adachi Fall 2022人のメンバー

CSULA-ADACHI-F22S5G3

5 メンバー

5のガイドは作成済み

コメント 1 件

Where do you order the touchscreen from?

Mike Turrell - 返信

コメントを追加

統計データ:

過去 24時間: 2

過去 7 日: 4

過去 30 日: 10

今までの合計 266