メインコンテンツにスキップ
リペアコミュニティに参加 - アカウントの作成

Motorola Droid Motherboard Replacement

必要な工具と部品

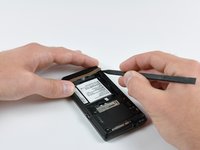
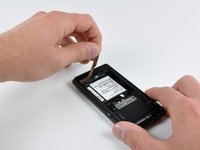
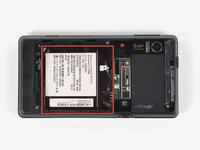
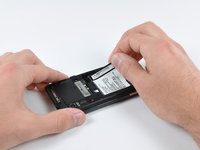
    1. Motorola Droid Motherboard Replacement, Battery: 手順 1、 3の画像 1 Motorola Droid Motherboard Replacement, Battery: 手順 1、 3の画像 2 Motorola Droid Motherboard Replacement, Battery: 手順 1、 3の画像 3
      • Slide the battery cover downwards while applying pressure to the center of the battery cover with your thumb.

      • Lift and remove the battery cover out from the phone.

      FixBotに聞いてみる

      コメントを追加

    2. Motorola Droid Motherboard Replacement: 手順 2、 1の画像 1
      • Grasp the upper left corner of the battery and lift it out of its housing.

      FixBotに聞いてみる

      コメントを追加

    1. Motorola Droid Motherboard Replacement, Rear Case: 手順 3、 1の画像 1
      • Use a spudger to lift and remove the black plastic screw cover at the top of the phone near the camera.

      • The cover is attached by adhesive, so some force may be required.

      FixBotに聞いてみる

      コメントを追加

    2. Motorola Droid Motherboard Replacement: 手順 4、 2の画像 1 Motorola Droid Motherboard Replacement: 手順 4、 2の画像 2
      • Using the tip of a spudger, peel up one corner of the gold ribbon beneath the battery compartment.

      • Peel the ribbon up off the phone.

      FixBotに聞いてみる

      コメントを追加

    3. Motorola Droid Motherboard Replacement: 手順 5、 2の画像 1 Motorola Droid Motherboard Replacement: 手順 5、 2の画像 2
      • Carefully peel the device information label that covers the motherboard EMI shields.

      • This label contains important information specific to the phone. Remove it with care and keep it in a safe place.

      FixBotに聞いてみる

      コメントを追加

    4. Motorola Droid Motherboard Replacement: 手順 6、 1の画像 1
      • Insert the flat end of a spudger and pry the plastic camera cover up off the phone.

      • The thin plastic cover is attached to the phone with an adhesive. Work slowly and carefully.

      FixBotに聞いてみる

      コメントを追加

    5. Motorola Droid Motherboard Replacement: 手順 7、 1の画像 1
      • Remove the seven 5.5 mm T5 Torx screws securing the rear case to the inner case.

      FixBotに聞いてみる

      コメントを追加

    6. Motorola Droid Motherboard Replacement: 手順 8、 1の画像 1
      • Insert the flat end of a spudger and pry downwards to release the plastic tab holding the rear case to the motherboard screw.

      FixBotに聞いてみる

      コメントを追加

    7. Motorola Droid Motherboard Replacement: 手順 9、 1の画像 1
      • Gently insert a spudger between the rear case and front case at the top of the phone, near the audio jack.

      • Carefully pry the top edge of the rear case up from the rest of the phone.

      FixBotに聞いてみる

      コメントを追加

    8. Motorola Droid Motherboard Replacement: 手順 10、 2の画像 1 Motorola Droid Motherboard Replacement: 手順 10、 2の画像 2
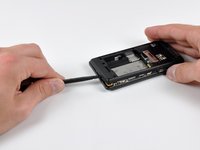
      • With the spudger still inserted between the rear case and front case, slide the spudger along the right edge of the device, moving toward the bottom, prying as you go.

      • Continue prying along the bottom edge of the device from right to left, freeing it from the front panel.

      FixBotに聞いてみる

      コメントを追加

    9. Motorola Droid Motherboard Replacement: 手順 11、 2の画像 1 Motorola Droid Motherboard Replacement: 手順 11、 2の画像 2
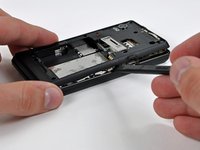
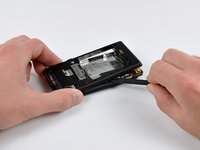
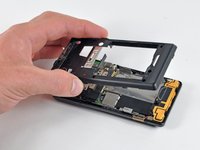
      • Continue prying the rear case from the front case along the left side, moving from bottom to top.

      • Lift the rear case up out of the phone.

      FixBotに聞いてみる

      コメントを追加

    1. Motorola Droid Motherboard Replacement, Speaker: 手順 12、 1の画像 1
      • Carefully lift and remove the speaker assembly up out of the phone.

      FixBotに聞いてみる

      コメントを追加

    1. Motorola Droid Motherboard Replacement, Motherboard: 手順 13、 3の画像 1 Motorola Droid Motherboard Replacement, Motherboard: 手順 13、 3の画像 2 Motorola Droid Motherboard Replacement, Motherboard: 手順 13、 3の画像 3
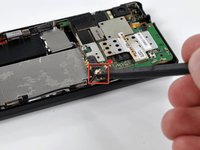
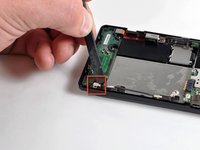
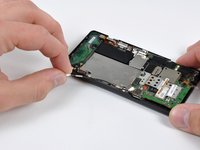
      • Use a spudger to pry the antenna cable connectors from their respective sockets on the motherboard and the speaker/antenna board.

      • De-route the antenna cable by pulling it out of the metal clips along the side of the front case.

      FixBotに聞いてみる

      コメントを追加

    2. Motorola Droid Motherboard Replacement: 手順 14、 1の画像 1
      • Peel the black tape covering the side button and display ribbon connectors on the motherboard.

      FixBotに聞いてみる

      コメントを追加

    3. Motorola Droid Motherboard Replacement: 手順 15、 1の画像 1
      • Disconnect the power button/volume button connector from its socket on the motherboard using the flat end of a spudger.

      FixBotに聞いてみる

      コメントを追加

    4. Motorola Droid Motherboard Replacement: 手順 16、 1の画像 1
      • Disconnect the display ribbon connector from its socket on the motherboard using the flat end of a spudger.

      FixBotに聞いてみる

      コメントを追加

    5. Motorola Droid Motherboard Replacement: 手順 17、 1の画像 1
      • Remove three 3.8 mm T5 Torx screws securing the motherboard to the front case.

      • Don't attempt to remove the motherboard yet, it is still attached by the keypad ribbon connector.

      FixBotに聞いてみる

      コメントを追加

    6. Motorola Droid Motherboard Replacement: 手順 18、 2の画像 1 Motorola Droid Motherboard Replacement: 手順 18、 2の画像 2
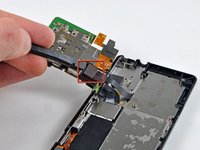
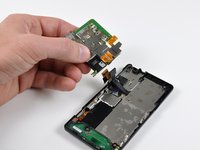
      • Carefully lift the motherboard from the front case and lay it next to the Droid, minding the keypad connector that is still attached.

      • Disconnect the keypad connector by prying it straight up off its socket on the motherboard.

      • Remove the motherboard from the phone.

      FixBotに聞いてみる

      コメントを追加

終わりに

To reassemble your device, follow these instructions in reverse order.

キャンセル: このガイドを終了できませんでした。

8 の人々がこのガイドを完成させました。

作成者

7人の作成者と共同で作成されました。

Brett Hartt

メンバー登録日: 04/12/10

132,258 ポイント

144のガイドは作成済み

チーム

iFixit iFixit人のメンバー

Staff

123 メンバー

36,020のガイドは作成済み

1件のガイドコメント

Hi all,

Can anyone please suggest me should I dump my motorola droid. I have taken it to fix-it shops and they all have the same answer the mother board is gone

So, is it better to buy a new mother board which would cost me as much as a new phone or just sell it for nickels on Ebay

please reply pbansal1@jhu.edu

prateek - 返信 共有

コメントを追加

統計データ:

過去 24時間: 3

過去 7 日: 8

過去 30 日: 35

今までの合計 29,677