はじめに
To remove the speaker you will need to remove the battery, open the phone and remove the motherboard. Be ready to use a plastic opening tool, T5 Torx Screwdriver and a spudger.
必要な工具と部品
-
この手順で使用する道具:T5 Torx Screwdriver$5.49
-
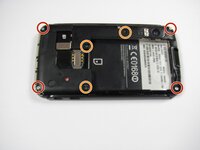
Remove the four 5.0 mm T5 Torx screws using a T5 Torx Screwdriver.
-
Remove the three 5.5 mm T5 Torx screws using a T5 Torx Screwdriver.
-
-
この手順で使用する道具:iFixit Opening Tool$1.99
-
Lift up the black rubber flap using an opening tool.
-
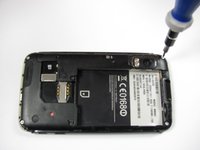
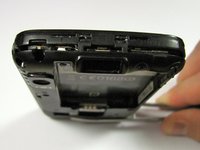
Remove the single 5.5 mm T5 Torx screw using a T5 Torx Screwdriver.
-
-
この手順で使用する道具:iFixit Opening Tool$1.99
-
Gently lift the tabs located at the top of the phone using an opening tool.
-
Gently lift the tab located at the bottom of the phone with the same tool.
-
-
-
この手順で使用する道具:iFixit Opening Tool$1.99
-
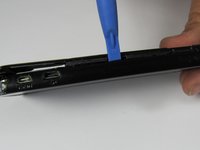
Insert an opening tool between the front and back of the case.
-
Slide the tool down the side of the phone.
-
Repeat the same process for the other side.
-
-
この手順で使用する道具:iFixit Opening Tool$1.99
-
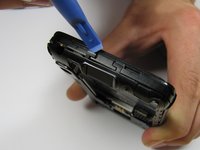
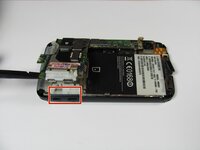
Slide an opening tool beneath the antenna and lift straight up from the motherboard.
-
-
この手順で使用する道具:Spudger$3.99
-
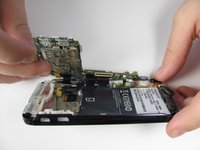
Insert a spudger between the black plastic and the motherboard.
-
Lift upwards with the spudger to dislodge the board.
-
-
-
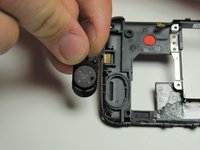
The speaker can be found on the bottom of the inside of the back case and is held in by glue.
-
Use a spudger or case opener tool to pry out the speaker by sliding it in the crack between the two pieces of black plastic.
-


To reassemble your device, follow these instructions in reverse order.
To reassemble your device, follow these instructions in reverse order.
2 の人々がこのガイドを完成させました。
チーム

Cal Poly, Team 9-42, Regan Spring 2012 Cal Poly, Team 9-42, Regan Spring 2012人のメンバー
CPSU-REGAN-S12S9G42
6 メンバー
15のガイドは作成済み