メインコンテンツにスキップ

Motherboard Replacement

必要な工具と部品

  1. Motherboard Replacement, Bottom Cover: 手順 1、 2の画像 1 Motherboard Replacement, Bottom Cover: 手順 1、 2の画像 2
    • Power off the SoundBank Z3.

    • Turn over the device.

    • Peel the silicone feet up to remove.

    • No extra adhesive is needed to reapply the feet as long as the sticky side is not touched.

  2. Motherboard Replacement: 手順 2、 1の画像 1
    • Remove all eight of the 11 mm Phillips screws from the bottom of the device.

  3. Motherboard Replacement: 手順 3、 2の画像 1 Motherboard Replacement: 手順 3、 2の画像 2
    • Remove the bottom panel speaker using an iFixit opening tool.

  4. Motherboard Replacement, Motherboard Cover: 手順 4、 3の画像 1 Motherboard Replacement, Motherboard Cover: 手順 4、 3の画像 2 Motherboard Replacement, Motherboard Cover: 手順 4、 3の画像 3
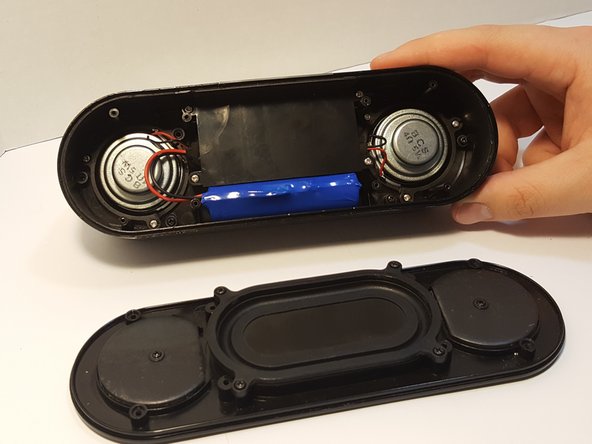
    • Remove the four 4.5 mm silver Phillips screws that secure the plastic panel covering the motherboard.

    • Remove the plastic panel.

  5. Motherboard Replacement, Battery: 手順 5、 2の画像 1 Motherboard Replacement, Battery: 手順 5、 2の画像 2
    • Remove the battery from the holder. It may be difficult the first time.

    • Use a spudger between the battery and speaker wall to loosen it from its surroundings.

    • If the battery is punctured, leaking, or bloated/puffy, it may be hazardous and should be properly disposed of.

  6. Motherboard Replacement: 手順 6、 2の画像 1 Motherboard Replacement: 手順 6、 2の画像 2
    • Remove the pressure-fitted foam from the slot by hand.

    • Unravel and remove foam from the wires.

    • When reassembling, the foam can be re-wrapped if care is taken when handling it.

  7. Motherboard Replacement: 手順 7、 1の画像 1
    • Using a soldering iron, remove the leads, separating the battery from motherboard.

    • Follow this guide to help you remove the wires from the motherboard if you are unfamiliar with soldering.

  8. Motherboard Replacement, Speakers: 手順 8、 2の画像 1 Motherboard Replacement, Speakers: 手順 8、 2の画像 2
    • Remove the three screws that are holding the speaker down.

    • Be careful not to rip out the speaker while taking out the screws.

  9. Motherboard Replacement: 手順 9、 2の画像 1 Motherboard Replacement: 手順 9、 2の画像 2
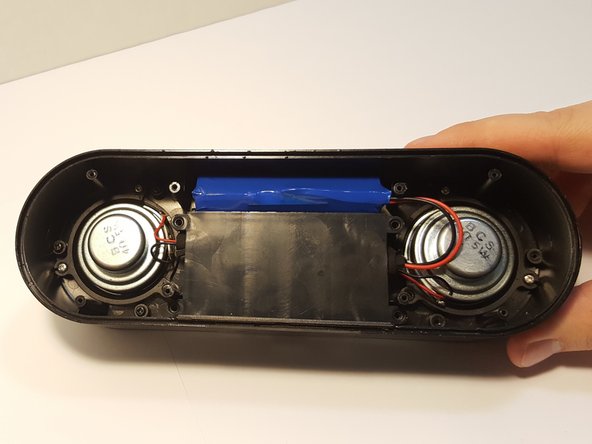
    • Desolder the speaker joints from the motherboard. Follow this How To Solder guide for help with desoldering.

  10. Motherboard Replacement: 手順 10、 2の画像 1 Motherboard Replacement: 手順 10、 2の画像 2
    • Remove the speaker from the motherboard.

    • Remove the speaker ring.

    • Be careful not to remove other components in the speaker.

    • Repeat Steps 5-7 with the other speaker.

  11. Motherboard Replacement, Motherboard: 手順 11、 2の画像 1 Motherboard Replacement, Motherboard: 手順 11、 2の画像 2
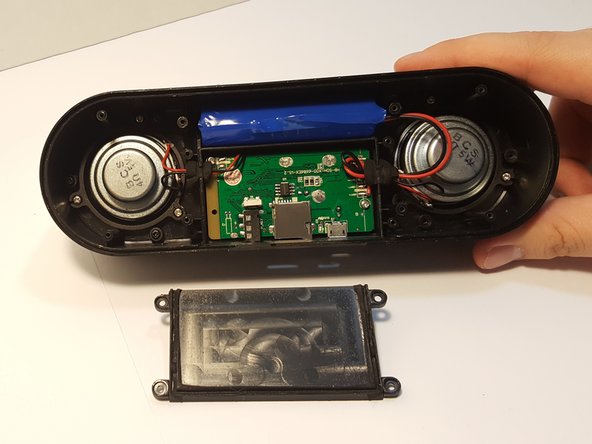
    • Remove these two 4.5 mm Philips silver screws holding down the motherboard.

    • The motherboard should be able to be lifted right out of the housing.

  12. Motherboard Replacement: 手順 12、 3の画像 1 Motherboard Replacement: 手順 12、 3の画像 2 Motherboard Replacement: 手順 12、 3の画像 3
    • You will finds a ribbon cable connecting the motherboard to the control interface circuit board.

    • Using a spudger or plastic opening tool, lift flap on the ribbon cable ZIF connector.

    • Using a plastic pry tool or fine tip plastic tool to open the clamp.

    • Using the tool, try lifting the clamp up on either location, noted by the blue arrow.

    • The ribbon should pop out, if not you should be able to slide it out from the clamp.

終わりに

To reassemble your device, follow these instructions in reverse order.

2 の人々がこのガイドを完成させました。

作成者

4人の作成者と共同で作成されました。

Samuel Knapik

メンバー登録日: 03/04/16

121 ポイント

1ガイドが承認済み

チーム

UMass Dartmouth, Team 3-2, Bhusal Spring 2016 UMass Dartmouth, Team 3-2, Bhusal Spring 2016人のメンバー

UMASSD-BHUSAL-S16S3G2

5 メンバー

8のガイドは作成済み

0 件のコメント

コメントを追加

統計データ:

過去 24時間: 0

過去 7 日: 0

過去 30 日: 3

今までの合計 347