メインコンテンツにスキップ

Mad Catz Dual Force 2 Pro Vibration Motors Replacement

必要な工具と部品

  1. Mad Catz Dual Force 2 Pro Vibration Motors Replacement, Remove Cover: 手順 1、 1の画像 1
    • Remove the six 7 mm Phillips screws from the rear cover.

  2. Mad Catz Dual Force 2 Pro Vibration Motors Replacement: 手順 2、 1の画像 1
    • Remove the back of the controller.

    • There are no loose items in the controller that can fall out, so you can open it, generally, however you want.

  3. Mad Catz Dual Force 2 Pro Vibration Motors Replacement: 手順 3、 1の画像 1
    • Remove the two 7 mm screws on the closest circuit board.

  4. Mad Catz Dual Force 2 Pro Vibration Motors Replacement: 手順 4、 2の画像 1 Mad Catz Dual Force 2 Pro Vibration Motors Replacement: 手順 4、 2の画像 2
    • Grip the sides of the motor you wish to replace and lift up.

    • Be careful not to tear the wires that connect the motors to the motherboard.

  5. Mad Catz Dual Force 2 Pro Vibration Motors Replacement, Remove the Screw: 手順 5、 1の画像 1
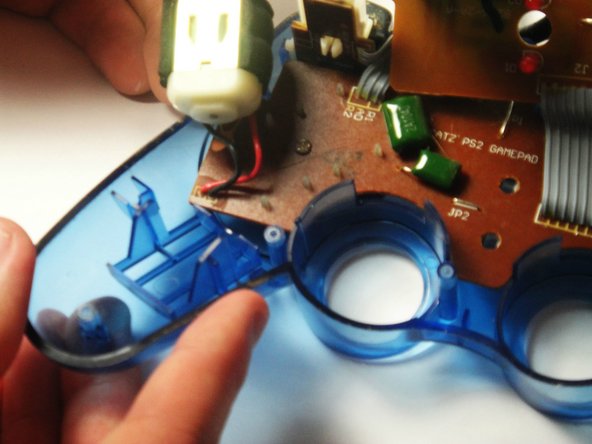
    • Use a soldering iron to de-solder both vibration motor wires from the motherboard.

    • If you do not know how to solder, see the soldering guide for instructions.

    • The positive (red) wire connects nearest the edge of the motherboard.

    • When soldering on circuit boards, be sure not to overheat the connection as permanent damage may result.

  6. Mad Catz Dual Force 2 Pro Vibration Motors Replacement: 手順 6、 1の画像 1
    • If needed, repeat the last two steps for the other vibration motors.

終わりに

To reassemble your device, follow these instructions in reverse order.

作成者

3人の作成者と共同で作成されました。

Alexander Coyne

メンバー登録日: 01/11/15

658 ポイント

5のガイドは作成済み

チーム

USF Tampa, Team 7-2, Remmell Winter 2015 USF Tampa, Team 7-2, Remmell Winter 2015人のメンバー

USFT-REMMELL-W15S7G2

4 メンバー

10のガイドは作成済み

0 件のコメント

コメントを追加

統計データ:

過去 24時間: 0

過去 7 日: 4

過去 30 日: 8

今までの合計 325