はじめに
A cracked LCD is no fun at all. Colors go wonky, things don't look right, it's an overall bad experience. Mysterious white lines and faded displays can often be fixed by replacing the LCD. Use this guide to help you out.
必要な工具と部品
-
-
Remove the following ten screws securing the lower case to the upper case:
-
Three 13.5 mm (14.1 mm) Phillips screws.
-
Seven 3 mm Phillips screws.
-
-
-
Remove the two 7.4 mm Tri-point screws securing the battery to the upper case.
-
Note: For certain repairs (e.g. hard drive), removing the battery is not necessary but it prevents any accidental shorting of electronics on the motherboard. If you do not remove the battery, please be careful as parts of the motherboard might be electrified.
-
-
-
Tilt the battery away from the logic board enough to access the battery cable connector.
-
Pull the battery cable connector away from its socket on the logic board and remove the battery from the upper case.
-
Charge it to 100%, and then keep charging it for at least 2 more hours. Next, unplug and use it normally to drain the battery. When you see the low battery warning, save your work, and keep your laptop on until it goes to sleep due to low battery. Wait at least 5 hours, then charge your laptop uninterrupted to 100%.
-
If you notice any unusual behavior or problems after installing your new battery, you may need to reset your MacBook's SMC.
-
-
-
Use the flat end of a spudger to carefully pry the AirPort/Bluetooth ribbon cable up off its socket on the logic board.
-
-
-
-
Grab the upper case with your right hand and rotate it slightly toward the top of the display so the upper display bracket clears the edge of the upper case.
-
Rotate the display slightly away from the upper case.
-
Lift the display up and away from the upper case, minding any brackets or cables that may get caught.
-
-
-
Insert the tip of a spudger underneath the black rubber gasket at the bottom right corner of the display assembly.
-
Gently pry the wide edge of the gasket up from the back case.
-
-
-
Wedge a guitar pick in between the bezel and display assembly near the inner bottom left corner.
-
Work along the inner bottom left edge of the display assembly, carefully prying the adhesive up with the guitar pick.
-
Continue prying along the inner bottom edge to release the adhesive securing the bezel to the display assembly.
-
-
-
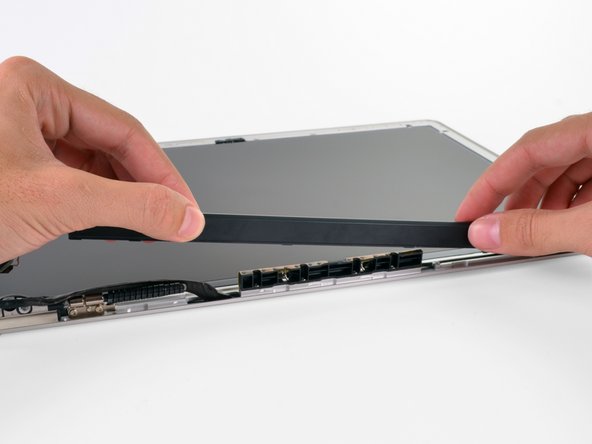
Lifting the left edge of the clutch cover, gently rock it back and forth on its long axis while pulling it away from the display.
-
Remove the clutch cover from the display, minding any cables that may get caught.
-
-
-
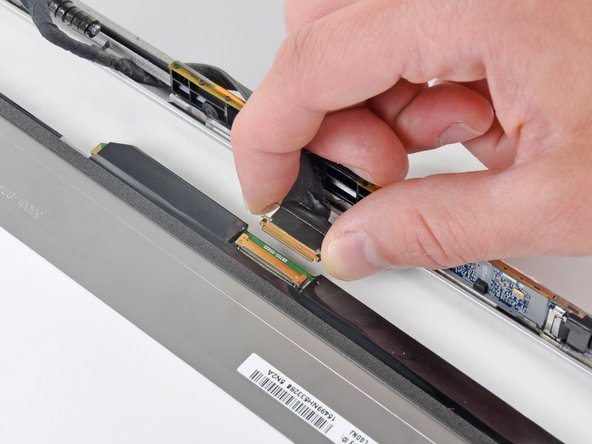
Remove the six 2.9 mm Phillips screws securing the LCD panel to the display assembly.
-
To reassemble your device, follow these instructions in reverse order.
To reassemble your device, follow these instructions in reverse order.
12 の人々がこのガイドを完成させました。
2 件のコメント
I had no problem with reapplying the gasket as it fits nicely into the notch.
A big THANKS to Walter! It is in deed not easy but thanks to this detailed instructions I got it working!! :)
Dirk Hoppe - 返信


