はじめに
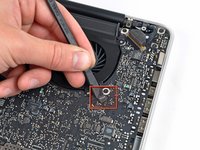
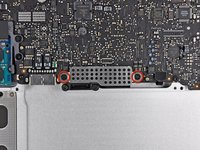
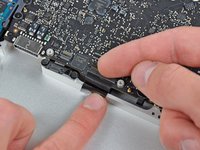
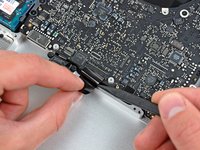
MagSafe DC-Inボードを交換するには基板を取り外さなければなりません。
必要な工具と部品
-
-
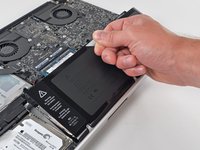
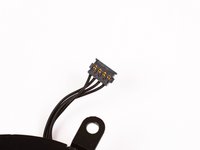
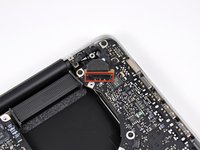
バッテリーケーブルコネクターにアクセスするために、ロジックボードからバッテリーを十分に傾けて下に隙間を作ってください。
-
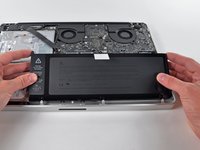
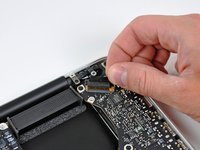
バッテリーケーブルのコネクターをメイン基板のソケットから手前に引いて接続を切り、バッテリーを上部ケースから取り外します。
-
100%になるまで充電します。充電後も最低2時間はプラグを繋げたままにします。それからプラグを外して、通常通り使用しながら、自然に放電させます。バッテリー残量小のサインが表示されたら、これまでの作業を保存して、スリープ状態になるまで放置してください。スリープ状態に入ったら、少なくとも5時間置きます。それから一気に100%まで充電します。
-
新しいバッテリーを装着後、通常通り作動しない場合は、MacBook ProのSMCをリセットしなければならない可能性があります。
-
-


デバイスを再組み立てする際は、これらのインストラクションを逆の順番に従って作業を進めてください。
67 の人々がこのガイドを完成させました。
以下の翻訳者の皆さんにお礼を申し上げます:
100%

Midori Doiさんは世界中で修理する私たちを助けてくれています! あなたも貢献してみませんか?
翻訳を始める ›

4件のガイドコメント
Excellent walkthrough! This was my first ifixit repair and I was able to successfully replace my damaged magsafe board. The 64-Bit driver kit was the perfect companion to this project and the many more that will come in the future.
Thanks for your help! I think something on the mainboard is toast and the computer is a total loss, but it was worth it to take a chance and see if the cheap mag board would fix it. Good guide!
atworkforu - 返信
Good guide - gave me the confidence to have a go - thanks - I would say to others be very gentle with the cable connectors - mine weren’t exactly the same type as shown in the guide - be patient and you’ll work it out.
I did the same procedure yesterday replacing a malfunction on magsafe board, just before signing up for Fixit and viewing this document. The walkthrough depicted here is really detailed and very well done. Excellent.