はじめに
ハードドライブをアップグレードして容量を増加させましょう!
必要な工具と部品
-
-
-
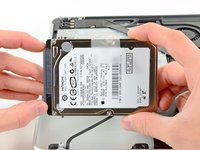
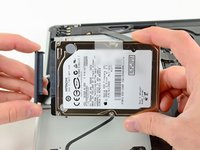
ハードドライブの両サイドから各2本ずつT6トルクスネジを外します。(合計4本)
-
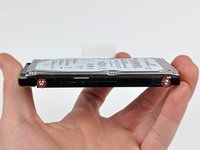
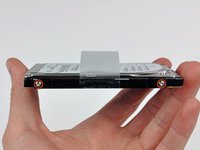
必要に応じて、古いハードドライブからプルタブを剥がして、新しいハードドライブの側面に移してください。
-


デバイスを再組み立てする際は、これらのインストラクションを逆の順番に従って作業を進めてください。
139 の人々がこのガイドを完成させました。
以下の翻訳者の皆さんにお礼を申し上げます:
100%

Midori Doiさんは世界中で修理する私たちを助けてくれています! あなたも貢献してみませんか?
翻訳を始める ›

12件のガイドコメント
Hi everyone! I have a question.
I'm not a super expert in computers, but I'm hoping to learn from this intelligent website.
I have a Laptop MacBook Pro 15' late 2011, and I would like to replace the hard drive to a higher so then I can update with better programs: like Adobe CC.
what I have is system Lion, memory 16 GB 1333 MHz DDR3, processor 2.2 GHz Intel Core i7
what would you suggest me for a better performance with up to date art programs?
Regards
Oliver,
If I'm understanding you correctly you want to replace the HDD with a larger capacity drive. In that case, for the most part, it won't improve the performance dramatically. A solid state drive would be the biggest improvement in terms of drive speed. The overall storage size won't really speed up the machine it will just give you more room for programs and storage.
Hope that helps,
-b
woestmab -
One upgrade is to increase spindle speed. Typically you'll have a 5400 rpm drive from Apple unless a faster drive was ordered (look up your drive's number on the Hardware Report on About this Mac). A 7200 rpm will give you better access times but will come at greater power consumption (shorter battery life). You'll be trading cost and capacity for speed with solid state drives (SSD) as they are typically smaller capacity but have no moving parts to wait for and may have lower power consumption. Hybrids (SSHD) combine both, and of this writing, go up to 1TB. They also will come with 5400 rpm speed for lower power consumption than 7200 rpm and will use the SSD part for frequently used data to increase speed. Just make sure the SSD or SSHD is compatible with your Mac and that any drive selected is no taller than 9.5mm or your bottom cover won't close.
Joe -
It caused an error upon reinstall of the OS. You forgot to mention that disconnecting the battery would reset the date, and installing the OS without resetting the date would give a general message about the process failing with no mention of a problem with the date.
Getting into terminal mode and typing: date mmddhhmmyyyy will reset the date. The hours and minutes go in the middle and the first mm is the month.