このバージョンは誤った内容を含んでいる可能性があります。最新の承認済みスナップショットに切り替えてください。
必要な工具と部品
-
-
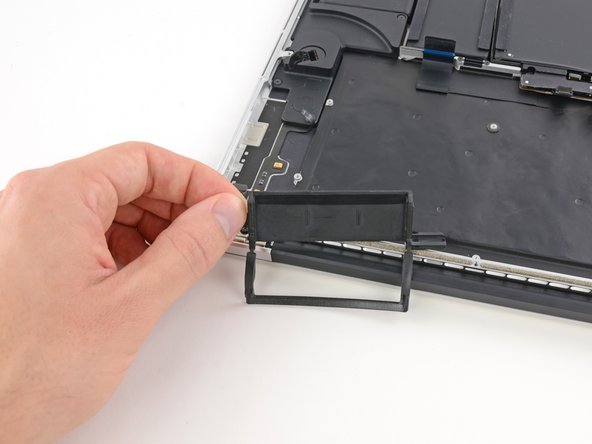
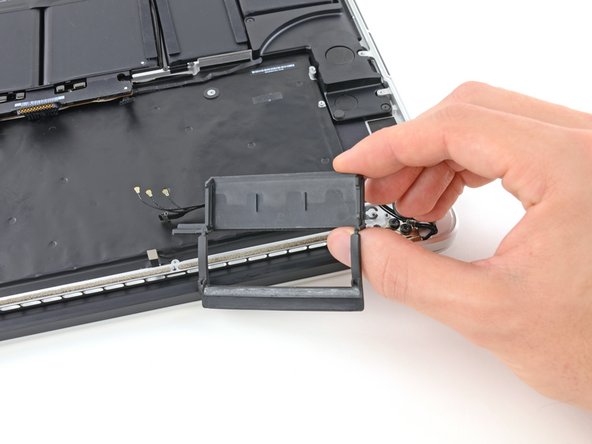
アルミニウム製ヒンジカバーを上部ケースに固定している3.1mm T5トルクスネジを2本外します。
-
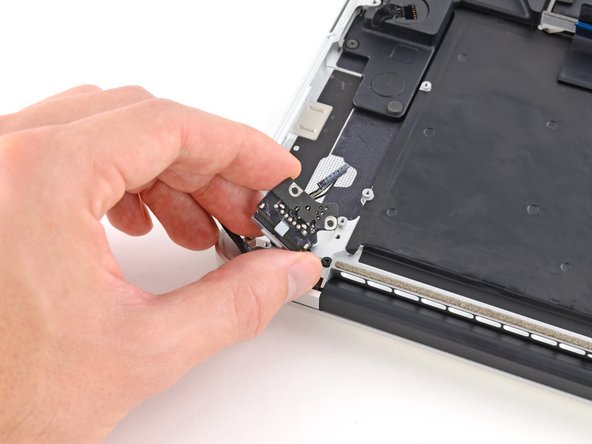
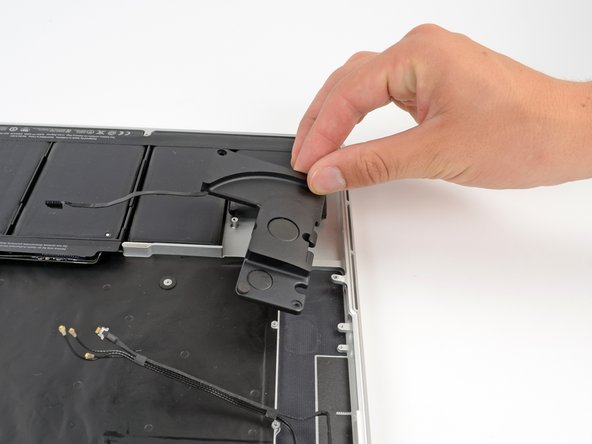
MacBook Proから2つのアルミニウム製ヒンジブラケットを取り外します。
-
-
-
スパッジャーの平面側先端を使用して、I/Oボードコネクタをロジックボード上のソケットからまっすぐ上にこじ開けます。
-
同様に、I/OボードのケーブルコネクターをI/Oボードのソケットから外します。
-
MacBook ProからI/Oボードケーブルを外します。
-
-
-
-
スパッジャーの先端を使ってI/Oボードのデータケーブルのロックを持ち上げて外し、バッテリー側に回します。
-
スパッジャーの平面側先端を使って、I/Oボードデータのケーブルをまっすぐ基板上のソケットからスライドして外します。
-
-
-
スパッジャーの平面側先端を使って、左側スピーカーのコネクターを基板上のソケットから持ち上げて接続を外します。
-
右側のスピーカーコネクターを基板上のソケットから持ち上げて接続を外します。
-
-
-
バッテリー付近の端を持ち上げて、MacBook Pro上部に向けて傾けます。
-
スパッジャーの平面側先端を使って、丁寧にMagSafe 2コネクターを基板上の下側にあるソケットから外します。
-
MagSafe 2コネクタの取り外しは、難しい場合があります。 バッテリーの交換などの作業をするために一時的にロジックボードを取り外す場合は、MagSafe DC-Inボードを固定している2つの2.5 mm T5トルクスネジを外すと作業が簡単になります。 それからロジックボードとMagSafeボードを一緒に取り出してください。
-
-
この手順は未翻訳です。 翻訳を手伝う。
-
Insert the edge of a plastic opening tool underneath the upper microphone.
-
Slide the blade of a plastic opening tool along the bottom of the upper microphone, releasing the adhesive.
-
In a similar manner, release the adhesive underneath the lower microphone.
-
Lift the cable out of the device.
-
-
この手順は未翻訳です。 翻訳を手伝う。
-
Grip both halves of the device. Firmly put one hand on the top center of the upper case (left) and one in the same place on the display assembly (right).
-
While holding the display assembly in place, slowly push forward on the upper case, releasing it from the display assembly.
-


36 の人々がこのガイドを完成させました。

5 件のコメント
Is there anyway to fix a track pad that is sticking Not clicking and selecting things at randon
Un gros coup d’air comprimé m’a suffit à résoudre le problème. A big blow of compressed air was enough to solve the problem ( insists on the lower left level and gap)
If this needs to be done in order to replace a faulty battery pack... some nylon string, sprinkled with a generous amount of caution, will do the trick.
Once I removed the right speaker, it only took me 10 minutes to cut the glue holding the batteries.
It is very doable if one proceeds with caution.
what changes from the 2012-early 2013 upper case to the late 2013-2014?
Just make sure to remove the headphone jack from the body as well. It is fastened with two T5 screws. The connector is disconnected part of this guide already.