はじめに
このガイドを使用して、破損したり、故障した右側ファンを交換してください。
必要な工具と部品
-
-
-
-
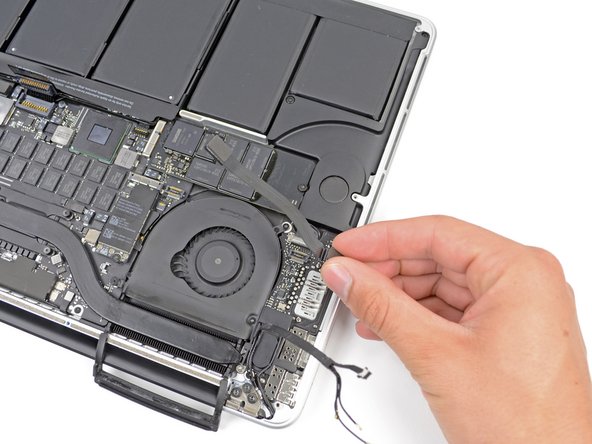
スパッジャーの平面側先端を使用して、I/Oボードコネクタをロジックボード上のソケットからまっすぐ上にこじ開けます。
-
同様に、I/OボードのケーブルコネクターをI/Oボードのソケットから外します。
-
MacBook ProからI/Oボードケーブルを外します。
-
デバイスを再組み立てする際は、これらの手順を逆の順番に従って作業を進めてください。
デバイスを再組み立てする際は、これらの手順を逆の順番に従って作業を進めてください。
20 の人々がこのガイドを完成させました。
以下の翻訳者の皆さんにお礼を申し上げます:
100%
Midori Doiさんは世界中で修理する私たちを助けてくれています! あなたも貢献してみませんか?
翻訳を始める ›
4 件のコメント
doesn't look too bad, my right fan is making a terrible sound, I'm debating if I should bring it to apple or if I should just replace it myself
pretty easy guide. i replaced the left fan recently, so i decided to do the right as well since it had been making the same grinding noise, albeit not quite as loud. the fans themselves were pretty clean, i’ve typically use a blast of compressed air to dust them out about once a month over the almost 5 years i’ve owned this MBP.
i skipped steps 3-4-5. and using some of the comments as guidance i was able to take a few short cuts and have the fan replaced in about 20 minutes. powered up the MB without the back cover just to make sure the fan would spin, it did, checked to make sure everything worked, internet, BT connection, camera etc, powered down, screwed on the back cover and done.
MacProUser - 返信
easy and fast. it took me 10 min to replace.
Replaced batteries and RIGHT FAN. Made all connections. LEFT FAN runs and won't stop, whether connected with charge cord or running on batteries. Laptop will NOT start up. Disconnected LEFT FAN to save batteries. I'M STUMPED! :-(


