はじめに
Upgrade or replace the SuperDrive (requires a slim drive).
必要な工具と部品
-
-
Use your fingers to push both battery release tabs away from the battery, and lift the battery out of the computer.
-
-
-
Remove the three identical 2mm Phillips screws from the memory door.
-
Lift the memory door up enough to grip it and slide it toward you, pulling it away from the casing.
-
-
-
-
Lift up at the rear of the case and work your fingers along the sides, freeing the case as you go. Once you have freed the sides, you may need to rock the case up and down to free the front of the upper case.
-
There are four plastic clips above the DVD slot, and another above and to the left of the IR sensor. These clips can be very difficult to disengage without prying. They can also be difficult to re-engage during reassembly.
-
-
-
Use the flat end of a spudger to disconnect the orange SuperDrive ribbon cable from the logic board, removing tape as necessary.
-
-
-
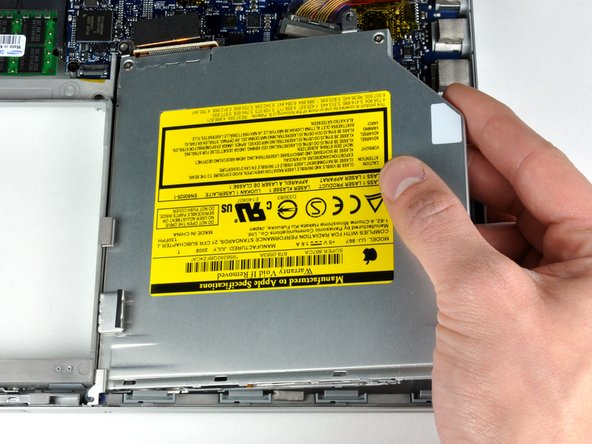
Remove the two silver Phillips screws securing the mounting bracket to the left side of the optical drive.
-
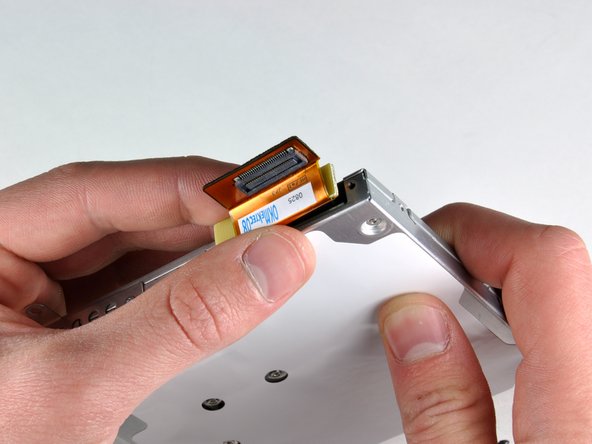
Rotate the drive and disconnect the orange ribbon cable from the optical drive.
-


To reassemble your device, follow these instructions in reverse order.
To reassemble your device, follow these instructions in reverse order.
162 の人々がこのガイドを完成させました。

2 件のコメント
In step 5 suggestion, muffin pan for parts, I used 500Ml (1 cup) yogurt containers, about 10 of them and numbered each one with the corresponding dis-assembly/re-assembly step, and my replacement of the CD RW-DVD-Rom to a DVD R-RW DL/CD RW drive in my Macbook went without a hitch. It took me about 2 hours, with breaks, and I also used a Magnifier Lamp along with approved, magnetic tip screwdriver bits, which made the whole thing a lot easier.
Since the optical drive was not available from iFixit or Amazon I bought from a company on eBay. After carefully checking the model number of my Mac A1226 I found that the original optical drive could not be found but that there was a slightly new optical drive model which would work with my Mac. Completely compatible and works great. The screw holes were in the right places. No problems following the iFixit guide as long as you have very careful attention to detail. To obtain the replacement optical drive check out this item/seller: https://www.ebay.com/itm/282356807784.