はじめに
お持ちのMacBook Pro が熱くなった際、OEM放熱グリスの塊が起動を遅くしていますか?ヒートシンクを取り出して、新しい放熱グリスを塗る作業では、この手順を参照してください。
必要な工具と部品
-
-
-
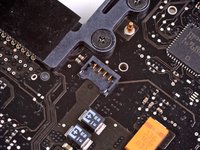
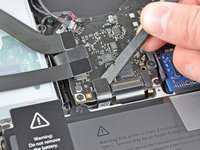
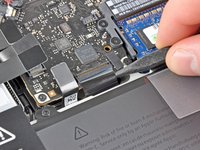
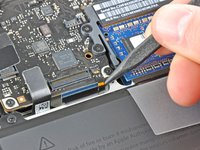
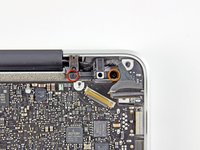
スパッジャーの先端を使って、右側スピーカー/サブウーファーケーブルを上部ケースに装着された固定フィンガーの下から持ち上げます。
-
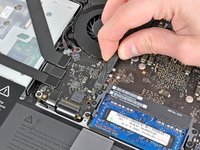
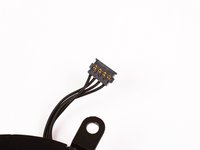
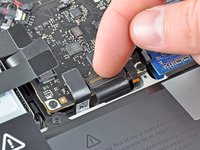
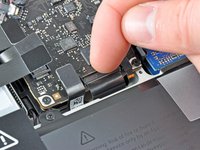
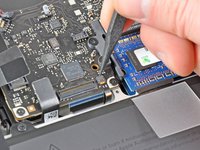
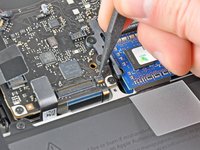
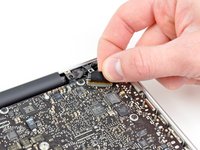
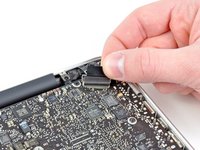
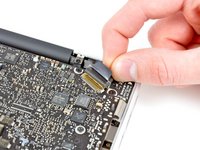
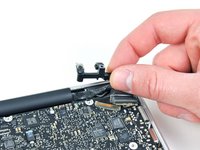
右側のスピーカー/サブウーファーケーブルをロジックボード上のソケットからコネクターを持ち上げるため、上向きに引っ張ります。
-


デバイスを再組み立てする際は、これらのインストラクションを逆の順番に従って作業を進めてください。
166 の人々がこのガイドを完成させました。
以下の翻訳者の皆さんにお礼を申し上げます:
100%

Midori Doiさんは世界中で修理する私たちを助けてくれています! あなたも貢献してみませんか?
翻訳を始める ›

12件のガイドコメント
Thanks, you’re a lifesaver! It’s much easier than I imagined. Used this to replace the old thermal past with some Arctic Silver 5. Temperature differences are surprising. During the break in period it went from 60 degrees Celsius idle to 50 degrees and from max 105 degrees Celsius under heavy load to about max 90 degrees. Now after a 24 hour break-in period it went down to 45 degrees idle and 85 max under heavy load. Will update if there’s any changes after the full 200 hour break-in period specified by the manufacturer.
Seems I’m facing with same issue. I’m testing temperature with “Intel Power Gadget“ application. Idle temperature is about 65-70 degree and during high load is about 100. Hope changing old thermal past will help me.
After I have changed the thermal paste now it is possible to see 100% process utilisation and stable 3.4 GHz usage (Macbook Pro 2012 Mid i7). I’m still getting 100 degrees but seems it is ok now. To see the difference I suggest to check “Intel Power Gadget” application charts before and after thermal paste change. I did not run any special benchmarks just run some heavy task which utilise all cores (e.g. IDE code indexing)