はじめに
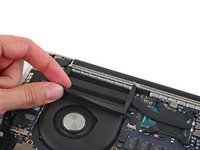
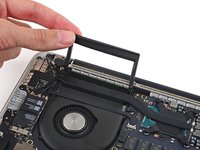
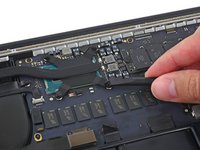
ヒートシンクを交換したり、取り外すにはこの手順を参照してください。
必要な工具と部品
-
この手順で使用する道具:Magnetic Project Mat$19.95
-
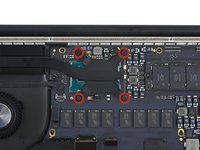
上部ケースと底ケースを留めている次の10本のネジを外します。
-
2.3 mm P5ペンタローブネジ−2本
-
3.0 mm P5ペンタローブネジー8本
-
この修理では、各ネジの装着位置をメモ書きして管理してください。再組み立ての際は、デバイスにダメージを与えないよう、正しい場所に装着してください。
-
-


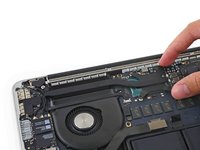
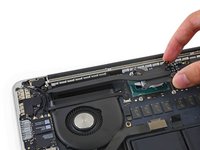
デバイスを再組み立てする際は、これらのインストラクションを逆の順番に従って作業を進めてください。
デバイスを再組み立てする際は、これらのインストラクションを逆の順番に従って作業を進めてください。
58 の人々がこのガイドを完成させました。
以下の翻訳者の皆さんにお礼を申し上げます:
100%

これらの翻訳者の方々は世界を修理する私たちのサポートをしてくれています。 あなたも貢献してみませんか?
翻訳を始める ›

6 件のコメント
what part should i purchae to get the rubber fan bumper?
Bonjour !
Merci pour ce tutoriel de qualité ! Pour la pâte thermique, j’ai opté pour la Grizzly Kryonaut… Un peu overkill pour un MBP 13” de 2015, mais cela devrait contribuer à sa longévité !
Une remarque cependant : sur mon modèle, la vis en ROUGE de l’ETAPE 9 n’était pas une Torx T5, mais une Y00 ! Cela ne m’a pas posé de problème car j’avais le kit complet de tournevis, mais cela l’aurait été si je n’avais acheté qu’un P5 et un T5 ! Faites attention !
Bonne continuation !
PS: si certains doutent de leurs capacités à réaliser cette opération, sachez que je suis grand débutant en informatique et que je n’ai eu AUCUN problème. La partie la plus ardue étant le retrait du connecteur de la batterie !
Used this guide to pop the heat sink and scrape off the old thermal paste. Cleaned and re-applied with new paste, hopefully leading to better thermal performance. One thing I noticed is that the heatsink doesn’t cover the second module (presumed to be the integrated GPU) next to the CPU? Perhaps this is why thermal performance is so abysmal on these little guys.
In my MacBook Pro, the screw in step 9 that is farthest away from the CPU is a Philips screw, rather than T5 Torx.
I bought my MacBook Pro in 2016, over a year after it came out, so this might be different depending on when yours was manufactured.