はじめに
このガイドを参照して、壊れたMagSafe DC-Inボードを交換しましょう。
必要な工具と部品
-
-
-
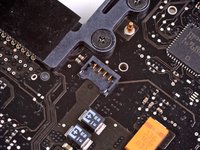
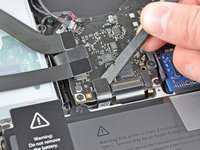
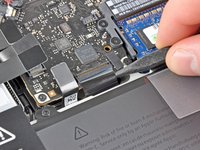
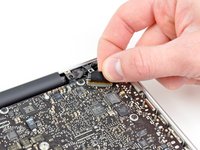
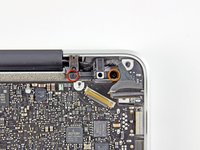
スパッジャーの先端を使って、右側スピーカー/サブウーファーケーブルを上部ケースに装着された固定フィンガーの下から持ち上げます。
-
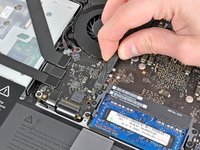
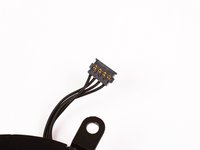
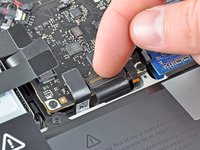
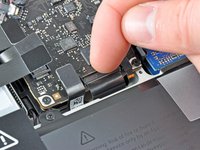
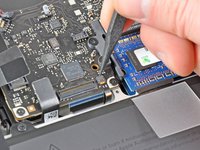
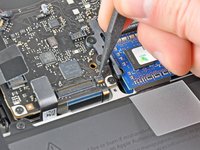
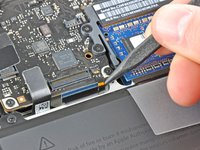
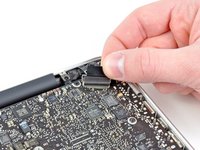
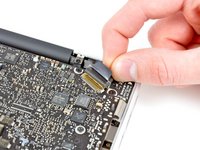
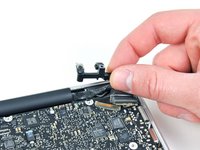
右側のスピーカー/サブウーファーケーブルをロジックボード上のソケットからコネクターを持ち上げるため、上向きに引っ張ります。
-


デバイスを再度組み立てるには、この説明書の逆の順番で組み立ててください。
130 の人々がこのガイドを完成させました。

12件のガイドコメント
Piece of cake, took an hour or so, but I was being extra careful. The only sticky part were the backlight cable and the keyboard ribbon cable ZIF socket, those two items I found fiddly to get re-inserted properly. Thanks for the tutorial.
Alan Gates - 返信
Thankyouuuu your guide very helpfull
Here's some tips to avoid left any screw : use a transparant tape with the sticky note and write or give the code…
I ussually give 3 layer of tape and devide into several sticky note… :)
Excellent guide! My seven-year-old Macbook now charges again without me having to tighten the power cable at weird angles!
The hardest part of this repair was getting the microphone out. That thing was glued in tightly, the rubber shroud is hard to grip through, and the little wires are so delicate!
Worked like a charm! Take your time. Directions were great but some of the connections were a little fiddly. Pay close attention of exactly how the connectors come apart. For these 67 year old eyes, a magnifying glass would have been handy along with some tweezers to replace fat fingers for getting some of the connections started.