メインコンテンツにスキップ

MacBook Air Models A1237 and A1304 Speaker Replacement

必要な工具と部品

  1. MacBook Air Models A1237 and A1304 Speaker Replacement, Lower Case: 手順 1、 1の画像 1
    • Unplug your MacBook Air and power it off before you proceed.

    • Remove ten Phillips screws securing the lower case to the MacBook Air:

    • Six 2.8 mm screws

    • Two 3.8 mm screws

    • Two 5.4 mm screws

  2. MacBook Air Models A1237 and A1304 Speaker Replacement: 手順 2、 2の画像 1 MacBook Air Models A1237 and A1304 Speaker Replacement: 手順 2、 2の画像 2
    • Slightly lift the lower case near the vents and push it toward the rear of the computer to free the mounting tabs.

  3. MacBook Air Models A1237 and A1304 Speaker Replacement, Battery: 手順 3、 1の画像 1
    • Disconnect the battery connector by pulling it straight out of its socket.

  4. MacBook Air Models A1237 and A1304 Speaker Replacement: 手順 4、 1の画像 1
    • Remove the following nine screws securing the battery to the Air:

    • Four 2.9 mm Phillips.

    • Four 3.8 mm Phillips.

    • One 7.2 mm Phillips.

  5. MacBook Air Models A1237 and A1304 Speaker Replacement: 手順 5、 1の画像 1
    • Lift the battery out of the Air.

    • If you're installing a new battery, you should calibrate it after installation:

    • Charge it to 100%, and then keep charging it for at least 2 more hours. Then, unplug and use it normally to drain the battery. When you see the low battery warning, save your work, and keep your laptop on until it goes to sleep due to low battery. Wait at least 5 hours, then charge your laptop uninterrupted to 100%.

    • If you notice any unusual behavior or problems after installing your new battery, you may need to reset your MacBook's SMC.

  6. MacBook Air Models A1237 and A1304 Speaker Replacement, Speaker: 手順 6、 1の画像 1
    • Remove the following two screws securing the speaker assembly to the upper case.

    • One 3 mm Phillips.

    • One 5.8 mm Phillips.

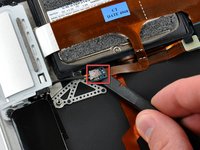
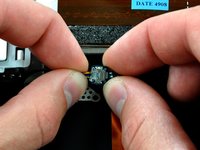
  7. MacBook Air Models A1237 and A1304 Speaker Replacement: 手順 7、 2の画像 1 MacBook Air Models A1237 and A1304 Speaker Replacement: 手順 7、 2の画像 2
    • Use a spudger to lift the audio-out connector board off the adhesive that secures it to the hard drive bracket.

    • Disconnect the audio out connector from its socket.

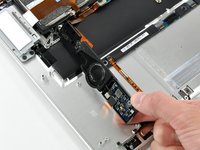
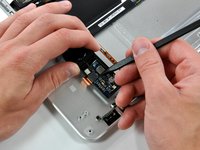
  8. MacBook Air Models A1237 and A1304 Speaker Replacement: 手順 8、 2の画像 1 MacBook Air Models A1237 and A1304 Speaker Replacement: 手順 8、 2の画像 2
    • Rotate the speaker assembly toward the center of the Air.

    • Use a spudger to pry the speaker cable connector up off the audio board.

  9. MacBook Air Models A1237 and A1304 Speaker Replacement, Speaker: 手順 9、 1の画像 1
    • Use the tip of a spudger to pry the speaker connector up off the audio board.

  10. MacBook Air Models A1237 and A1304 Speaker Replacement: 手順 10、 1の画像 1
    • Use the tip of a spudger to separate the audio board from the adhesive securing it to the logic board.

  11. MacBook Air Models A1237 and A1304 Speaker Replacement: 手順 11、 1の画像 1
    • Disconnect the audio-out cable by pulling the male end straight away from its socket on the audio board.

  12. MacBook Air Models A1237 and A1304 Speaker Replacement: 手順 12、 1の画像 1
    • Speaker assembly remains.

終わりに

To reassemble your device, follow these instructions in reverse order.

5 の人々がこのガイドを完成させました。

作成者

3人の作成者と共同で作成されました。

Walter Galan

693,685 ポイント

1,203のガイドは作成済み

0 件のコメント

コメントを追加

統計データ:

過去 24時間: 1

過去 7 日: 3

過去 30 日: 17

今までの合計 23,161