はじめに
このガイドを参照して、上部ケースを交換しましょう。
必要な工具と部品
-
-
スパッジャーの平面側先端を使って、I/Oボード上のソケットからI/Oボードケーブルコネクタを持ち上げます。
-
-
-
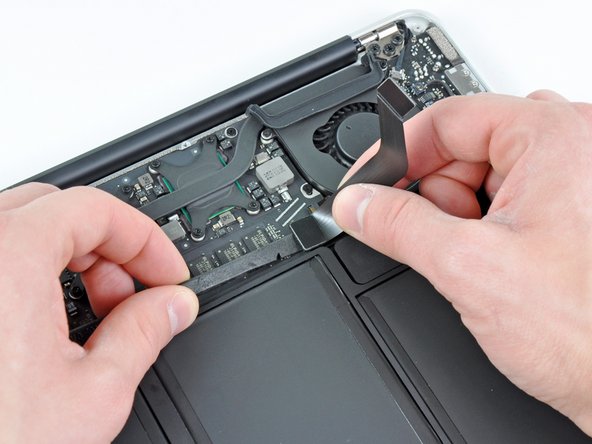
ロジックボード上のソケットから電源ケーブルを引っ張り、I/Oボードの接続を外します。
-
-
-
I/Oボードを上部ケースに固定している3.6 mm T5トルクスネジを1本外します。
When inserting new board, make sure the headphones jack socket rim is registered properly with the case hole before tightening T5 screw.
-
-
-
-
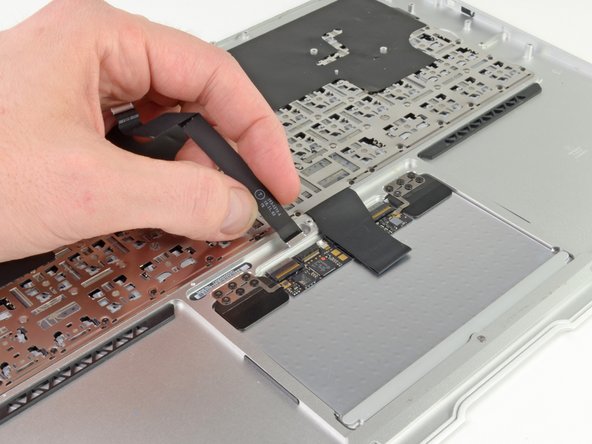
スパッジャーの先端もしくは指先を使って、トラックパッドのリボンケーブルZIFソケット上の固定フラップを持ち上げます。
-
トラックパッドのリボンケーブルをAirの正面端に向けて、ソケットからまっすぐ引き抜きます。
-
-
-
スパッジャーの平面側先端を使って、両側のアンテナケーブルコネクタをこじ開けて、AirPort/Bluetoothカードから外します。
-
-
-
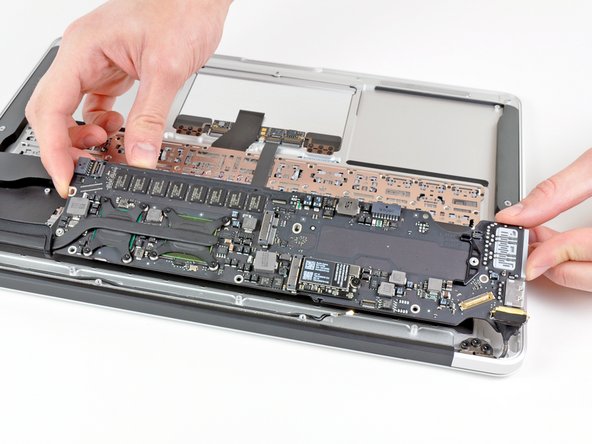
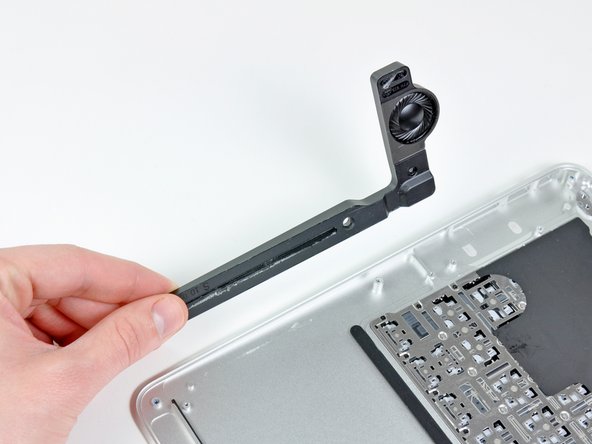
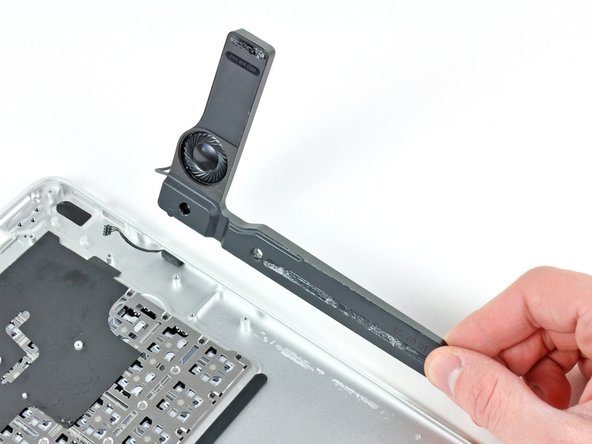
ケーブルが巻き込まれないよう注意しながら、上部ケースからロジックボードアセンブリを注意深く取り外します。
I also had an issue with the logic board installation as the above comment mentioned. I found easiest way is to just remove the speaker that you just re-installed. It's 1 screw - take that speaker out and now that wire that was bumping logic board is out of the way, and just then re-install the speaker.
When replacing the logic board, make sure the two rf connectors are out of the way before you put the screws back.
-
-
-
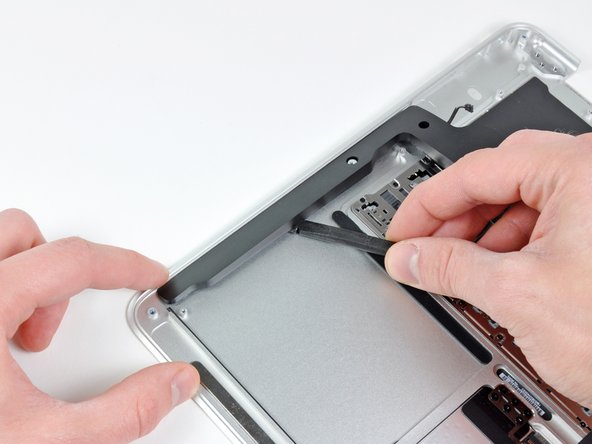
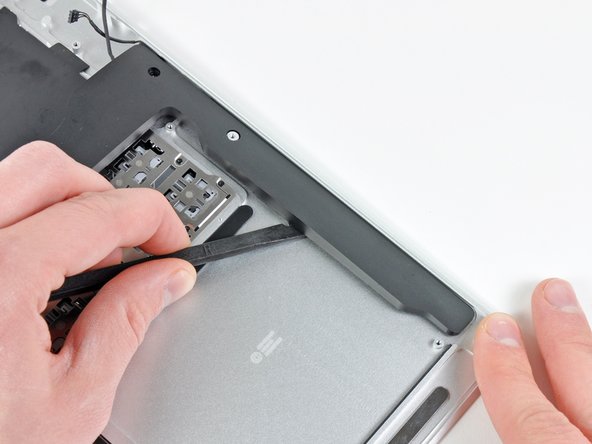
スパッジャーの先端を使って、上部ケースの左側からマイクロフォンをこじ開けます。
-
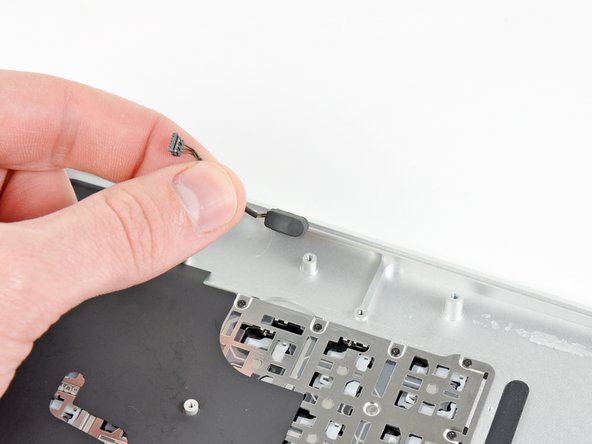
上部ケースからマイクロフォンを外します。
-
上部ケースが残ります。
Thing to note when re-attaching the microphone - make sure that its sensor, which is located at bottom, is aligned with the hole.
-
-
-
次の7本のネジを外します。
-
トラックパッドを上部ケースに固定している1.6mmプラスネジを6本外します。
-
上部ケースの正面端付近に留められた1.4 mm T5 トルクネジを1本外します。
Great guide. The only problem was that I didn't have such small Phillips screwdriver for the last step, so I needed to make a quick trip to a shop. Although it's standard tool, perhaps it makes sense to add it to required tools section?
@Jaroslaw Lipski (or anyone else) - I ran into the same problem in that I did not have a small enough Phillips screwdriver for the last step -- Does anyone know what exact screwdriver I need?
PH00 and push high pressher. but sometime false and cannot screw any more. its too difficult and never back. I cannot and buy keyboard and trackpad.
taizoy0725 - 返信
-


デバイスを再度組み立てるには、この説明書の逆の順番で組み立ててください。
デバイスを再度組み立てるには、この説明書の逆の順番で組み立ててください。
36 の人々がこのガイドを完成させました。
以下の翻訳者の皆さんにお礼を申し上げます:
100%

これらの翻訳者の方々は世界を修理する私たちのサポートをしてくれています。 あなたも貢献してみませんか?
翻訳を始める ›

7 件のコメント
I'm pretty experienced in dismantling/reassembling Aluminum MacBook Pros, plastic MacBooks, aluminum Powerbooks and various iBooks and this was not bad at all. Mostly just time-consuming.
I'm not sure I'd rate it as "difficult" for those with previous experience. The screw count is particularly low by comparison to other machines I've worked on, and there are only a few different types of screw.
The new top case arrived with the adhesives to re-secure the speakers, new screws to attach the trackpad, and the microphone was pre-installed.
Excellent guide, and a great help as always. Thanks!
I just repaired my mba after spilling some juice on it... I did it in about 2hours, i kept track of the screws in each step and i must say it wasn't difficult at all, and i have no experience with computer so.. Just be careful with some wires and when you disconnect the monitor but that's all. I'm so happy my mba works again! The upper case and the tools arrived very quick and with adhesives and some extra screws (much appreciated since the stock screws were kind of damaged and i had to break one) for the trackpad. Thanks ifixit!
Just completed the upper case replacement today due to a failed keyboard and also a failed touch pad (due to liquid damage). Took a few hours to take it apart (and be careful as I was doing it) found hardest part was keeping track of screws and parts. I ended up using plastic red/white Solo cups with the Step # written on each cup (so you don't confuse the screws per step). Undoing the retaining clips for ribbon wires was hardest part highly recommend using a spudger with a fine tip as these are very tiny parts.
The instructions were great. I used a white plastic ice-tray to hold the screws and fill each cube up sequentially. All you have to do, is work backwards through the recesses to where you started. No way to mix things up and hard to tip over.
Photos and descriptions are so good I was able to do this with no experience. My wife and I did it together which was like a cheap date. Two people came in handy mating the display to the hinges while keeping the shims lined up.
We had to temporarily tape the shims in place to get things to line up for screw installation.That was the crux move of this repair.Thank you for the write up.
Great guide - ice tray idea was good - wrote numbers of the compartments with a sharpie, and wrote them on the printed guide. Took around 1.5 hours to do a keyboard (ie, bottom half of laptop) swap.
Noted that the rubber gasket around the fan didnt quite go back properly (should be noted it seems to need to be fitted before the logic board goes back).
Also I picked up a replacement bottom half from ebay with the speakers and mike already in place, so that removed the most dubious part of the exercise.
Wouldnt call this hard - id call it medium…. Hard is a screen swap on a 3DS - I failed on that one… RIP 3ds
Also was surprised how easy the screen connector was to open / close, and by how small the flaps are on the other flatflex connectors.