はじめに
miniのハードドライブ交換にはこのガイドを使用してください。
必要な工具と部品
-
-
-
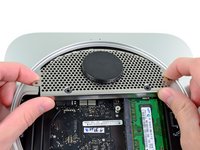
下記のアンテナプレートを固定している次のネジを外します:
-
2本の6.6 mm T8 トルクスネジ
-
2本の5.0 mm T8 トルクスネジ(スクリュードライバーでも可)
-
再組み立ての際には:
-
-
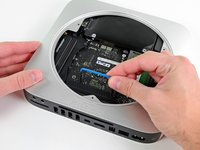
この手順で使用する道具:Mac mini Logic Board Removal Tool$4.99
-
Mac mini Logic Board Removal Tool を赤でハイライトされた穴に挿入してください。工具が基盤の下のアウターケースに到達しているか確認してください。
-
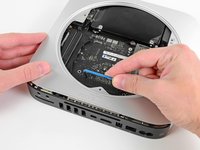
慎重に工具をI/Oボード側に引っ張ります。基盤とI/Oボードアセンブリはアウターケース外側にわずかに動きます。
-
Mac mini Logic Board Removal toolを取り出します。
-
-
-
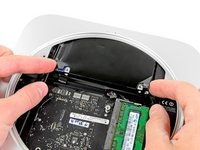
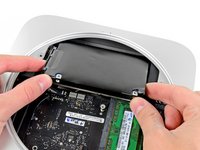
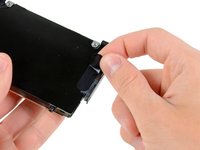
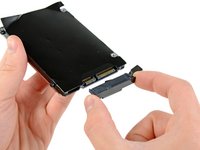
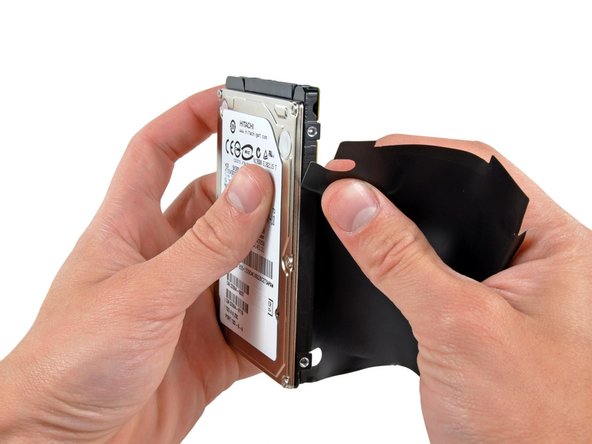
慎重にハードドライブからハードドライブカバーをはがしてください。
-
ハードドライブが残ります。
-
新しいハードドライブをインストールするには、OS X install guide を参照してください。
-


デバイスを再組み立てする際は、これらのインストラクションを逆の順番に従って作業を進めてください。
550 の人々がこのガイドを完成させました。

81件のガイドコメント
no need to remove the logic board! the disk comes out after step 12.
Also you do not really need to disconnect the antenna. Just be carefull no to break the wire.
i replaced 5400 rpm hdd with Samsung SSD 840 Pro
I did it Rober's way - thanks - no disconnecting antenna in step 10
Stopping after step 12 and replacing hard drive there without removing logic board
I put the sheet that was around the old hard drive over the new one - not sure if its needed?
After it is all done i did Command + R to do internet recovery and get OS X mountain lion on the blank drive
Last thing to do is go here to enable trim: http://www.groths.org/?page_id=322
royl123 -
Very helpful guide, thanks! As many have said before, I would not detach the fan or antenna, just move it out of the way.
One very trivial tip: slide a piece of paper over the logic board as soon as you've removed the fan, as a protection against accidentally touching the components with your fingers or tools.
I did not reinstall the plastic cover on the HDD. This is only to protect the logic board of the HDD, which ofcourse is very well protected in SSD's.
That depends which position the hard drive is in. If it's in the upper slot (ie at the 'top' of the enclosure when it's in use) then you will need to remove the logic board.
Dismantling the Mini was simple, but the two hardest steps when installing a new hard drive were sliding the drive back in aligned correctly, and replacing the antenna grill.
Even with the logic board pushed out, I found it difficult to line up the screws on the hard drive and get it seated properly. As for the grill, it would not line up with the screw holes. I had to use the Mac Mini tool hooked into a hole in the grill as a lever to lift it up and in towards the lip of the rim it was sitting on. There was an audible snap as it settled into place.