メインコンテンツにスキップ

MSI GT70 MS-1763 Keyboard Replacement

必要な工具と部品

  1. MSI GT70 MS-1763 Keyboard Replacement, Battery: 手順 1、 2の画像 1 MSI GT70 MS-1763 Keyboard Replacement, Battery: 手順 1、 2の画像 2
    • Power off the laptop and turn it over.

  2. MSI GT70 MS-1763 Keyboard Replacement: 手順 2、 2の画像 1 MSI GT70 MS-1763 Keyboard Replacement: 手順 2、 2の画像 2
    • Release the safety latches that hold the battery in place. The left latch will stay moved up, while the right side is spring activated and will have to be held.

  3. MSI GT70 MS-1763 Keyboard Replacement: 手順 3、 2の画像 1 MSI GT70 MS-1763 Keyboard Replacement: 手順 3、 2の画像 2
    • While holding up the left latch, use a Jimmy and slide the old battery out of its compartment.

  4. MSI GT70 MS-1763 Keyboard Replacement, Hard Drive: 手順 4、 2の画像 1 MSI GT70 MS-1763 Keyboard Replacement, Hard Drive: 手順 4、 2の画像 2
    • Remove all twelve 4 mm Phillips #0 screws from the back of the laptop.

    • Remove the back cover.

  5. MSI GT70 MS-1763 Keyboard Replacement: 手順 5、 1の画像 1
    • Remove the rubber spacer holding the hard drive secure.

  6. MSI GT70 MS-1763 Keyboard Replacement: 手順 6、 2の画像 1 MSI GT70 MS-1763 Keyboard Replacement: 手順 6、 2の画像 2
    • Slide the hard drive to the left, removing it from its bay.

  7. MSI GT70 MS-1763 Keyboard Replacement, Keyboard: 手順 7、 3の画像 1 MSI GT70 MS-1763 Keyboard Replacement, Keyboard: 手順 7、 3の画像 2 MSI GT70 MS-1763 Keyboard Replacement, Keyboard: 手順 7、 3の画像 3
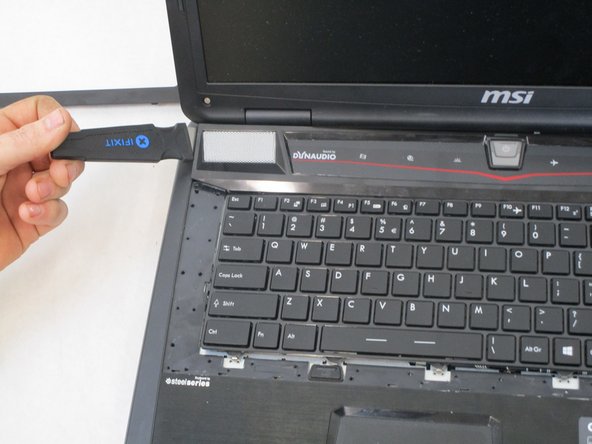
    • Using a Jimmy, remove the outer cover around the keyboard.

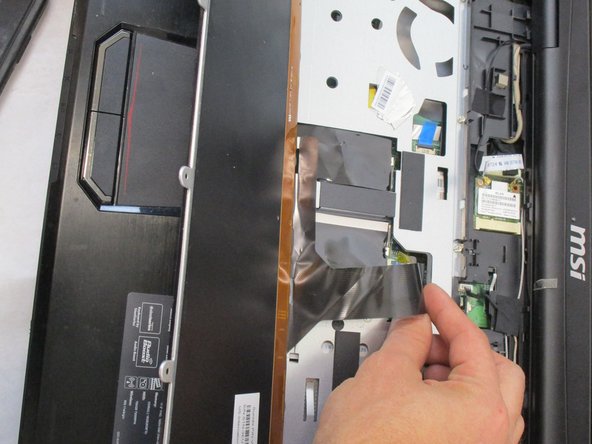
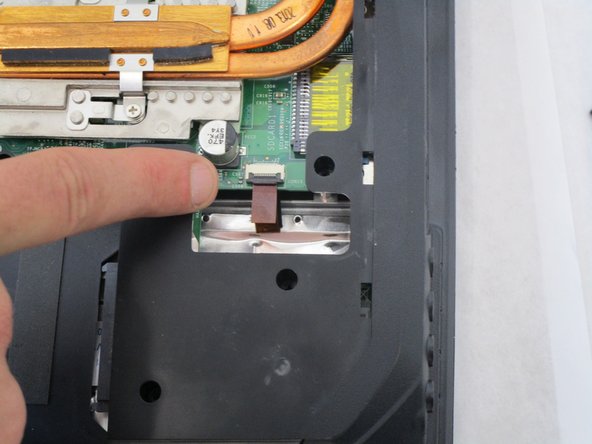
    • Remove the ribbon cable from the ZIF connector on the underside of the top cover.

  8. MSI GT70 MS-1763 Keyboard Replacement: 手順 8、 2の画像 1 MSI GT70 MS-1763 Keyboard Replacement: 手順 8、 2の画像 2
    • Using a Phillips #0 screwdriver, remove the five 3 mm screws at the top of the keyboard.

  9. MSI GT70 MS-1763 Keyboard Replacement: 手順 9、 1の画像 1
    • Flip the keyboard back and disconnect the keyboard cable.

  10. MSI GT70 MS-1763 Keyboard Replacement: 手順 10、 3の画像 1 MSI GT70 MS-1763 Keyboard Replacement: 手順 10、 3の画像 2 MSI GT70 MS-1763 Keyboard Replacement: 手順 10、 3の画像 3
    • Flip the laptop over and disconnect the data cable from the ZIF connector on the bottom right.

    • You can now turn the laptop back over and remove the keyboard.

終わりに

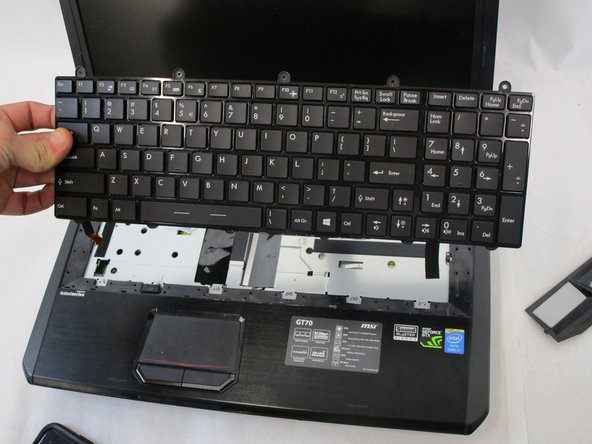
To reassemble your device, follow these instructions in reverse order.

作成者

6人の作成者と共同で作成されました。

Bhrett Farrar

メンバー登録日: 08/22/19

109 ポイント

1ガイドが承認済み

チーム

コメント 1 件

Mine is the Cyberbuypower rebadge of this model. And you only need to remove the two keyboards screws on the bottom. And then the top button board (called outer cover here)

Even here I don’t see why you have to remove all those screws.

garegin - 返信

コメントを追加

統計データ:

過去 24時間: 1

過去 7 日: 9

過去 30 日: 26

今までの合計 2,138