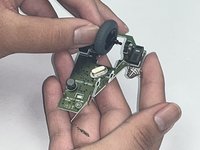
メインコンテンツにスキップ

Logitech M185 Wireless Mouse Motherboard Replacement

必要な工具と部品

  1. Logitech M185 Wireless Mouse Motherboard Replacement, Motherboard: 手順 1、 3の画像 1 Logitech M185 Wireless Mouse Motherboard Replacement, Motherboard: 手順 1、 3の画像 2 Logitech M185 Wireless Mouse Motherboard Replacement, Motherboard: 手順 1、 3の画像 3
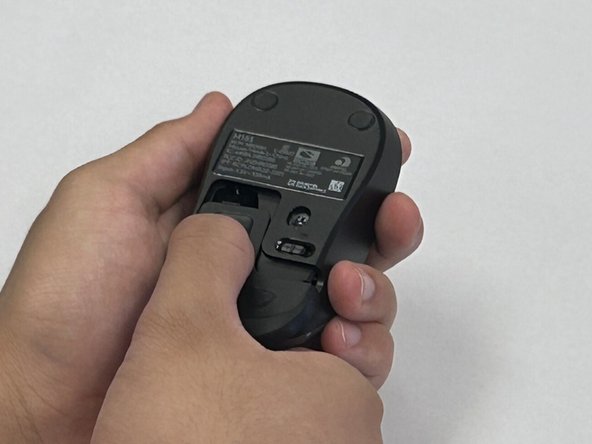
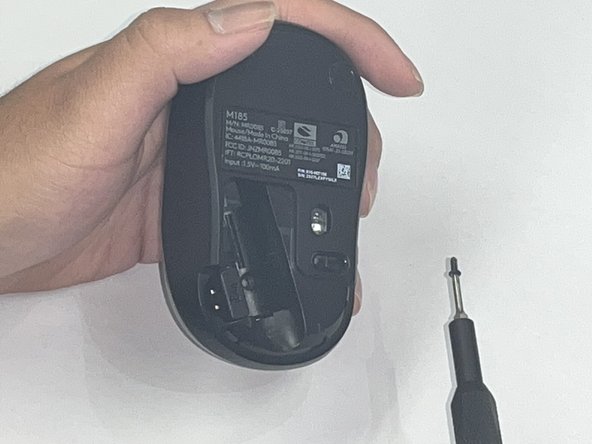
    • Flip the mouse over so the bottom is facing up and you can see the power switch.

    • Before you begin, flip the power switch on the bottom to the "Off" position.

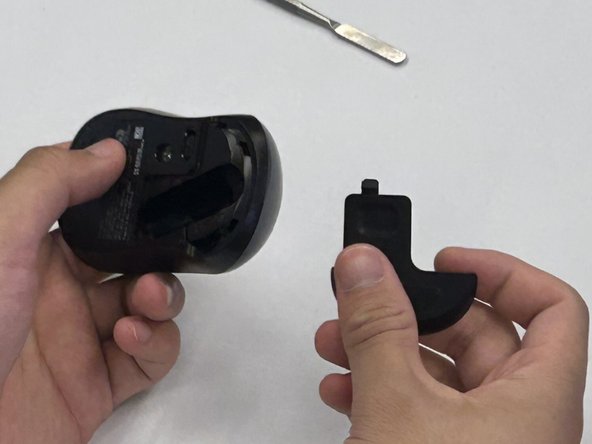
    • Press down on the battery cover.

    • Slide the battery cover off.

  2. Logitech M185 Wireless Mouse Motherboard Replacement: 手順 2、 2の画像 1 Logitech M185 Wireless Mouse Motherboard Replacement: 手順 2、 2の画像 2
    • There is not a battery in our mouse. However, it is necessary to remove the battery to access the screw beneath.

    • Use a Phillips #00 screwdriver and remove the single screw from the battery compartment.

  3. Logitech M185 Wireless Mouse Motherboard Replacement: 手順 3、 1の画像 1
    • Use a black nylon spudger to pry off the shell.

    • Work your way along the seam to release the tabs connecting the top and bottom of the mouse.

    • Do not use a metal spudger for prying, as it may damage internal components, such as the main circuit board, that are not visible.

    • Gently squeeze the sides of the mouse while using the spudger to pry the top case away from the bottom. The pressure will cause the mouse to open.

  4. Logitech M185 Wireless Mouse Motherboard Replacement: 手順 4、 1の画像 1
    • Use a black nylon spudger to pry out the motherboard and remove it from the bottom case.

    • Don't use a metal spudger on the internals of your device as displayed in the photo, it can cause damage.

    • Be careful when handling the motherboard. If you don't have any gloves, do not touch the motherboard with your hands. Only hold it by the edges.

  5. Logitech M185 Wireless Mouse Motherboard Replacement: 手順 5、 2の画像 1 Logitech M185 Wireless Mouse Motherboard Replacement: 手順 5、 2の画像 2
    • Remove the scroll wheel from the motherboard.

    • Before you insert your new motherboard, remember to attach the scroll wheel to it.

終わりに

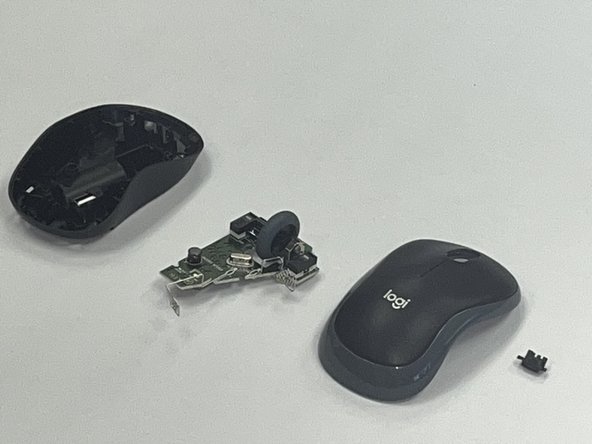
To reassemble your device, follow these instructions in reverse order. Take your e-waste to an R2 or e-Stewards certified recycler.

ある他の人がこのガイドを完成しました。

作成者

2人の作成者と共同で作成されました。

Robert

メンバー登録日: 09/09/24

186 ポイント

1ガイドが承認済み

チーム

CSU Los Angeles, Team 2-5, Kershman Fall 2024 CSU Los Angeles, Team 2-5, Kershman Fall 2024人のメンバー

CSULA-KERSHMAN-F24S2G5

4 メンバー

1のガイドは作成済み

0件のガイドコメント

コメントを追加

統計データ:

過去 24時間: 1

過去 7 日: 7

過去 30 日: 54

今までの合計 905