はじめに
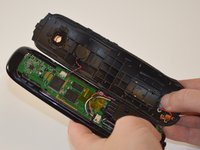
If your battery keeps dying then refer to this short and easy guide on how to remove and replace your battery. The device components are delicate so be sure to take care when opening the device. Recommended for this guide are plastic opening tools and a phillips screwdriver. The most difficult part of this guide is locating all of the screws and physically opening the back panel of the remote.
必要な工具と部品
-
-
Remove the single 6 mm Phillips #0 screw located beneath the sticker near the USB charging port.
-
-
-
-
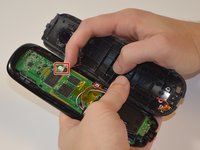
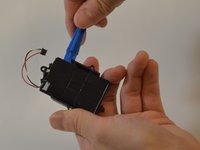
The battery is still connected to the device via wiring. To free the battery completely, remove the dark plastic piece from the slot with the plastic opening tool. Slowly rotate the dark plastic piece and the battery clockwise until then can be removed from underneath the small circuit board with the USB port.
-


To reassemble your device, follow these instructions in reverse order.
34 の人々がこのガイドを完成させました。
チーム

USF Tampa, Team 8-1, Eyestone Fall 2015 USF Tampa, Team 8-1, Eyestone Fall 2015人のメンバー
USFT-EYESTONE-F15S8G1
5 メンバー
9のガイドは作成済み
20件のガイドコメント
Step 6 (disassembly and re-assembly) Only thing to point out is that the PCB on the bottom of the battery holder twists into the holder (small plastic holding feature). This is important to get proper alignment of the Micro-USB connector). When removing the battery holder make sure the PCB pops out of the snap that is on the opposite side from the screw that holds the Micro-USB connector. This avoids putting too much strain on the leads of that PCB.
Wish I read the comments before I did the work - came close to snapping the leads. To anyone trying this, the battery holder is not attached to that small pcb but rather there are small notches that hold the battery case in place. Knowing that will allow you to apply the right pressure in the right places to move it away from the PCB.
vinny -
Rest of the instructions were fairly self explanatory, although I'm grateful for the confirmation to reduce risk
This point is an absolute saver though!
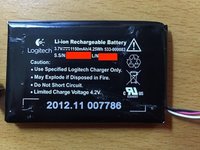
Battery model please