メインコンテンツにスキップ

Logitech G402 Left and Right Mouse Buttons Replacement

必要な工具と部品

  1. Logitech G402 Left and Right Mouse Buttons Replacement, Left and Right Mouse Buttons: 手順 1、 1の画像 1
    • Remove the adhesive mouse skates from the bottom casing.

  2. Logitech G402 Left and Right Mouse Buttons Replacement: 手順 2、 3の画像 1 Logitech G402 Left and Right Mouse Buttons Replacement: 手順 2、 3の画像 2 Logitech G402 Left and Right Mouse Buttons Replacement: 手順 2、 3の画像 3
    • Remove the five 1.2 mm screws using a Phillips #00 screwdriver from the bottom of the mouse.

    • Separate the top casing from the bottom.

  3. Logitech G402 Left and Right Mouse Buttons Replacement: 手順 3、 2の画像 1 Logitech G402 Left and Right Mouse Buttons Replacement: 手順 3、 2の画像 2
    • Remove the two case screws using a Phillips #00 screwdriver.

    • Remove the single 1.2 mm screw from the middle of the circuit board using a Phillips #00 screwdriver.

  4. Logitech G402 Left and Right Mouse Buttons Replacement: 手順 4、 3の画像 1 Logitech G402 Left and Right Mouse Buttons Replacement: 手順 4、 3の画像 2 Logitech G402 Left and Right Mouse Buttons Replacement: 手順 4、 3の画像 3
    • Remove the perpendicular circuit board containing the side buttons.

    • Remove the remaining 1.2 mm screws under the removed board and next to the mouse buttons using a Phillips #00 screwdriver.

  5. Logitech G402 Left and Right Mouse Buttons Replacement: 手順 5、 3の画像 1 Logitech G402 Left and Right Mouse Buttons Replacement: 手順 5、 3の画像 2 Logitech G402 Left and Right Mouse Buttons Replacement: 手順 5、 3の画像 3
    • Pull back the plastic clip and lift the circuit board out of the bottom casing.

  6. Logitech G402 Left and Right Mouse Buttons Replacement: 手順 6、 2の画像 1 Logitech G402 Left and Right Mouse Buttons Replacement: 手順 6、 2の画像 2
    • Separate the wire from the bottom casing by pulling the wire out.

  7. Logitech G402 Left and Right Mouse Buttons Replacement: 手順 7、 3の画像 1 Logitech G402 Left and Right Mouse Buttons Replacement: 手順 7、 3の画像 2 Logitech G402 Left and Right Mouse Buttons Replacement: 手順 7、 3の画像 3
    • You can access the iFixit guide to soldering and desoldering here.

    • Please be cautious when using a soldering iron. Soldering irons can reach several hundreds of degrees in temperature and improper use may result in a burn.

    • Please perform soldering and desoldering in a very well ventilated space. Solder containing lead can potentially be toxic and be an irritant. Solder and desolder outside or in the presence of a fume hood or fume extractor.

    • The solder connections for the left and right buttons are labeled in the second picture.

    • The solder connections circled in red are for the left mouse button.

    • The solder connections circled in orange are for the left mouse button.

  8. Logitech G402 Left and Right Mouse Buttons Replacement: 手順 8、 2の画像 1 Logitech G402 Left and Right Mouse Buttons Replacement: 手順 8、 2の画像 2
    • Solder the replacement button onto the circuit board.

    • Make sure the metal contacts are not bent and are touching the soldering contacts before soldering.

終わりに

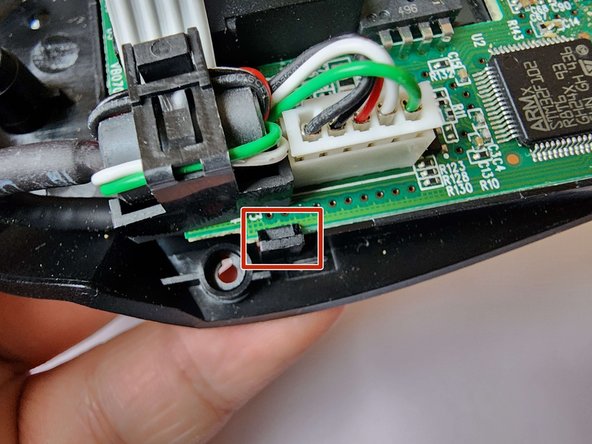
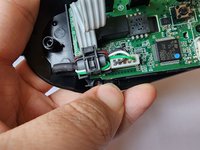
To reassemble your device, follow these instructions in reverse order. When reassembly is complete, apply the replacement mouse skates.

作成者

1人の作成者と共同作成されました。

Aaron C.

メンバー登録日: 01/11/24

157 ポイント

1ガイドが承認済み

チーム

York University, Team O-10, O'Regan Winter 2024 York University, Team O-10, O'Regan Winter 2024人のメンバー

YORK-O'REGAN-W24SOG10

1 メンバー

1のガイドは作成済み

0 件のコメント

コメントを追加

統計データ:

過去 24時間: 2

過去 7 日: 21

過去 30 日: 70

今までの合計 117