メインコンテンツにスキップ

Lenovo Yoga 3 11 Speaker Replacement

必要な工具と部品

  1. Lenovo Yoga 3 11 Speaker Replacement, Lower Case: 手順 1、 1の画像 1
    • Remove the eleven 6 mm T5 Torx screws securing the lower case.

    • Gently lift the lower case up and away from the device.

  2. Lenovo Yoga 3 11 Speaker Replacement, Battery: 手順 2、 3の画像 1 Lenovo Yoga 3 11 Speaker Replacement, Battery: 手順 2、 3の画像 2 Lenovo Yoga 3 11 Speaker Replacement, Battery: 手順 2、 3の画像 3
    • Remove the two 3 mm Phillips #00 screws securing the battery.

    • There are arrows on the battery indicating the location of the screws.

  3. Lenovo Yoga 3 11 Speaker Replacement: 手順 3、 1の画像 1
    • Use a pair of tweezers to gently disconnect the battery connector.

  4. Lenovo Yoga 3 11 Speaker Replacement: 手順 4、 2の画像 1 Lenovo Yoga 3 11 Speaker Replacement: 手順 4、 2の画像 2
    • Use a pair of tweezers to gently disconnect the speaker cable.

    • Remove the wires from underneath the battery tabs using the tweezers.

  5. Lenovo Yoga 3 11 Speaker Replacement: 手順 5、 1の画像 1
    • Carefully remove the battery from the device.

  6. Lenovo Yoga 3 11 Speaker Replacement, Speaker: 手順 6、 2の画像 1 Lenovo Yoga 3 11 Speaker Replacement, Speaker: 手順 6、 2の画像 2
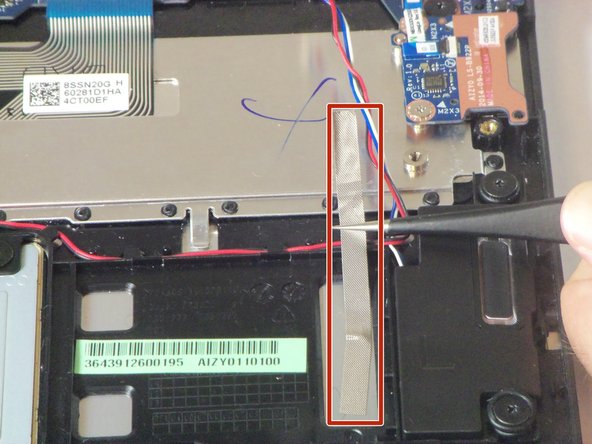
    • Use a pair of tweezers to peel up one side of each of the 3 pieces of tape that cover the speaker wires.

  7. Lenovo Yoga 3 11 Speaker Replacement: 手順 7、 2の画像 1 Lenovo Yoga 3 11 Speaker Replacement: 手順 7、 2の画像 2
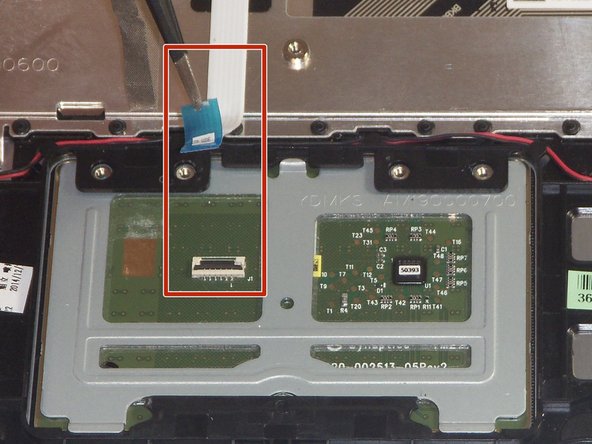
    • Use a pair of tweezers to disconnect the ZIF connector securing the trackpad ribbon cable. Gently lift the black tab up, and the cable should come free.

  8. Lenovo Yoga 3 11 Speaker Replacement: 手順 8、 3の画像 1 Lenovo Yoga 3 11 Speaker Replacement: 手順 8、 3の画像 2 Lenovo Yoga 3 11 Speaker Replacement: 手順 8、 3の画像 3
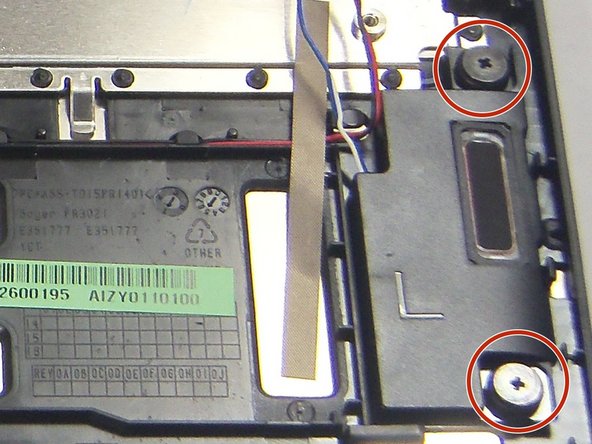
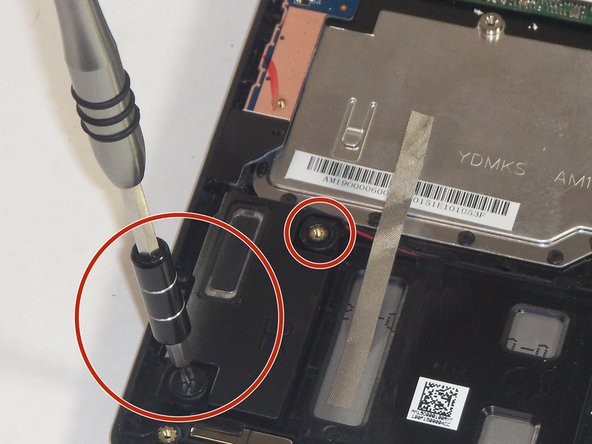
    • Remove the two 2 mm Phillips #0 screws securing the left speaker.

    • Remove the two 2 mm Phillips #0 screws securing the right speaker.

  9. Lenovo Yoga 3 11 Speaker Replacement: 手順 9、 2の画像 1 Lenovo Yoga 3 11 Speaker Replacement: 手順 9、 2の画像 2
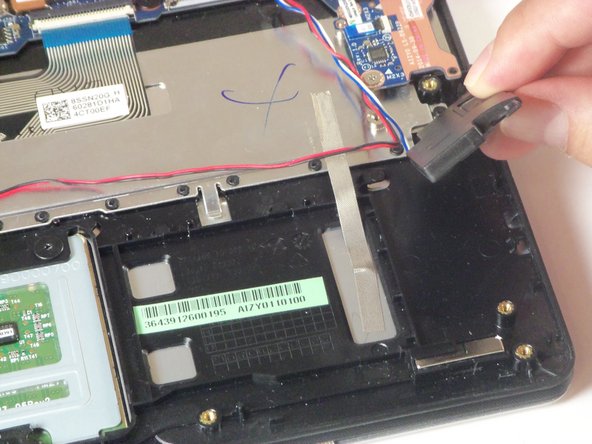
    • Use a pair of tweezers to disconnect the speaker connector.

    • Gently lift the speakers free of the device.

終わりに

To reassemble your device, follow these instructions in reverse order.

ある他の人がこのガイドを完成しました。

作成者

5人の作成者と共同で作成されました。

Slade Fernandes

メンバー登録日: 08/27/15

532 ポイント

3のガイドは作成済み

チーム

USF Tampa, Team 2-3, Blackwell Fall 2015 USF Tampa, Team 2-3, Blackwell Fall 2015人のメンバー

USFT-BLACKWELL-F15S2G3

4 メンバー

11のガイドは作成済み

0 件のコメント

コメントを追加

統計データ:

過去 24時間: 0

過去 7 日: 0

過去 30 日: 6

今までの合計 1,192