はじめに
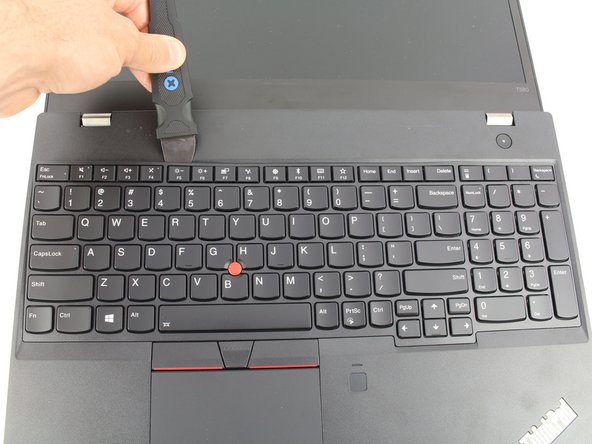
ThinkPad T580のキーボードが動かなくなったら、この修理ガイドを参考にして修理してください。キーボードは、ユーザーからの物理的な入力をマザーボードに繋ぐ役割を担っているため、正常に機能していない場合、ユーザーがコンピューターを完全に使用できなくなる可能性があります。
キーボードに不具合がある場合、例えば、1回押しただけなのに何度も押したことになる、押したことを全く認識しない、キーがチャタリングする、キーボードが完全に押したことを認識しなくなる、などの問題があれば、キーボードを交換することで問題を軽減することができるはずです。
幸いなことに、ThinkPad T580のキーボードはモジュール式で、本体前面から交換することが可能です。裏蓋を開ける必要はありません。
必要な工具と部品
このデバイスを再組み立てするには、インストラクションを逆の順番に従って作業を進めてください。
このデバイスを再組み立てするには、インストラクションを逆の順番に従って作業を進めてください。
以下の翻訳者の皆さんにお礼を申し上げます:
100%
Midori Doiさんは世界中で修理する私たちを助けてくれています! あなたも貢献してみませんか?
翻訳を始める ›
5 件のコメント
Aren't there screws on the bottom of the laptop that ought to be unscrewed as well? That's what the T580 service guide says, I think.
This guide is wrong. You need to remove three screws on the bottom. Then slide the keyboard forward (towards the screen) and lift it up at the front to remove it.
This guide is indeed incorrect. After just pulling the screws out of the back of the keyboard thinking they were "clips" as stated in the article, I can confirm that you DO need to unscrew the three center screws on the back of the laptop prior to removing the keyboard.
Hi Dave.
You and the other commenters are 100% right! I have updated the guide accordingly.
Is it possible to replace the non-backlit keyboard into backlit one?


