メインコンテンツにスキップ

Lenovo 500e Chromebook 2nd Gen Keyboard Replacement

必要な工具と部品

  1. Lenovo 500e Chromebook 2nd Gen Keyboard Replacement, Back Panel: 手順 1、 1の画像 1
    • Remove nine 6 mm screws from the bottom cover of the laptop using a Phillips #0 screwdriver.

  2. Lenovo 500e Chromebook 2nd Gen Keyboard Replacement: 手順 2、 2の画像 1 Lenovo 500e Chromebook 2nd Gen Keyboard Replacement: 手順 2、 2の画像 2
    • Remove stylus from the lower left corner of the back panel.

  3. Lenovo 500e Chromebook 2nd Gen Keyboard Replacement: 手順 3、 2の画像 1 Lenovo 500e Chromebook 2nd Gen Keyboard Replacement: 手順 3、 2の画像 2
    • Go along the edge of the back panel with an iFixit opening tool until it pops loose.

    • Remove the back panel from the laptop.

  4. Lenovo 500e Chromebook 2nd Gen Keyboard Replacement, Battery: 手順 4、 1の画像 1
    • Remove the four 4 mm Phillips #00 screws holding the battery in.

  5. Lenovo 500e Chromebook 2nd Gen Keyboard Replacement: 手順 5、 2の画像 1 Lenovo 500e Chromebook 2nd Gen Keyboard Replacement: 手順 5、 2の画像 2
    • Use the iFixit opening tool to unplug the battery from the motherboard.

    • Potential for device damage: Make sure to be gentle while removing the wire.

  6. Lenovo 500e Chromebook 2nd Gen Keyboard Replacement: 手順 6、 1の画像 1
    • Remove the battery from the laptop.

  7. Lenovo 500e Chromebook 2nd Gen Keyboard Replacement, Motherboard: 手順 7、 2の画像 1 Lenovo 500e Chromebook 2nd Gen Keyboard Replacement, Motherboard: 手順 7、 2の画像 2
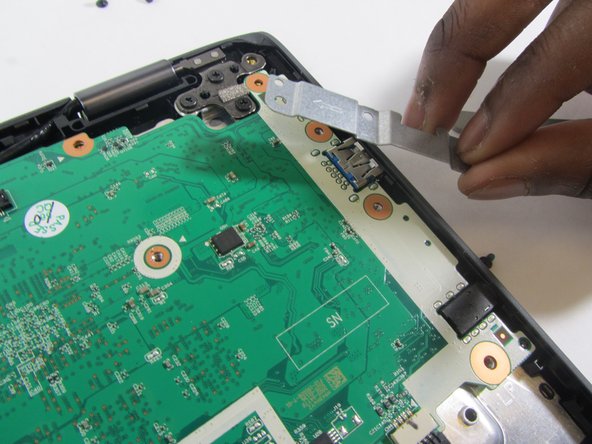
    • Remove the three 4 mm screws (six total) from the left and right side brackets using a Phillips #00 screwdriver.

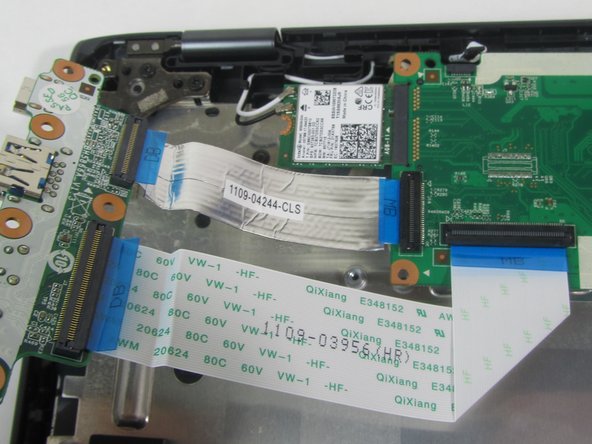
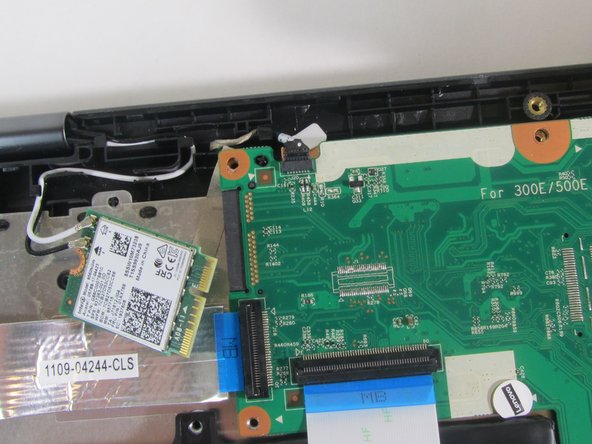
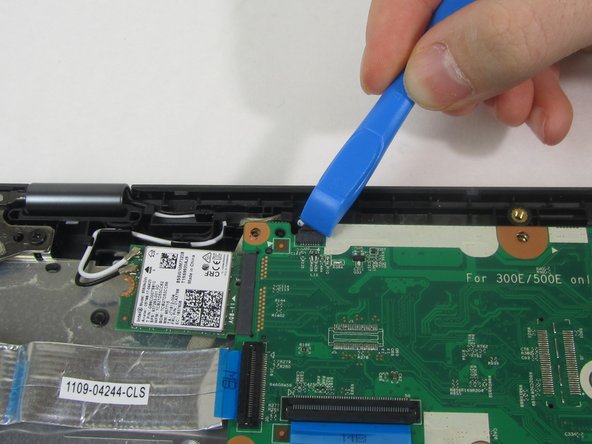
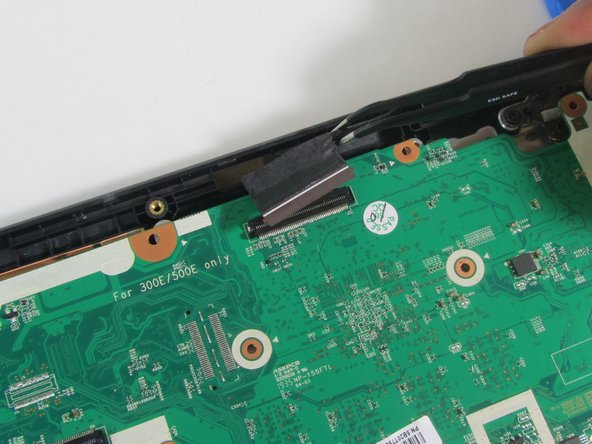
    • Gently remove the metal brackets from the motherboard.

  8. Lenovo 500e Chromebook 2nd Gen Keyboard Replacement: 手順 8、 2の画像 1 Lenovo 500e Chromebook 2nd Gen Keyboard Replacement: 手順 8、 2の画像 2
    • Remove the nine 4 mm screws from the motherboard using a Phillips #00 screwdriver.

  9. Lenovo 500e Chromebook 2nd Gen Keyboard Replacement: 手順 9、 2の画像 1 Lenovo 500e Chromebook 2nd Gen Keyboard Replacement: 手順 9、 2の画像 2
    • Gently remove the USB port from the side housing using an iFixit opening tool.

  10. Lenovo 500e Chromebook 2nd Gen Keyboard Replacement: 手順 10、 2の画像 1 Lenovo 500e Chromebook 2nd Gen Keyboard Replacement: 手順 10、 2の画像 2
    • Gently peel the metal strip away from the metal backing.

  11. Lenovo 500e Chromebook 2nd Gen Keyboard Replacement: 手順 11、 1の画像 1
    • Remove the single 3 mm screw that holds the Wi-Fi card in place using a Phillips #00 screwdriver.

  12. Lenovo 500e Chromebook 2nd Gen Keyboard Replacement: 手順 12、 2の画像 1 Lenovo 500e Chromebook 2nd Gen Keyboard Replacement: 手順 12、 2の画像 2
    • Disconnect the Wi-Fi card from the motherboard using an iFixit opening tool.

  13. Lenovo 500e Chromebook 2nd Gen Keyboard Replacement: 手順 13、 3の画像 1 Lenovo 500e Chromebook 2nd Gen Keyboard Replacement: 手順 13、 3の画像 2 Lenovo 500e Chromebook 2nd Gen Keyboard Replacement: 手順 13、 3の画像 3
    • Using an iFixit opening tool, disconnect the camera cable.

    • Potential for device damage: Be gentle while removing the wire.

  14. Lenovo 500e Chromebook 2nd Gen Keyboard Replacement: 手順 14、 2の画像 1 Lenovo 500e Chromebook 2nd Gen Keyboard Replacement: 手順 14、 2の画像 2
    • Using an iFixit opening tool, detach the speaker wiring from the motherboard.

    • Set speakers aside for reinstallation.

    • Potential for device damage: Be gentle while removing the wire.

  15. Lenovo 500e Chromebook 2nd Gen Keyboard Replacement: 手順 15、 2の画像 1 Lenovo 500e Chromebook 2nd Gen Keyboard Replacement: 手順 15、 2の画像 2
    • Using an iFixit opening tool, detach the track pad connector from the motherboard.

    • Potential for device damage: Be gentle while detaching the connector.

  16. Lenovo 500e Chromebook 2nd Gen Keyboard Replacement: 手順 16、 3の画像 1 Lenovo 500e Chromebook 2nd Gen Keyboard Replacement: 手順 16、 3の画像 2 Lenovo 500e Chromebook 2nd Gen Keyboard Replacement: 手順 16、 3の画像 3
    • Using an iFixit opening tool, detach the keyboard cable from the motherboard.

    • Potential for device damage: Be gentle when detaching the cable.

  17. Lenovo 500e Chromebook 2nd Gen Keyboard Replacement: 手順 17、 2の画像 1 Lenovo 500e Chromebook 2nd Gen Keyboard Replacement: 手順 17、 2の画像 2
    • Using tweezers, disconnect the black cable from the motherboard.

    • Potential for device damage: Be gentle while detaching the cable.

  18. Lenovo 500e Chromebook 2nd Gen Keyboard Replacement: 手順 18、 1の画像 1
    • Gently remove the motherboard from the laptop.

  19. Lenovo 500e Chromebook 2nd Gen Keyboard Replacement, Keyboard: 手順 19、 1の画像 1
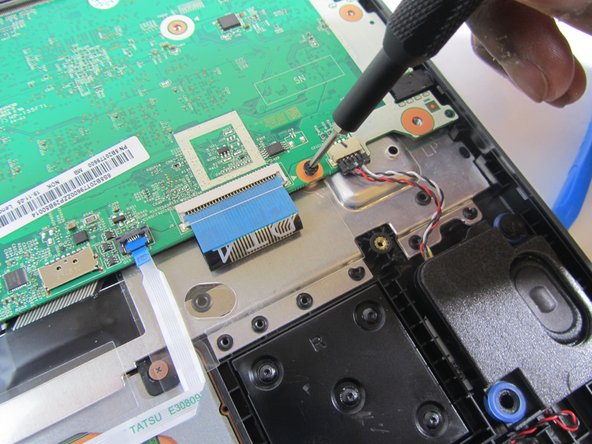
    • Remove the three 5 mm screws (six total) from each hinge using a Phillips #0 screwdriver.

  20. Lenovo 500e Chromebook 2nd Gen Keyboard Replacement: 手順 20、 2の画像 1 Lenovo 500e Chromebook 2nd Gen Keyboard Replacement: 手順 20、 2の画像 2
    • Gently open the laptop screen and it will separate from the keyboard.

終わりに

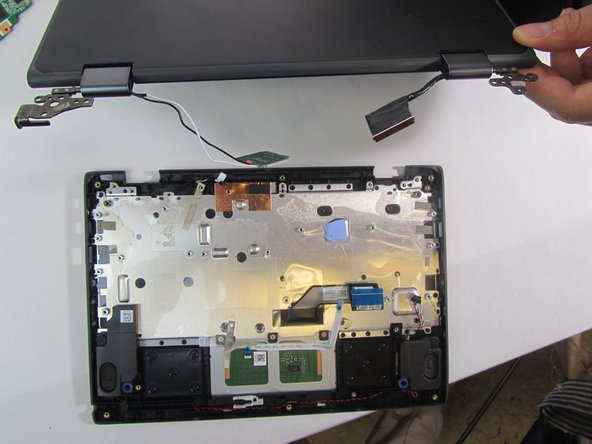
To reassemble your device, follow these instructions in reverse order.

作成者

1人の作成者と共同作成されました。

Nicolas Lidinsky

メンバー登録日: 01/09/22

701 ポイント

5のガイドは作成済み

チーム

Illinois Wesleyan University, Team 1-3, Bullock Spring 2022 Illinois Wesleyan University, Team 1-3, Bullock Spring 2022人のメンバー

IWU-BULLOCK-S22S1G3

3 メンバー

5のガイドは作成済み

0 件のコメント

コメントを追加

統計データ:

過去 24時間: 1

過去 7 日: 4

過去 30 日: 24

今までの合計 907