メインコンテンツにスキップ

Lasko CD08200 Control Panel Replacement

必要な工具と部品

  1. Lasko CD08200 Control Panel Replacement, Lasko CD08200 Disassembly: 手順 1、 2の画像 1 Lasko CD08200 Control Panel Replacement, Lasko CD08200 Disassembly: 手順 1、 2の画像 2
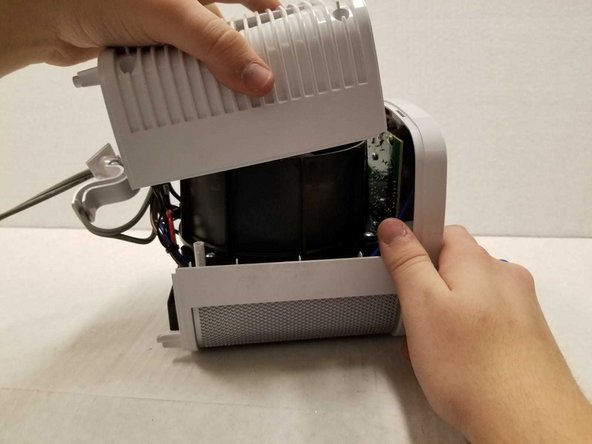
    • Turn over the device and place it on its head.

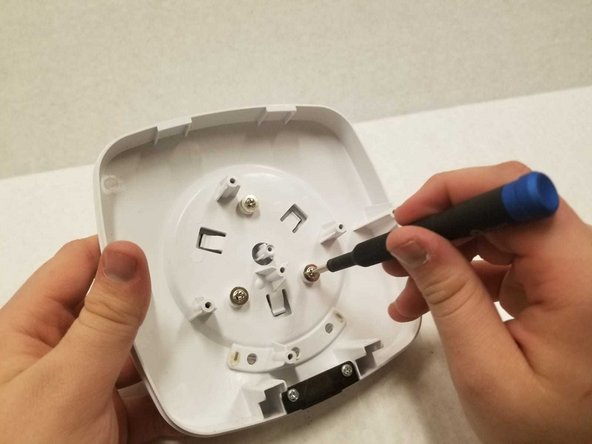
    • Remove the four 14mm screws holding the bottom using a TR15 screwdriver.

  2. Lasko CD08200 Control Panel Replacement: 手順 2、 1の画像 1
    • Remove both 14mm screws from the power cord casing using a Phillips #2 screwdriver.

    • Remove the power cord casing from the device case.

  3. Lasko CD08200 Control Panel Replacement: 手順 3、 3の画像 1 Lasko CD08200 Control Panel Replacement: 手順 3、 3の画像 2 Lasko CD08200 Control Panel Replacement: 手順 3、 3の画像 3
    • Cut the sticker on the right side of the device using a Jimmy.

    • Unscrew the four 14mm screws with a Phillips #2 bit on the back of the device.

    • If your screwdriver cannot reach the screw, you can use the metal spudger.

    • Remove the back casing from the device.

  4. Lasko CD08200 Control Panel Replacement: 手順 4、 3の画像 1 Lasko CD08200 Control Panel Replacement: 手順 4、 3の画像 2 Lasko CD08200 Control Panel Replacement: 手順 4、 3の画像 3
    • Remove the four 14mm screws housing the fan using the Phillips #2 screwdriver.

    • Remove the top of the fan housing with the fan attached and place it on the table.

  5. Lasko CD08200 Control Panel Replacement, Control Panel: 手順 5、 2の画像 1 Lasko CD08200 Control Panel Replacement, Control Panel: 手順 5、 2の画像 2
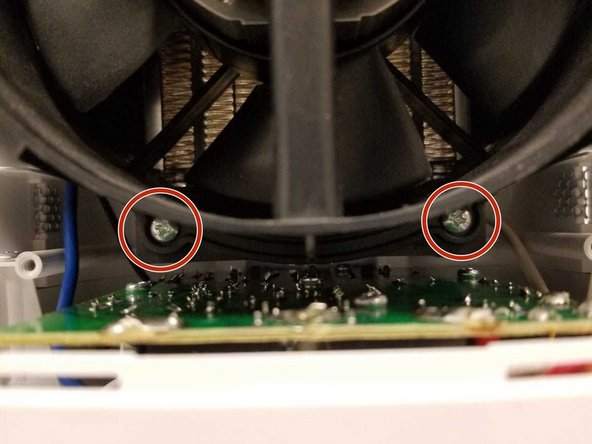
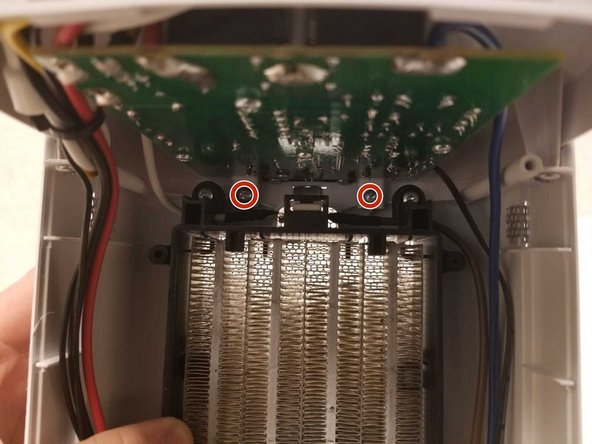
    • Unscrew the four rings using the Phillips #2.

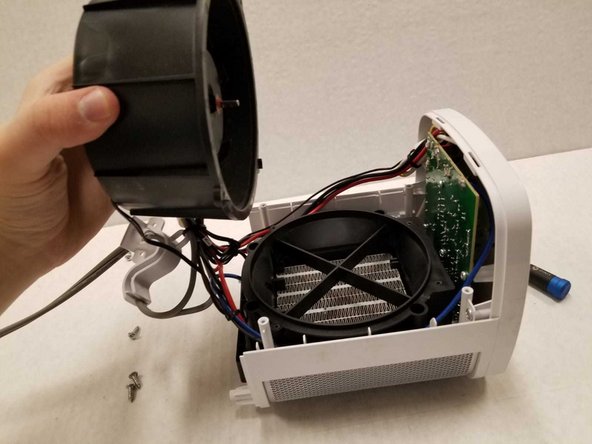
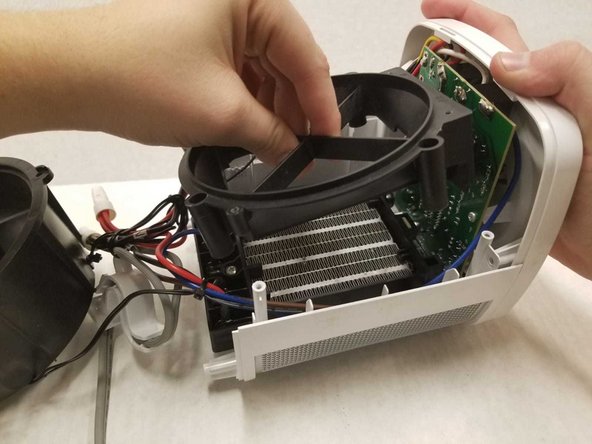
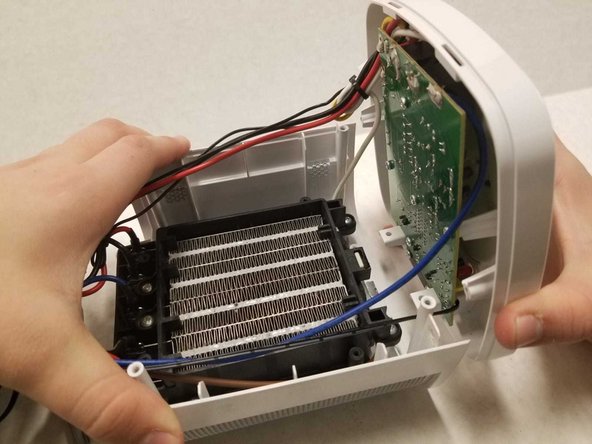
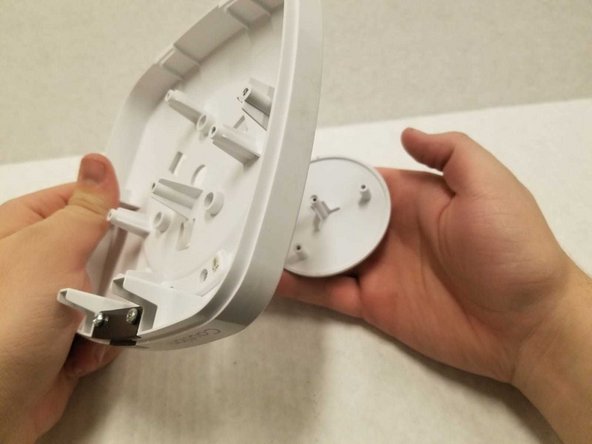
    • Gently remove the fan base from the device.

  6. Lasko CD08200 Control Panel Replacement: 手順 6、 3の画像 1 Lasko CD08200 Control Panel Replacement: 手順 6、 3の画像 2 Lasko CD08200 Control Panel Replacement: 手順 6、 3の画像 3
    • Remove the four 14mm screws using the Phillips #2 screwdriver.

    • Gently detach the control panel from the device.

  7. Lasko CD08200 Control Panel Replacement: 手順 7、 2の画像 1 Lasko CD08200 Control Panel Replacement: 手順 7、 2の画像 2
    • Remove the five 14mm screws using the Phillips #2 screwdriver.

    • Pull apart the motherboard from the panel.

  8. Lasko CD08200 Control Panel Replacement: 手順 8、 3の画像 1 Lasko CD08200 Control Panel Replacement: 手順 8、 3の画像 2 Lasko CD08200 Control Panel Replacement: 手順 8、 3の画像 3
    • Remove the three 10mm screws using the Phillips #2 screwdriver.

    • Pull the button from the panel’s top.

    • During reassembly of the top panel, you must align the LED light with the three windows of the top panel and back panel.

終わりに

To reassemble your device, follow these instructions in reverse order.

ある他の人がこのガイドを完成しました。

作成者

3人の作成者と共同で作成されました。

Najiib Ahmed

メンバー登録日: 01/14/20

161 ポイント

1ガイドが承認済み

チーム

York University, Team S1-G1, Woodhouse Winter 2020 York University, Team S1-G1, Woodhouse Winter 2020人のメンバー

YORK-WOODHOUSE-W20S1G1

3 メンバー

9のガイドは作成済み

0 件のコメント

コメントを追加

統計データ:

過去 24時間: 0

過去 7 日: 3

過去 30 日: 11

今までの合計 758