メインコンテンツにスキップ

LG V50 ThinQ Screen Replacement

必要な工具と部品

  1. LG V50 ThinQ Screen Replacement, Screen: 手順 1、 3の画像 1 LG V50 ThinQ Screen Replacement, Screen: 手順 1、 3の画像 2 LG V50 ThinQ Screen Replacement, Screen: 手順 1、 3の画像 3
    • Flip the phone over, making sure that the back of the phone is facing up.

    • With an opening pick, run the tool along the edge of the back cover of the phone and carefully pry it open.

  2. LG V50 ThinQ Screen Replacement: 手順 2、 2の画像 1 LG V50 ThinQ Screen Replacement: 手順 2、 2の画像 2
    • With the device facing down, remove all 12 1mm Phillips #000 screws.

    • Keep in mind that the screws must be reused at the end of the guide to put the phone back together.

  3. LG V50 ThinQ Screen Replacement: 手順 3、 3の画像 1 LG V50 ThinQ Screen Replacement: 手順 3、 3の画像 2 LG V50 ThinQ Screen Replacement: 手順 3、 3の画像 3
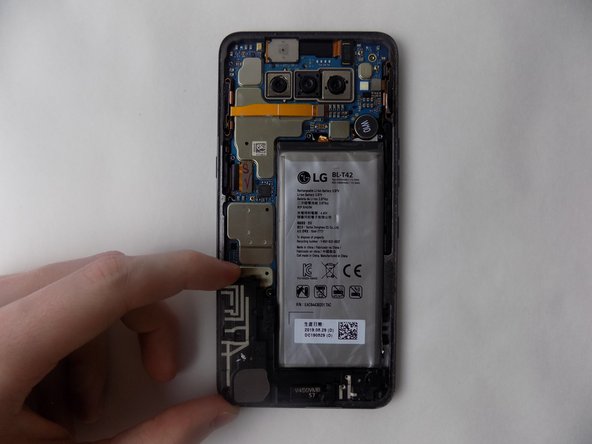
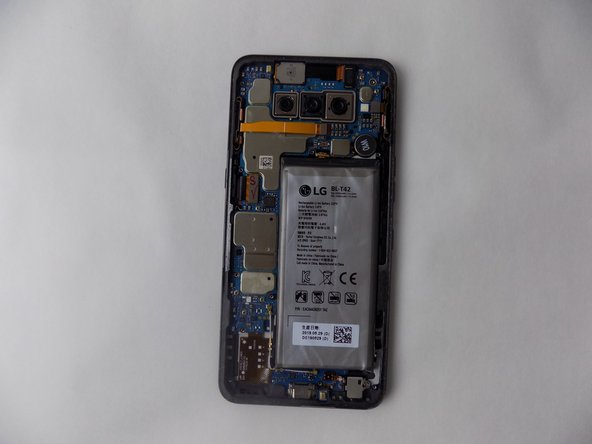
    • Remove the two brackets covering the internal components.

  4. LG V50 ThinQ Screen Replacement: 手順 4、 2の画像 1 LG V50 ThinQ Screen Replacement: 手順 4、 2の画像 2
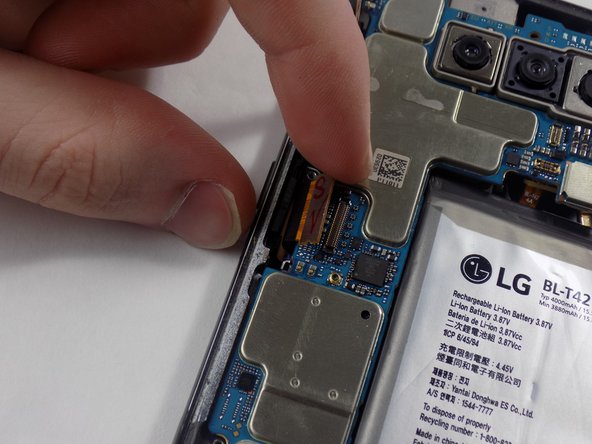
    • Remove the battery connection from its connector port, located above the battery.

    • Similarly, remove the screen connection from its connector port, found on the left side of the back of the device.

  5. LG V50 ThinQ Screen Replacement: 手順 5、 1の画像 1
    • With an opening pick (or a similar tool that isn't sharp), run the tool along the edge between the screen and the base of the phone.

    • After the screen is removed from the device, use a 1mm double-sided adhesive along the edges of the phone.

    • Carefully put the replacement screen into place.

終わりに

To reassemble your device, follow these instructions in reverse order.

ある他の人がこのガイドを完成しました。

作成者

1人の作成者と共同作成されました。

Carlos Rivera

メンバー登録日: 11/03/23

121 ポイント

1ガイドが承認済み

チーム

UMass Dartmouth, Team 2-3, Gulbrandsen Fall 2023 UMass Dartmouth, Team 2-3, Gulbrandsen Fall 2023人のメンバー

UMASSD-GULBRANDSEN-F23S2G3

4 メンバー

5のガイドは作成済み

0 件のコメント

コメントを追加

統計データ:

過去 24時間: 1

過去 7 日: 7

過去 30 日: 37

今までの合計 231