はじめに
If your LG G8 ThinQ phone is not producing clear audio, use this guide to replace the headphone jack. Diagnose these symptoms using our troubleshooting page.
This guide involves removing the back cover of the phone and some internal components to access the headphone jack.
This phone uses adhesive to increase the seal of the rear panel; this can be replaced to closer replicate factory fit and finish.
必要な工具と部品
-
-
Unplug and power off your phone before you begin.
-
Insert the SIM card eject tool into the pinhole in the lower right side of the phone.
-
Remove the SIM card and tray.
-
-
-
Place the phone so that the screen is facing down.
-
Insert opening cards between the back panel and frame of the phone to loosen the clips and adhesive.
-
Using equal pressure, carefully pry the back panel away from the phone.
-
Once enough space has been created, use an opening tool to completely separate the back panel from the phone.
-
-
-
-
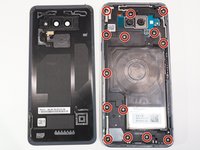
Remove all 14 screws from the midframe using a Phillips #000 screwdriver.
-
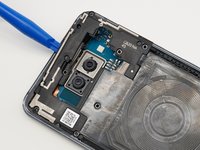
Work an opening tool around the perimeter of the midframe to pry and remove it from the phone.
-
-
-
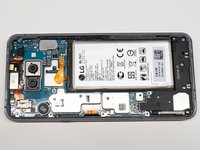
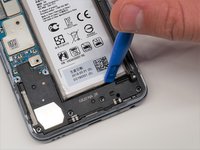
Using an opening tool, carefully pry out remove the speaker system from the phone.
-
-
-
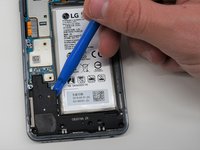
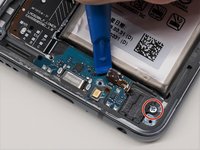
Using an opening tool, carefully disconnect the ribbon cable connecting the 3.5mm audio jack to the motherboard.
-
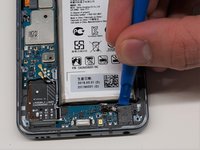
Remove the screw holding the 3.5 mm audio jack in place using a Phillips #000 screwdriver.
-
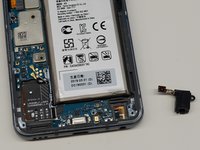
Remove the audio jack from the phone.
-


To reassemble your device, follow these instructions in reverse order.
To reassemble your device, follow these instructions in reverse order.

チーム

Western Carolina University, Team 1-4, Virtue Fall 2021 Western Carolina University, Team 1-4, Virtue Fall 2021人のメンバー
WCU-VIRTUE-F21S1G4
4 メンバー
5のガイドは作成済み