はじめに
There are many benefits to adding a second hard drive or SSD to your iMac such as improved speeds, greater storage space, and less heartache when installing new software. Use this guide to install one using our optical bay hard drive enclosure.
必要な工具と部品
-
-
Stick a heavy-duty suction cup near each of the two top corners of the glass panel.
-
While lightly holding the suction cup against the glass, raise the movable handle until it is parallel with the other handle (as indicated by the third picture).
-
-
-
-
Peel back the portion of aluminum tape highlighted in red, leaving the rest attached to the black plastic optical drive bracket.
-
-
-
Use the tip of a spudger to press each of the optical drive bracket tabs out of their slots on the bottom of the optical drive.
-
Rotate the optical drive bracket slightly away from the optical drive.
-
Pull the optical drive bracket away from the open end of the optical drive, minding any tabs that may get caught.
-
-
-
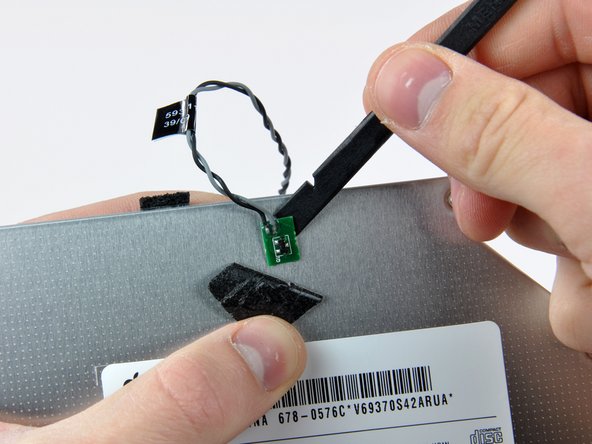
Use the tip of a spudger to peel back the piece of foam tape covering the optical drive thermal sensor.
-
Use the flat end of a spudger to carefully pry the thermal sensor up off the adhesive securing it to the optical drive.
-
If you have a disc or anything else stuck inside your optical drive, we have a guide to fix it.
-
-
-
Remove the three 3.0 mm Phillips screws from the optical bay enclosure.
-
-
-
Remove the plastic positioner from the optical bay hard drive enclosure by pressing in on one of the clips on either side and lifting it up and out of the enclosure.
-
-
-
Make sure that the hard drive connectors are facing down before placing it into the enclosure.
-
Gently place the hard drive into the enclosure's hard drive slot.
-
While firmly holding the enclosure in place with one hand, use your other hand to press the hard drive into the enclosure connectors.
-


To reassemble your device, follow these instructions in reverse order.
To reassemble your device, follow these instructions in reverse order.
132 の人々がこのガイドを完成させました。


12 件のコメント
Not terribly difficult, though I did install an SSD in my son's 20" iMac. Used the OWC data doubler bracket, which, of course, isn't designed for the iMac. I had to bend some metal in order to make it work at a very basic level, but otherwise didn't run into any real roadblocks.
I used OWC Data Doubler. Fit no prob.
Success, and not as difficult as I thought. Getting the glass out (27") was a bit nervous but it's strong and the suction cups work well. The display itself has a heavy frame around it so also is strong. I used a large soft artist's brush to dust the display and inner glass. I carefully used needle nose pliers on the cables and connectors, couldn't get enough grip with tweezers.
I have iMac late 2009 (EMC 2374) and the optical bay fits well into it. I installed Samsung SSD 850 PRO 256 Gb with a documented speed 520/550 (write/read). But unfortunately it seems because of ODD (optical disk drive) link I've got only 250/270. Anyway I'm pretty happy, because I merged SSD with my hybrid HDD 2 Tb (150/150) and now have 2.25 Tb Fusion drive with about x2 speed. My advise - don't buy expensive SSD with high speed if you want to link it through optical bay - the speed will be cut anyway.
The real matter is the interface that is an old 3GB/s instead of a recent 6GB/s that limit the performance of SSD drive