メインコンテンツにスキップ

How to Open the Logitech MX Ergo

必要な工具と部品

  1. How to Open the Logitech MX Ergo, Power off your mouse: 手順 1、 3の画像 1 How to Open the Logitech MX Ergo, Power off your mouse: 手順 1、 3の画像 2 How to Open the Logitech MX Ergo, Power off your mouse: 手順 1、 3の画像 3
    • Before you begin, flip the mouse's power switch into the OFF position.

    • A red indicator should be visible beneath the switch.

    • Unplug all cables from your mouse.

    • Throughout your repair, it may be helpful to lay your mouse on a soft cloth to stabilize it and prevent damage while you work.

  2. How to Open the Logitech MX Ergo, Remove the cover: 手順 2、 2の画像 1 How to Open the Logitech MX Ergo, Remove the cover: 手順 2、 2の画像 2
    • Remove the magnetic cover by pulling it away from the bottom of your mouse.

  3. How to Open the Logitech MX Ergo, Remove the case screws: 手順 3、 2の画像 1 How to Open the Logitech MX Ergo, Remove the case screws: 手順 3、 2の画像 2
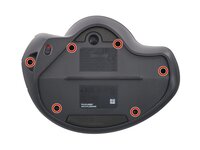
    • Use a Torx T6 screwdriver to remove the six 5.7 mm-long screws securing the two halves of the mouse together.

  4. How to Open the Logitech MX Ergo, Remove the trackball: 手順 4、 3の画像 1 How to Open the Logitech MX Ergo, Remove the trackball: 手順 4、 3の画像 2 How to Open the Logitech MX Ergo, Remove the trackball: 手順 4、 3の画像 3
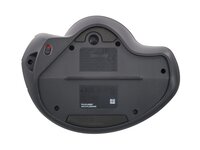
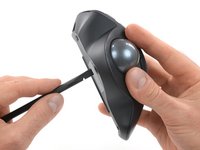
    • Insert a spudger into the hole on the bottom of the mouse, beneath the trackball.

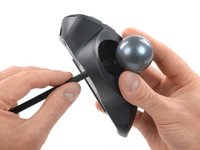
    • Use the spudger to push the trackball out of its recess.

    • Remove the trackball.

  5. How to Open the Logitech MX Ergo, Release the plastic clips: 手順 5、 3の画像 1 How to Open the Logitech MX Ergo, Release the plastic clips: 手順 5、 3の画像 2 How to Open the Logitech MX Ergo, Release the plastic clips: 手順 5、 3の画像 3
    • Clips around the perimeter of the mouse case hold the two halves together.

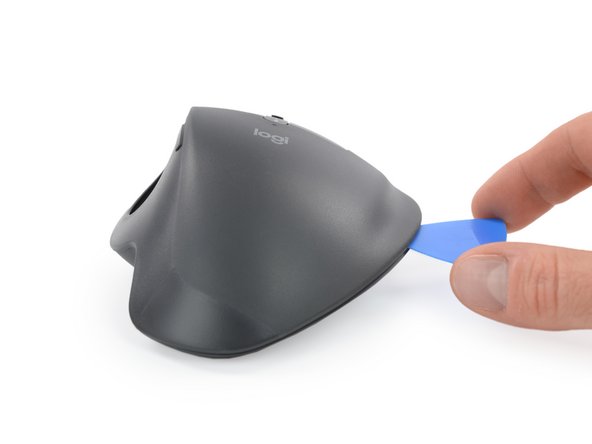
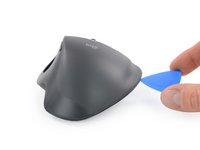
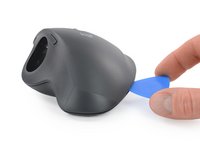
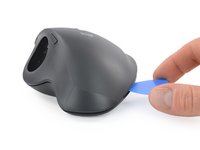
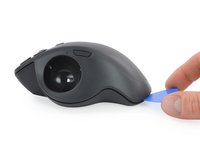
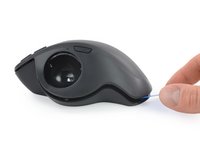
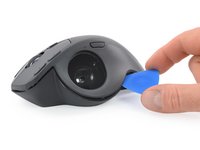
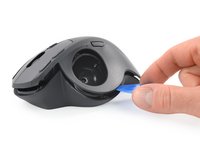
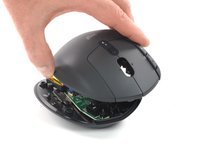
    • Insert the tip of an opening pick into the seam between the two halves, near the middle of the right edge.

    • Twist the opening pick to release the plastic clip.

  6. How to Open the Logitech MX Ergo: 手順 6、 2の画像 1 How to Open the Logitech MX Ergo: 手順 6、 2の画像 2
    • Slide the opening pick along the seam until it's about half way to the rear of the mouse.

    • Twist the pick to release the plastic clip.

  7. How to Open the Logitech MX Ergo: 手順 7、 2の画像 1 How to Open the Logitech MX Ergo: 手順 7、 2の画像 2
    • Slide the opening pick all the way to the rear the mouse.

    • Twist the pick to release the plastic clip.

  8. How to Open the Logitech MX Ergo: 手順 8、 2の画像 1 How to Open the Logitech MX Ergo: 手順 8、 2の画像 2
    • Slide the opening pick to the middle of the left edge, next to the trackball recess.

    • Twist the pick to release the plastic clip.

  9. How to Open the Logitech MX Ergo, Reposition the top half: 手順 9、 3の画像 1 How to Open the Logitech MX Ergo, Reposition the top half: 手順 9、 3の画像 2 How to Open the Logitech MX Ergo, Reposition the top half: 手順 9、 3の画像 3
    • Don't completely separate the two halves yet—they're still connected by a delicate cable.

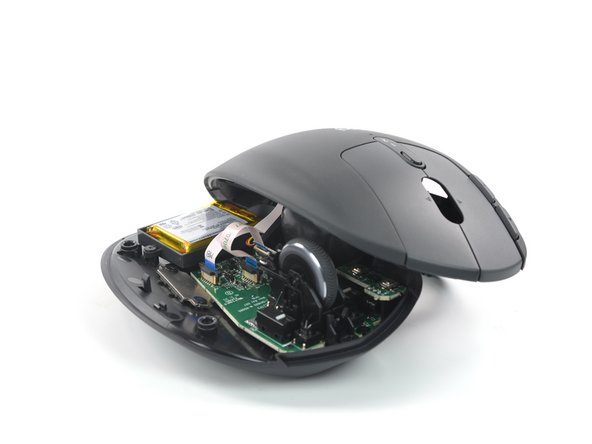
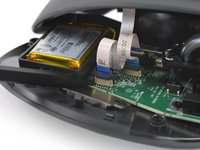
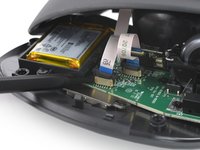
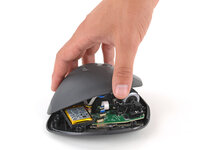
    • Gently lift the top half and place it to the left of the mouse so you can access the internals.

    • Be careful not to strain any of the cables inside the mouse.

  10. How to Open the Logitech MX Ergo, Disconnect the interconnect cable: 手順 10、 3の画像 1 How to Open the Logitech MX Ergo, Disconnect the interconnect cable: 手順 10、 3の画像 2 How to Open the Logitech MX Ergo, Disconnect the interconnect cable: 手順 10、 3の画像 3
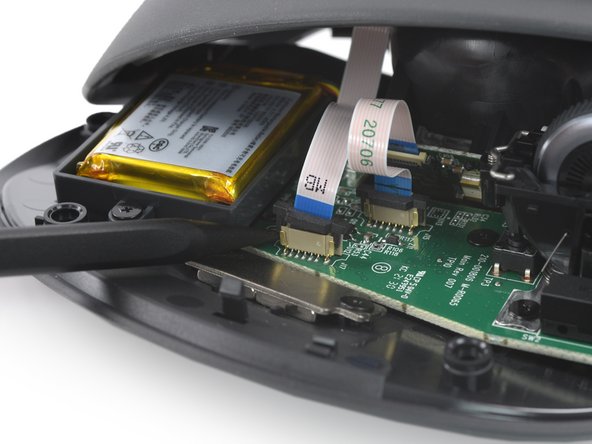
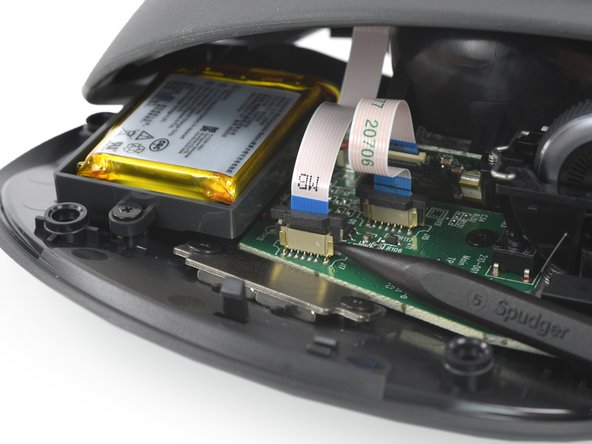
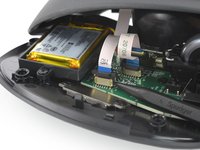
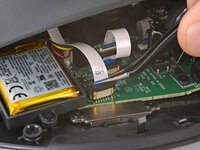
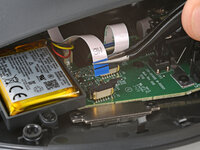
    • Use the point of a spudger to gently lift alternating sides of the black sliding latch on the interconnect cable socket.

    • You should feel the latch pop into the unlocked position. Don't push too far, or the latch may come completely off the connector.

  11. How to Open the Logitech MX Ergo: 手順 11、 2の画像 1 How to Open the Logitech MX Ergo: 手順 11、 2の画像 2
    • Use tweezers or your fingers to pull the interconnect cable straight up and out of its socket.

  12. How to Open the Logitech MX Ergo, Remove the top half of the mouse: 手順 12、 2の画像 1 How to Open the Logitech MX Ergo, Remove the top half of the mouse: 手順 12、 2の画像 2
    • Lift the top half of the mouse straight up and remove it.

終わりに

Compare your new replacement part to the original part—you may need to transfer remaining components or remove adhesive backings from the new part before installing.

To reassemble your device, follow the above steps in reverse order.

Take your e-waste to an R2 or e-Stewards certified recycler.

Repair didn’t go as planned? Check out our Answers community for troubleshooting help.

9 の人々がこのガイドを完成させました。

作成者

4人の作成者と共同で作成されました。

Adriana Zwink

メンバー登録日: 12/18/19

61,760 ポイント

167のガイドは作成済み

チーム

iFixit iFixit人のメンバー

Staff

123 メンバー

23,605のガイドは作成済み

5件のガイドコメント

Thank you. It was quite a coincidence that I found this because I had just purchased that fix it repair tool kit. It was pretty handy that I had it all right here in front of me. Thanks again you made it easy.

Marti Roy - 返信

Hi @martilynn, thank you for sharing your experience! We're glad that the guide was useful for your repair.

Adriana Zwink -

Very helpful guide! Managed to figure out how to clear some gunk off an end users mouse. Much appreciated!

Skurtsson - 返信

Actually not necessary to remove the interconnect cable, and I wish I had not. Instructions do not include reassembly.

jeffrey bailey - 返信

Had a clogged sensor and the mouse ball wasnt registering movement. I didnt realize how easy it was to push out the trackball! thanks for the simple how to, a few years of use just got cleaned out.

Kayla - 返信

コメントを追加

統計データ:

過去 24時間: 6

過去 7 日: 47

過去 30 日: 241

今までの合計 10,201