はじめに
If your Hover-1 Charger (H1-COL) is having audio problems, there may be an issue with its speaker. Before you begin disassembling your hoverboard, check out our troubleshooting pages that address Bluetooth speaker and powering on. If the problem persists, this guide will help you replace your hoverboard’s Bluetooth speaker.
The speaker is very small and fragile, please handle with care. If possible DO NOT touch the cone or dust cap of the speaker, it could damage the speaker. Make sure to wear an anti-static wrist strap to protect the electronics against the buildup of static electricity. Some screw housings are fragile; they may fall apart when the screw is removed.
必要な工具と部品
-
-
Flip the hoverboard over so that the warning label is facing up.
-
Remove the twelve 12 mm screws with a Phillips #2 screwdriver.
-
Remove the four 10 mm screws with a Phillips #2 screwdriver.
-
-
-
-
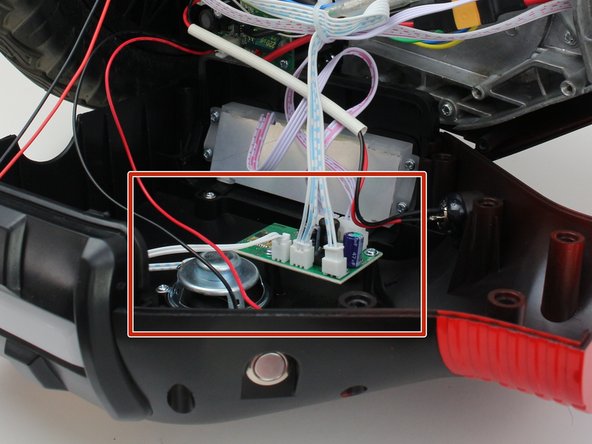
Unplug the red and white four pin connector from the circuit board. Unplugging this connector is photographed as an example.
-
Unplug the red and white four pin connector from the circuit board.
-
Unplug the white and blue three pin connector from the circuit board.
-
Unplug the white and blue two pin connector from the circuit board.
-


To reassemble your device, follow these instructions in reverse order.
To reassemble your device, follow these instructions in reverse order.
ある他の人がこのガイドを完成しました。

チーム

Cal Poly, Team S12-G1, Regan Fall 2019 Cal Poly, Team S12-G1, Regan Fall 2019人のメンバー
CPSU-REGAN-F19S12G1
4 メンバー
6のガイドは作成済み