For the best access to the brake pads, we recommend securing the motorcycle in an upright position.
If you do not have a motorcycle lift, you will still be able change the brake pads, but it is still a good idea to secure the front wheel in place.
Be sure to allow time for the brake pads to cool completely before working on them. It may take ten to twenty minutes, especially if the motorcycle has just been ridden.
Using a 1/4" hex head or allen wrench, unscrew the two bolts holding the front brake assembly to the fork.
Unscrew and remove the bottom bolt, but do not completely remove the top bolt yet.
Supporting the brake assembly with one hand, remove the top bolt.
Carefully slide the brake off of the brake rotor and hang it from the metal hanger.
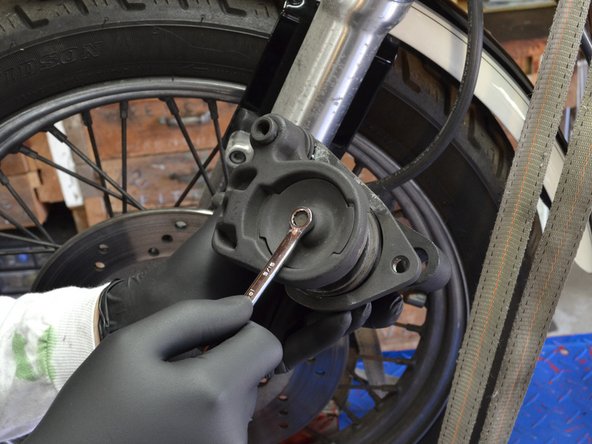
Using a 5/16 wrench, remove the bolt holding the stationary brake pad cover in place.
Remove the stationary brake pad cover from the brake assembly.
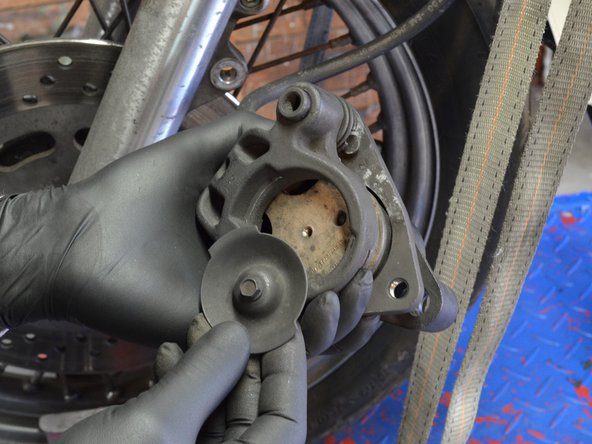
Remove the floating caliper and remaining brake pad from the caliper assembly.
The brake pad and floating caliper are not attached to each other. Be careful to not drop either the brake pad or caliper.
Using a can of brake cleaner, spray out the piston and inside of the brake caliper.
Make sure to do this over a bucket or tray; there tends to be a lot of grime inside the brake caliper and spraying it out can make quite a mess.
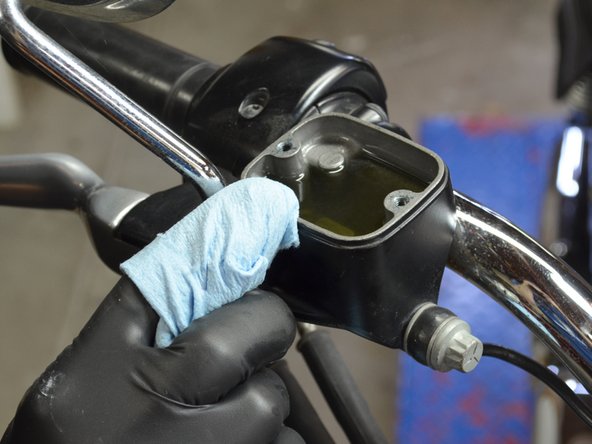
Using a Phillips #2 screwdriver, remove the two screws securing the cover on the master brake-fluid reservoir.
Carefully remove the cover of the master reservoir, making sure that you do not spill any of the brake fluid.
Brake fluid can cause ugly stains and scarring on cosmetic components of the motorcycle. Make sure you don't spill any.
Position the screw of a large C clamp so that the head of the screw is pressing against the inside of the brake piston.
It is possible to use your hands rather than a C clamp, but it is much more difficult.
Slowly tighten the C clamp, forcing the brake piston back into the brake cylinder until it is completely depressed.
Make sure that you work slowly, or else the piston will force brake fluid out of the master reservoir and all over the motorcycle.
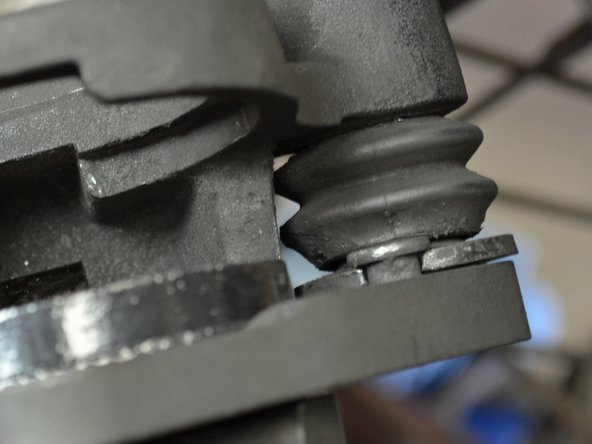
Using your fingers, pull the alignment peg out of its hole in the stationary caliper.
Apply a thin layer of grease to the alignment peg.
Re-install the alignment peg, but do not push it all the way in. Only push it in about half-way.
Make sure that the floating caliper spring is in the proper place before re-installing the floating caliper.
The spring should be on the same side as the alignment peg.
Place one of the brake pads into the floating caliper, with the anti-squeal side facing away from the spring and mount peg.
Holding the brake assembly in one hand and the floating caliper in the other, gently slide the floating caliper into the front brake assembly.
The anti-squeal side of the brake pad should be facing away from the stationary caliper, and towards the brake piston.
Move the floating caliper alignment peg so that the metal tab on the floating caliper fits together with the indentation on the alignment peg.
Being careful to not dislodge the floating caliper, insert the stationary brake pad so that the tab on the brake pad fits into the corresponding slot on the stationary caliper.
Make sure that the abrasive side of the brake pad is facing inwards, and the anti-squeal side is facing outwards.
Using one hand to keep the brake pads from falling out, replace the cover on the stationary brake pad.
Insert the screw and lock washer that came with the brake pads and tighten using a Phillips #2 screwdriver.
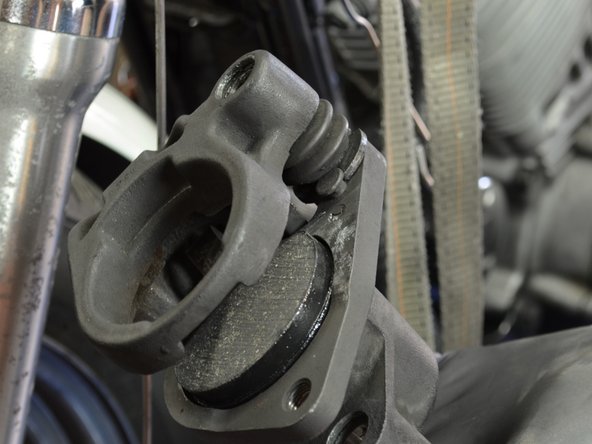
With the piston on the outside of the rotor, carefully slide the front brake assembly back over the rotor
Slide the brake assembly until the lower hole in the brake assembly aligns with the lower mount hole on the fork.
Apply a small amount of grease on the lower brake mount screw.
The brake assembly should stay attached to the rotor. If it does not, go ahead and hang it from the metal hanger while you grease the screw.
Insert the screw into the lower mount hole.
Insert the upper retaining bolt into the upper bolt hole in the fork and brake assembly.
Using only your hands, tighten the bolt as much as possible.
このガイドを埋め込む
サイズを選択し、以下のコードをコピーして、このガイドを小さなウィジェットとしてサイト/フォーラムに埋め込みます。
1つの手順
全ガイド
小サイズ - 600px
中サイズ - 800px
大サイズ - 1200px
プレビュー