メインコンテンツにスキップ

HTC Desire 826 Screen Replacement

必要な工具と部品

  1. HTC Desire 826 Screen Replacement, Battery: 手順 1、 3の画像 1 HTC Desire 826 Screen Replacement, Battery: 手順 1、 3の画像 2 HTC Desire 826 Screen Replacement, Battery: 手順 1、 3の画像 3
    • Find a seam in the back of the device.

    • Insert the plastic spudger into the seam and pry off the back panel.

    • There will be glue, so keep prying until it comes off or you may need to heat up the edges of the device to loosen the adhesive with the iOpener.

  2. HTC Desire 826 Screen Replacement: 手順 2、 3の画像 1 HTC Desire 826 Screen Replacement: 手順 2、 3の画像 2 HTC Desire 826 Screen Replacement: 手順 2、 3の画像 3
    • Remove the 4.0 mm screw above the battery with a T5 Torx screwdriver.

    • Remove the metal bracket with the tweezers.

  3. HTC Desire 826 Screen Replacement: 手順 3、 1の画像 1
    • Disconnect the battery cable from the motherboard with the tweezers.

  4. HTC Desire 826 Screen Replacement: 手順 4、 2の画像 1 HTC Desire 826 Screen Replacement: 手順 4、 2の画像 2
    • Lift the battery with a plastic spudger and remove it from the device.

  5. HTC Desire 826 Screen Replacement, Screen: 手順 5、 2の画像 1 HTC Desire 826 Screen Replacement, Screen: 手順 5、 2の画像 2
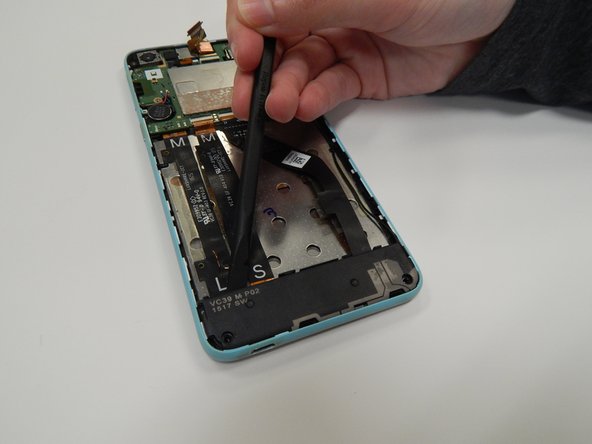
    • Remove the two 4.0 mm screws attaching the bottom plastic panel using a T5 screwdriver.

    • Remove the black plastic cover using a plastic spudger

  6. HTC Desire 826 Screen Replacement: 手順 6、 1の画像 1
    • Use tweezers to pry the wire up from the battery bed

    • Detach the ribbon cable by pulling with the tweezers where circled in blue

    • Flip the phone over so the screen side is facing up for the next step

  7. HTC Desire 826 Screen Replacement: 手順 7、 2の画像 1 HTC Desire 826 Screen Replacement: 手順 7、 2の画像 2
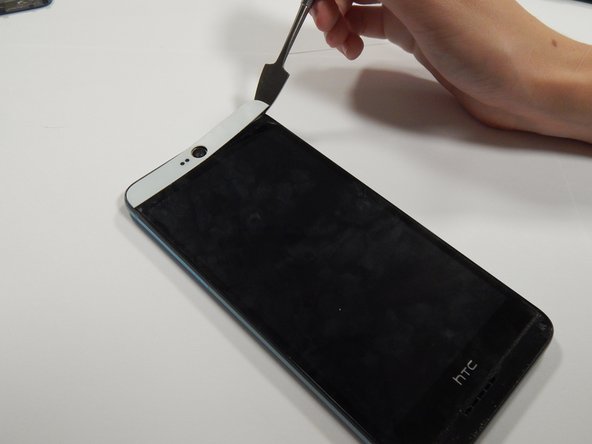
    • Use the metal spudger to pry up the plastic cover pieces from the front of the phone

  8. HTC Desire 826 Screen Replacement: 手順 8、 2の画像 1 HTC Desire 826 Screen Replacement: 手順 8、 2の画像 2
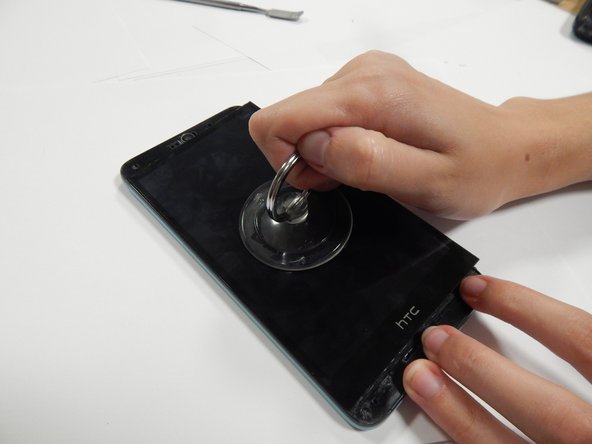
    • Pry up the edges of the screen using the metal spudger

    • Then use the suction cup to remove the screen from your device

    • There will likely be glue holding your screen in place, so keep prying but be cautious not to break the screen. You may want to use the iOpener to loosen the adhesive prior to removal.

終わりに

To reassemble your device, follow these instructions in reverse order.

作成者

3人の作成者と共同で作成されました。

Julia Zimmerman

メンバー登録日: 09/04/19

109 ポイント

1ガイドが承認済み

チーム

University of Alabama, Team S1-G2, Bedsole Fall 2019 University of Alabama, Team S1-G2, Bedsole Fall 2019人のメンバー

UA-BEDSOLE-F19S1G2

4 メンバー

10のガイドは作成済み

コメント 1 件

Après avoir fait le démontage de l'écran , le digital est devenu très dur et ne réagi pas automatiquement au toucher . Que dois-je faire ?

Japhet piergy Bassa - 返信

コメントを追加

統計データ:

過去 24時間: 0

過去 7 日: 1

過去 30 日: 1

今までの合計 341