メインコンテンツにスキップ

HP Pavilion 17-e146us Motherboard Replacement

必要な工具と部品

  1. HP Pavilion 17-e146us Motherboard Replacement, Battery: 手順 1、 1の画像 1
    • Turn the device over.

  2. HP Pavilion 17-e146us Motherboard Replacement: 手順 2、 2の画像 1 HP Pavilion 17-e146us Motherboard Replacement: 手順 2、 2の画像 2
    • Move the battery lock switch to the right to unlock. The battery release button will unlock the battery from the computer.

    • The battery release button is located above the the battery.

  3. HP Pavilion 17-e146us Motherboard Replacement: 手順 3、 1の画像 1
    • The battery will unlock from the computer.

    • Remove the unlocked battery from the computer.

  4. HP Pavilion 17-e146us Motherboard Replacement, Keyboard: 手順 4、 3の画像 1 HP Pavilion 17-e146us Motherboard Replacement, Keyboard: 手順 4、 3の画像 2 HP Pavilion 17-e146us Motherboard Replacement, Keyboard: 手順 4、 3の画像 3
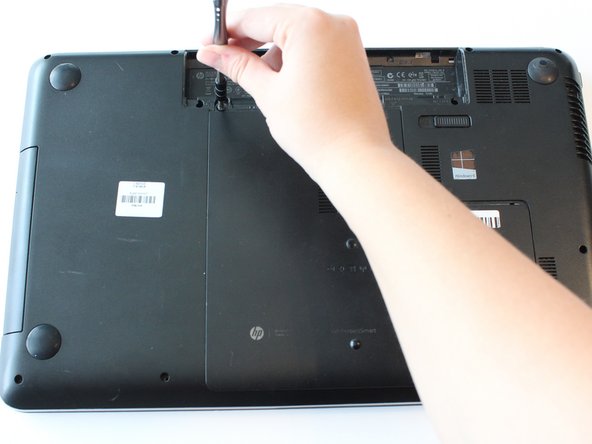
    • Remove the 6.25 mm screw in the left-lower hand corner of the battery port using a Phillips head screw driver.

  5. HP Pavilion 17-e146us Motherboard Replacement: 手順 5、 1の画像 1
    • Remove the HP protect smart ventilation case.

    • The smart ventilation is a part of the back cover of the device

  6. HP Pavilion 17-e146us Motherboard Replacement: 手順 6、 1の画像 1
    • Remove seven 6.5 mm screws using a Phillips #0 screwdriver.

    • Remove four 3.0 mm screws located in the charger port using a Phillips #0 screwdriver.

  7. HP Pavilion 17-e146us Motherboard Replacement: 手順 7、 2の画像 1 HP Pavilion 17-e146us Motherboard Replacement: 手順 7、 2の画像 2
    • Pull and remove the disk drive.

    • The disk drive is located on the left side of the device when it is turned over.

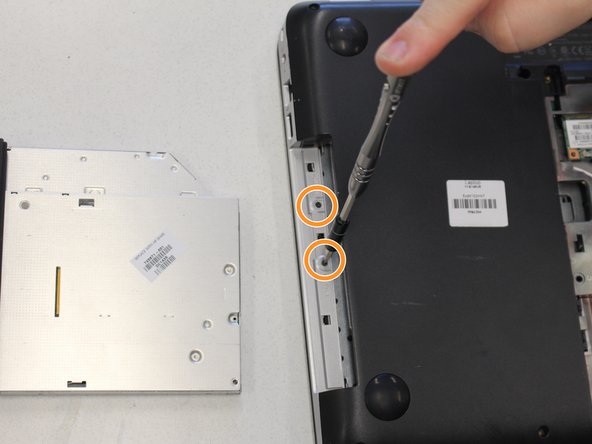
    • Remove two 3.00 mm screws on the inside of the disk drive using a Phillips screwdriver.

  8. HP Pavilion 17-e146us Motherboard Replacement: 手順 8、 1の画像 1
    • Apply firm pressure inside the release port using a narrow tool such as a screw driver or tweezers.

    • The release port releases the keyboard.

  9. HP Pavilion 17-e146us Motherboard Replacement: 手順 9、 1の画像 1
    • Flip device over so that the cover is facing towards you

  10. HP Pavilion 17-e146us Motherboard Replacement: 手順 10、 3の画像 1 HP Pavilion 17-e146us Motherboard Replacement: 手順 10、 3の画像 2 HP Pavilion 17-e146us Motherboard Replacement: 手順 10、 3の画像 3
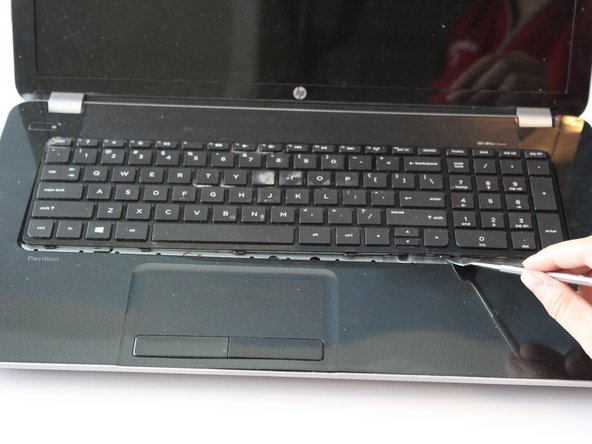
    • Open device. The keyboard should be separate from the inside panel.

    • If the keyboard does not automatically pop out, use a spudger or opening tool along the edge of the front panel and the keyboard to pop the keyboard out.

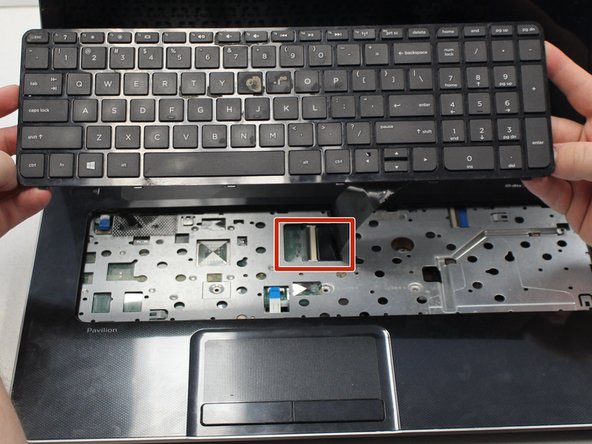
    • Detach the keyboard's cable connector from the motherboard.

  11. HP Pavilion 17-e146us Motherboard Replacement, Motherboard: 手順 11、 1の画像 1
    • Remove three 6.5 mm Phillips screws located underneath the keyboard using a Phillips #0 screwdriver.

  12. HP Pavilion 17-e146us Motherboard Replacement: 手順 12、 1の画像 1
    • Place wedge tool in-between the front panel and the cover underneath the keyboard

    • Use wedge tool to pop the two covers apart.

    • This may require some force.

  13. HP Pavilion 17-e146us Motherboard Replacement: 手順 13、 2の画像 1 HP Pavilion 17-e146us Motherboard Replacement: 手順 13、 2の画像 2
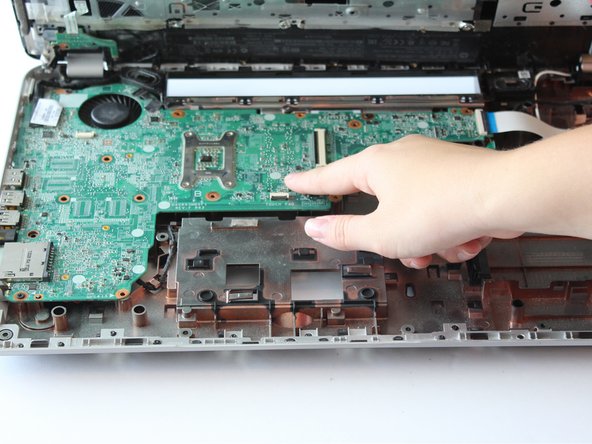
    • Remove the motherboard using your hands

    • The motherboard is large green portion located inside the device

終わりに

To reassemble your device, follow these instructions in reverse order.

ある他の人がこのガイドを完成しました。

作成者

2人の作成者と共同で作成されました。

Emma Neumann

メンバー登録日: 09/04/19

629 ポイント

5のガイドは作成済み

チーム

University of Alabama, Team S2-G7, Bedsole Fall 2019 University of Alabama, Team S2-G7, Bedsole Fall 2019人のメンバー

UA-BEDSOLE-F19S2G7

3 メンバー

5のガイドは作成済み

0 件のコメント

コメントを追加

統計データ:

過去 24時間: 0

過去 7 日: 1

過去 30 日: 4

今までの合計 877