はじめに
This is a step by step guide intended to assist you in the removal and replacement of your screen. This guide is helpful if you are dealing with a cracked or unresponsive screen and want to replace it.
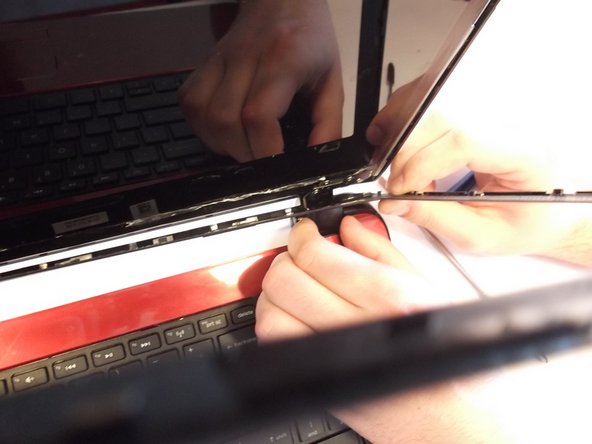
This guide shows the use of a metal spudger on delicate components, which can further damage the laptop! When working with electronics, it's important to choose a tool that's ESD-safe to avoid accidental damage to the device. The metal spudger is great when you need serious prying power, but the regular black nylon spudger or a plastic opening tool should be used whenever possible.
必要な工具と部品
-
-
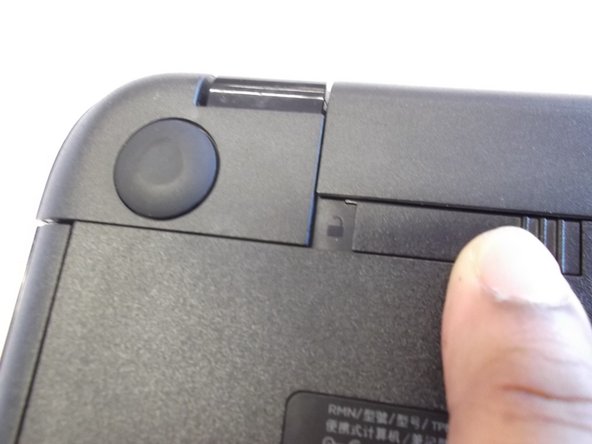
On the underside of the laptop towards the hinge for the screen there are two rectangular slide switches located inside of rectangular tracks.
-
-
-
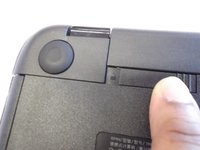
The left switch is the battery unlock switch.
-
Inside the rectangular track of this switch there is an image of a closed lock that should be visible. Push this switch to the other end of the track and an image of an open lock should be visible.
-
-
-
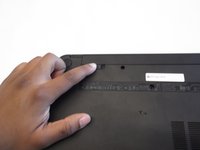
Then take and slide the other switch to the other end of its track which will pop out the battery.
-
Grab the battery and pull it out of the slot.
-
-
-
-
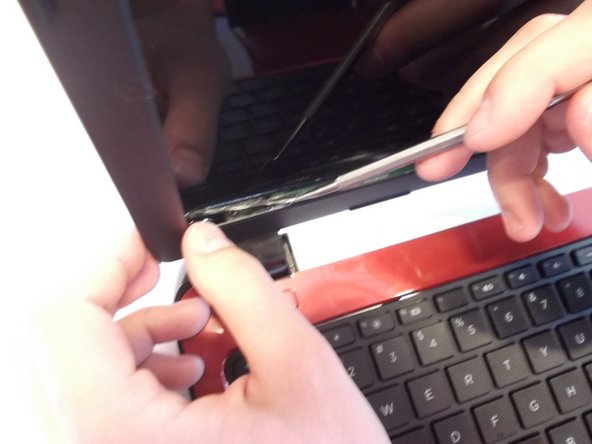
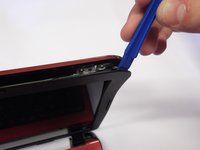
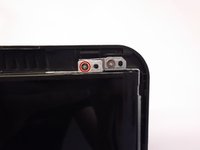
Slide plastic opening tool in crack at the top corner of the outer frame of the screen (in the gap between the red and black sections of plastic) and pry apart as shown.
-
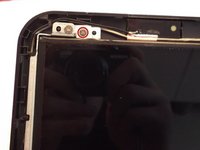
Pry apart all edges the same as the top. Use the spudger for the bottom section as it is glued to tape, make sure to pry this apart carefully and the tape should be separated from the black plastic part as shown.
-
-
-
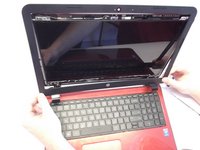
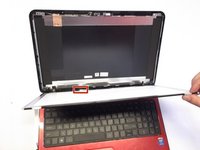
Separate the black plastic frame from the body of the computer by sliding it up and towards you while rotating the top section away from you.
-
-
-
Unscrew the 4x 4mm Phillips #1 screws from the four corners of the screen they are the ones that are attached to the metal tabs coming from the screen itself.
-
-
-
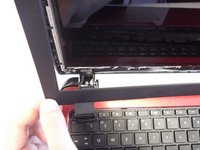
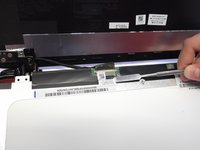
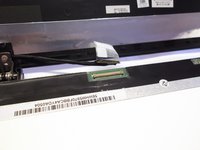
Pull the screen away from the plastic backing there will be a plug on the bottom section of the screen near the keyboard.
-
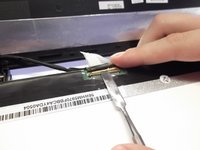
Take small metal spudger and gently scrape up the sticker holding the screen in place.
-
-
-
Use a plastic opening tool to lift up the black tab on the ZIF connector.
-
Slowly pull the ribbon cable out of the connector.
-


To reassemble your device, follow these instructions in reverse order.
3 の人々がこのガイドを完成させました。
