はじめに
Replace a cracked or faulty display on your HP Chromebook 14.
必要な工具と部品
-
-
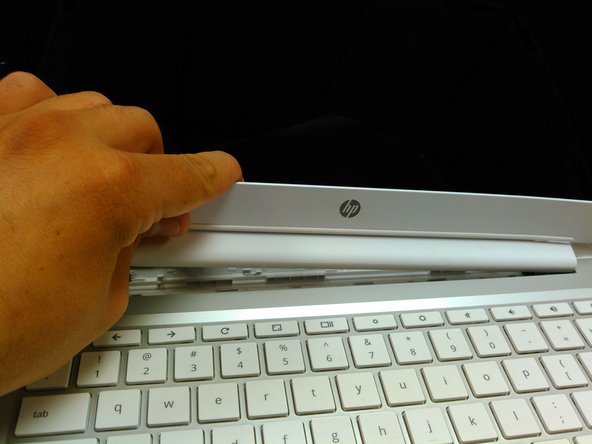
Pry up the nylon covers at the lower left and right of the display to reveal two Phillips head screws.
-
-
-
-
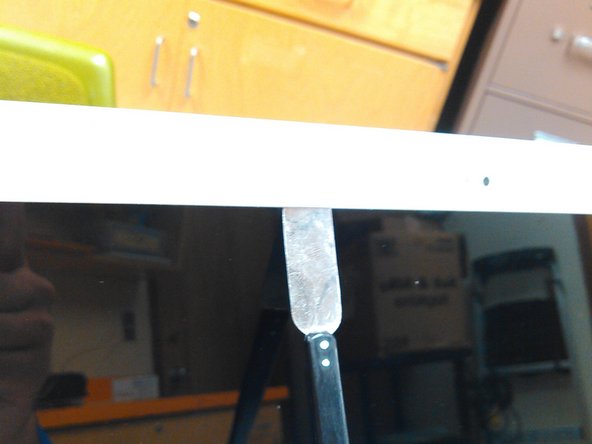
Use a spudger or other pry tool to pry up the bezel from all sides.
-
Once all the clips are free, pull the bezel from the bottom.
-
-
-
Remove the four screws securing the display panel.
-
-
-
Let the display panel rest on the keyboard.
-
The highlighted area is taped to the back of the display panel. Pry up to free it.
-


To reassemble your device, follow these instructions in reverse order.
To reassemble your device, follow these instructions in reverse order.
23 の人々がこのガイドを完成させました。
チーム

8 件のコメント
Nylon covers are hard to see, they cover the entire area and peel off like a sticker, I didn't think mine had any and I pulled the screw socket out, not disastrous but I would have liked to have not done this.
madornetto - 返信
Any idea where I can buy some replacement ones?
mcaddie7 -
I was able to complete it successfully though right now I can't get the bezel quite flush down on the bottom left. One clip doesn't seem to want to go in so I'm not sure if the display cable is in the way or not. Will have to give it another look here after work but otherwise easy enough!
So what's the screen model used in this video?, I have the same laptop
I replaced my sons screen and now the screen is completely black. I ordered the same exact screen that it had. Spent the extra money to get the special tools and made sure I didn't touch anything with my bear hands. Can someone email me with a possible solution? I've power cycled it, and let it charge overnight. I'm at a loss and I can't afford to take it to a computer repair shop. It's only 7 months old.
@kristinas2boys I've never worked on this particular model, but whenever a repair doesn't work out as expected your first step should be to check your work. Open it back up, re-seat the display connector to make sure you're getting a good signal, and check for any signs of damage, etc. If the problem persists, it could be a defective display, which you can test by reinstalling the old display—if it works correctly, your replacement may be defective. If none of that applies, post your issue in our Answers forum and you'll have a better chance of getting some help. Good luck!
can someone tell me or show me or provide a video link on how to remove the entire screen housing from the base of an HP chromebook 14-smb? i want to seperate the chomebook base from the screen housing. thank you
raz mahtaz - 返信
The nylon covers are essentially stickers, so you don't have to pry to deep.
Daniel Bernal III - 返信