メインコンテンツにスキップ

HP Chromebook 11A G8 EE Battery Replacement

必要な工具と部品

  1. HP Chromebook 11A G8 EE Battery Replacement, Keyboard Assembly: 手順 1、 2の画像 1 HP Chromebook 11A G8 EE Battery Replacement, Keyboard Assembly: 手順 1、 2の画像 2
    • On the bottom of the laptop, remove four 7 mm screw using a Phillips #1 screwdriver.

    • Using the Phillips #1 screwdriver, remove the two remaining 8 mm screws by the hinges.

  2. HP Chromebook 11A G8 EE Battery Replacement: 手順 2、 3の画像 1 HP Chromebook 11A G8 EE Battery Replacement: 手順 2、 3の画像 2 HP Chromebook 11A G8 EE Battery Replacement: 手順 2、 3の画像 3
    • Flip the laptop over and open up the display.

    • Using the iFixit opening tool, carefully separate the palm rest from the bottom cover by working your way around the perimeter and prying it up.

    • You will hear an audible and tactile click or pop letting you know that you have unclipped a portion of the palm rest from the base enclosure.

    • Lift the palm rest of the laptops towards you, away from the screen.

  3. HP Chromebook 11A G8 EE Battery Replacement: 手順 3、 2の画像 1 HP Chromebook 11A G8 EE Battery Replacement: 手順 3、 2の画像 2
    • Carefully, lift the keyboard ribbon lock and disconnect the keyboard ribbon from the motherboard.

    • Disconnect the touchpad ribbon from the motherboard, and remove top cover.

    • Remove the keyboard.

  4. HP Chromebook 11A G8 EE Battery Replacement, Speaker: 手順 4、 3の画像 1 HP Chromebook 11A G8 EE Battery Replacement, Speaker: 手順 4、 3の画像 2 HP Chromebook 11A G8 EE Battery Replacement, Speaker: 手順 4、 3の画像 3
    この手順で使用する道具:
    Tweezers
    $4.99
    購入する
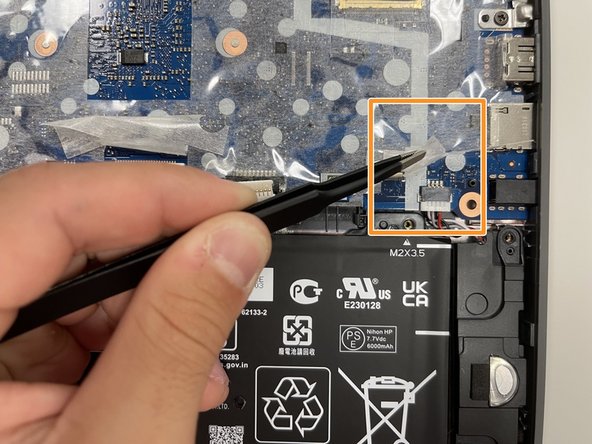
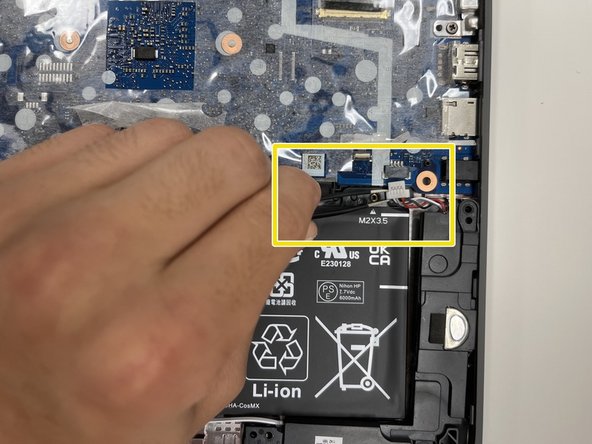
    • Using the tweezers, carefully disconnect the battery cable from the motherboard.

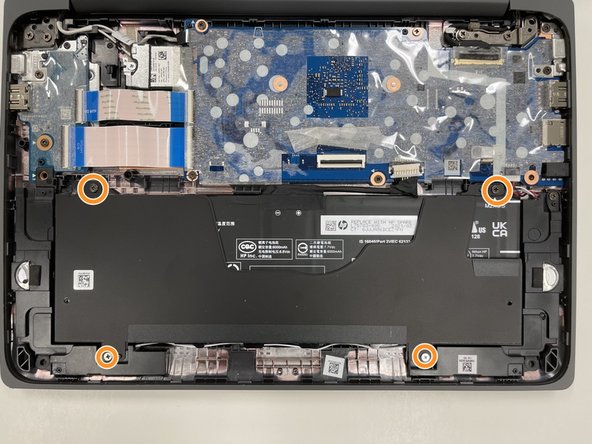
    • Use the Phillips #0 screwdriver, remove the four 3.5 mm screws that secure the battery cover to the battery.

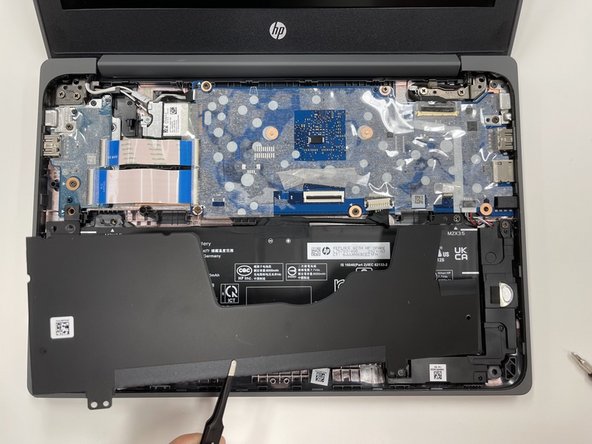
    • Using the tweezers, carefully remove the battery cover.

  5. HP Chromebook 11A G8 EE Battery Replacement: 手順 5、 3の画像 1 HP Chromebook 11A G8 EE Battery Replacement: 手順 5、 3の画像 2 HP Chromebook 11A G8 EE Battery Replacement: 手順 5、 3の画像 3
    • Using the Phillips #1 screwdriver, remove the 3.5 mm screw that secures the speaker to the frame.

    • Peel back the clear sheet.

    • Using the tweezers, carefully disconnect the speaker cable from the motherboard.

  6. HP Chromebook 11A G8 EE Battery Replacement: 手順 6、 2の画像 1 HP Chromebook 11A G8 EE Battery Replacement: 手順 6、 2の画像 2
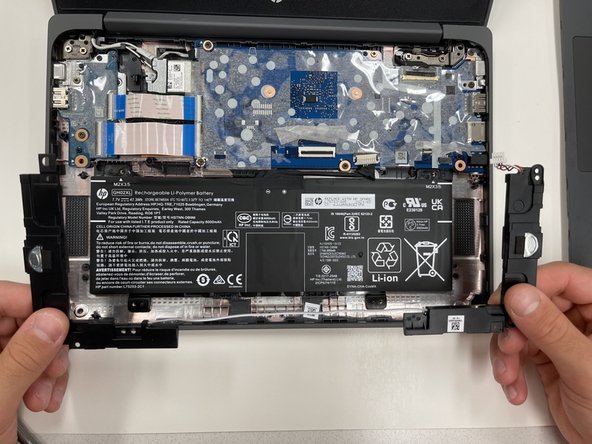
    • Remove the speaker cable from the routing channel on the keyboard.

    • Using your hands, carefully lift the speakers out of the alignment pins, and remove.

  7. HP Chromebook 11A G8 EE Battery Replacement, Battery: 手順 7、 2の画像 1 HP Chromebook 11A G8 EE Battery Replacement, Battery: 手順 7、 2の画像 2
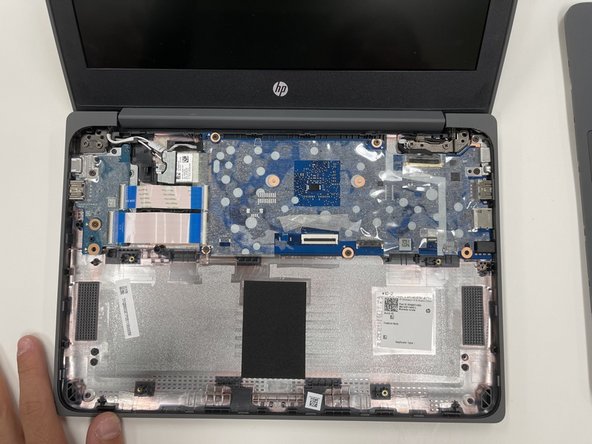
    • Lift the battery out of the case and remove.

終わりに

To reassemble your device, follow these instructions in reverse order.

2 の人々がこのガイドを完成させました。

作成者

3人の作成者と共同で作成されました。

Ella Portwood

メンバー登録日: 09/03/21

684 ポイント

4のガイドは作成済み

チーム

University of Alabama, Team 2-1, Bedsole Fall 2021 University of Alabama, Team 2-1, Bedsole Fall 2021人のメンバー

UA-BEDSOLE-F21S2G1

4 メンバー

7のガイドは作成済み

コメント 1 件

I am literally in school rn this is so easy. Great instructions easy to follow. Chromebooks are very easy to take apart in school because of the fact that the keyboard assembly and trackpad are one piece. 10/10 instructions would do this again.

Carter Russell - 返信

コメントを追加

統計データ:

過去 24時間: 0

過去 7 日: 12

過去 30 日: 54

今までの合計 1,831