はじめに
Your LCD Display is a vital part of your HP Chromebook. Without a functioning LCD Display, you can not use your Chromebook.
In some instances, the display can become cracked or broken from physical contact. This will require you to replace your LCD display.
Use this troubleshooting guide to see if you can fix your problem without replacing your LCD Display. If your issue is not resolved, use the following replacement guide to replace your LCD screen. Before starting with the guide, do the following:
- Disconnect all external devices and connections to the device.
- Make sure the device is disconnected from power and Shut down the device from the Chromebook's OS.
必要な工具と部品
-
-
Remove six 6.6 mm screws from the back case using a Phillips #1 screwdriver.
-
Remove two 8.7 mm screws from the back case using a Phillips #1 screwdriver.
-
Turn the computer over and open it as if you are going to use it.
-
-
-
-
Using your iFixit opening tool, ease it in between the frame of the top case and lift up.
-
Slide your opening tool clockwise around the edge of the laptop, separating the front panel from the top case.
-
Lay the laptop flat.
-
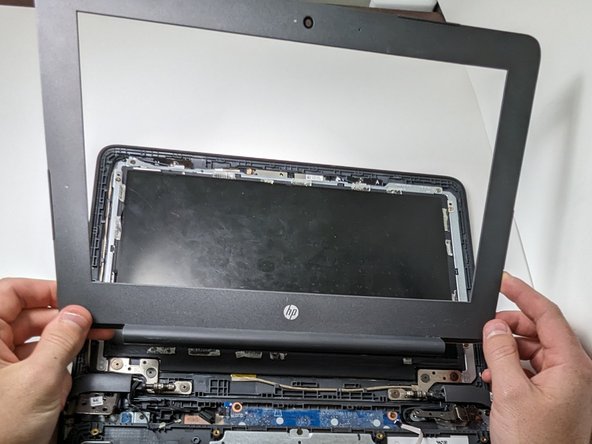
Carefully lift the frame and bring the top of the top cover towards you.
-
Once the frame is about 90 degrees from the base, pull the bottom of the frame towards you, separating the frame from the top case.
-
-
-
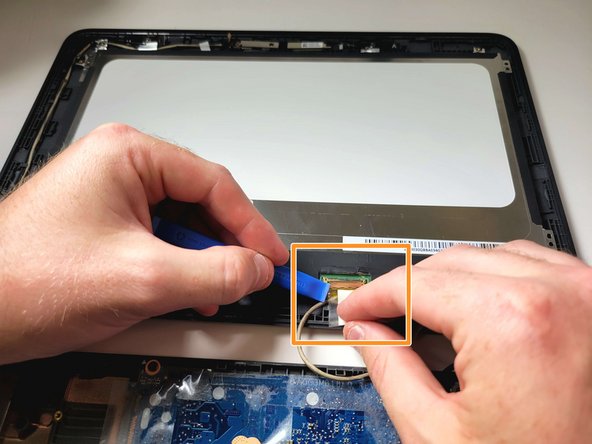
Lift the display out of its setting and turn it over.
-
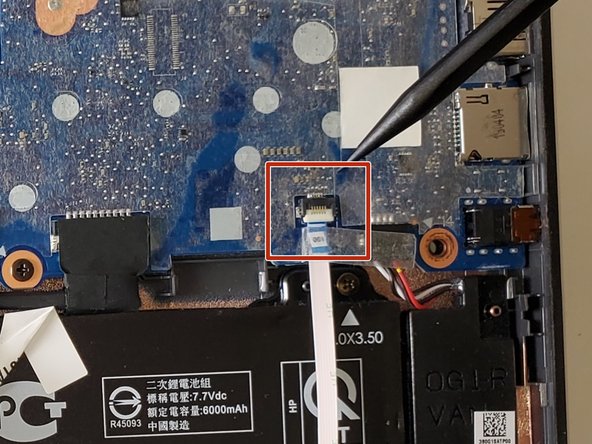
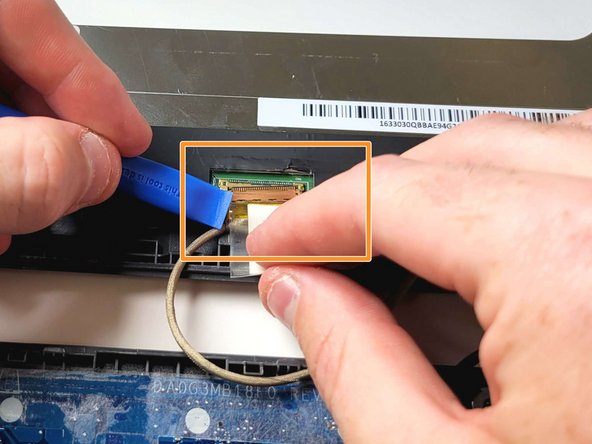
Locate the LCD cable connection at the bottom of the display and peel back the tape connecting the cable.
-
Using your iFixit opening tool, put the corner of the tool into the small gap in the corner where the connection is made and pry it back towards you.
-


To reassemble your device, follow these instructions in reverse order.
To reassemble your device, follow these instructions in reverse order.

チーム

Austin Community College, Team 8-1, Watkins Fall 2023 Austin Community College, Team 8-1, Watkins Fall 2023人のメンバー
AUSTINCC-WATKINS-F23S8G1
3 メンバー
5のガイドは作成済み