メインコンテンツにスキップ

HMDX Chill Charging Port Replacement

必要な工具と部品

  1. HMDX Chill Charging Port Replacement, Remove Rubber Base: 手順 1、 3の画像 1 HMDX Chill Charging Port Replacement, Remove Rubber Base: 手順 1、 3の画像 2 HMDX Chill Charging Port Replacement, Remove Rubber Base: 手順 1、 3の画像 3
    • Insert a metal spudger under the rubber base.

    • Pry the rubber base off.

  2. HMDX Chill Charging Port Replacement: 手順 2、 1の画像 1
    • Use a Phillips #1 screwdriver to remove four 9 mm screws from the base of the device.

  3. HMDX Chill Charging Port Replacement: 手順 3、 2の画像 1 HMDX Chill Charging Port Replacement: 手順 3、 2の画像 2
    • Grip the base of the HMDX Chill.

    • Pull the base upwards.

  4. HMDX Chill Charging Port Replacement, Motherboard: 手順 4、 3の画像 1 HMDX Chill Charging Port Replacement, Motherboard: 手順 4、 3の画像 2 HMDX Chill Charging Port Replacement, Motherboard: 手順 4、 3の画像 3
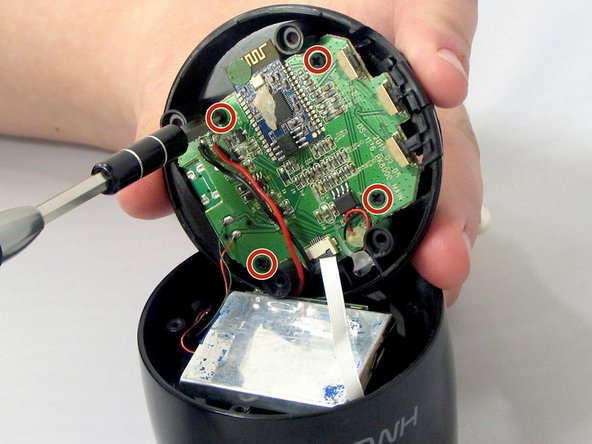
    • Use a Phillips #1 screwdriver to remove the four 6 mm screws that secure the motherboard to the base of the device.

  5. HMDX Chill Charging Port Replacement: 手順 5、 1の画像 1
    • Pull the motherboard away from the base gently.

    • Do not pull too hard on the motherboard. It is still attached to the base by wires.

  6. HMDX Chill Charging Port Replacement: 手順 6、 3の画像 1 HMDX Chill Charging Port Replacement: 手順 6、 3の画像 2 HMDX Chill Charging Port Replacement: 手順 6、 3の画像 3
    • Use a soldering iron to desolder the wires connecting the motherboard to the case.

  7. HMDX Chill Charging Port Replacement: 手順 7、 2の画像 1 HMDX Chill Charging Port Replacement: 手順 7、 2の画像 2
    • Insert the spudger between the case and the wire and move the spudger upwards.

    • This will cause the case to prop open.

    • The wire behind the motherboard will now be visible. Pull this out from behind.

  8. HMDX Chill Charging Port Replacement: 手順 8、 1の画像 1
    • Use the soldering iron to desolder the wires connecting the motherboard to the base of the HMDX Chill.

  9. HMDX Chill Charging Port Replacement, Desolder the Charging Port: 手順 9、 2の画像 1 HMDX Chill Charging Port Replacement, Desolder the Charging Port: 手順 9、 2の画像 2
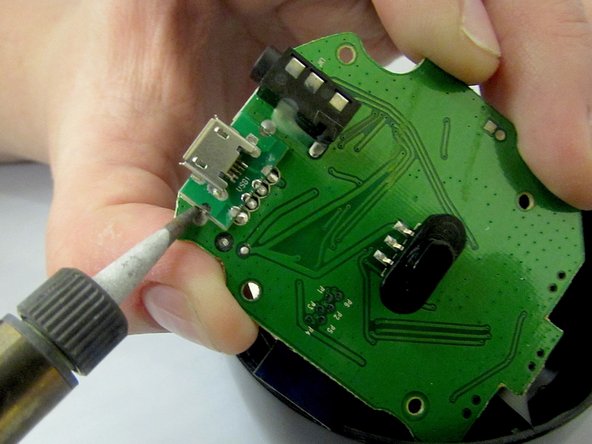
    • Using a soldering tool, desolder the charging port from the motherboard.

終わりに

To reassemble your device, follow these instructions in reverse order.

作成者

5人の作成者と共同で作成されました。

Jourdan Holubasch

メンバー登録日: 03/31/16

759 ポイント

7のガイドは作成済み

チーム

EWU-Giguere-S16S1G1 EWU-Giguere-S16S1G1人のメンバー

Community

4 メンバー

7のガイドは作成済み

コメント 1 件

I have the charging port removed. Where do I find a replacement??

Aaron Hughes - 返信

コメントを追加

統計データ:

過去 24時間: 0

過去 7 日: 0

過去 30 日: 0

今までの合計 482