はじめに
This is a prerequisite guide! This guide is part of an another procedure and is not meant to be used alone.
This guide shows how to partially separate the motherboard from the frame in order to access the rear-facing camera.
必要な工具と部品
-
-
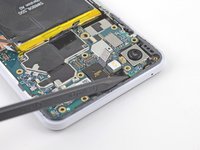
Remove the 4 mm long T3 screw securing the top-right corner of the loudspeaker.
-
-
-
Remove the two 3 mm long T3 screws securing the button array connector bracket.
-
-
-
-
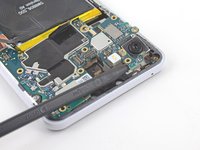
Use the point of a spudger to pry up and disconnect the earpiece connector from its motherboard socket.
-
Carefully remove the connector pad surrounding the earpiece socket.
-
-
-
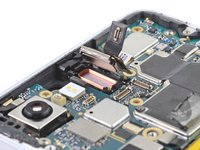
Use the point of a spudger to pry up and disconnect the following:
-
Microphone connector
-
Button array connector
-
Earpiece connector (should already be disconnected)
-
-
-
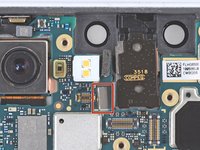
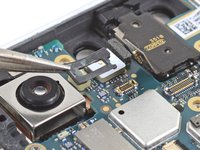
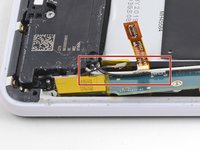
Insert the point of a spudger underneath the motherboard, near the rear-facing camera module.
-
Pry up gently to loosen the motherboard from its recess.
-
If the motherboard is not budging, make sure you have disconnected all the connectors.
-
The motherboard has to squeeze past the earpiece speaker cable. If too much pressure is put on the earpiece cable, the earpiece speaker will pop open. You can prevent this by pressing on the earpiece module with a finger while you maneuver the motherboard out.
-
-
-
While you perform this step, take care to keep slack on the antenna cables attached to the bottom leg of the motherboard.
-
Lift the top half of the motherboard slightly to clear the board from its recess.
-
Twist the left edge of the board over and out of the phone and rest the board on the right edge of the phone.
-


To reassemble your device, follow these instructions in reverse order.
To reassemble your device, follow these instructions in reverse order.
3 の人々がこのガイドを完成させました。

