メインコンテンツにスキップ

DualShock 4 CUH-ZCT2U D-pad Gasket Replacement

必要な工具と部品

  1. DualShock 4 CUH-ZCT2U D-pad Gasket Replacement, D-pad Gasket: 手順 1、 2の画像 1 DualShock 4 CUH-ZCT2U D-pad Gasket Replacement, D-pad Gasket: 手順 1、 2の画像 2
    • Use a Phillips #00 screwdriver to remove the four 6.0 mm-long screws on the back of the controller.

  2. DualShock 4 CUH-ZCT2U D-pad Gasket Replacement: 手順 2、 2の画像 1 DualShock 4 CUH-ZCT2U D-pad Gasket Replacement: 手順 2、 2の画像 2
    • Four fragile plastic clips hold the front and back case together. You can see their locations more clearly in this guide.

    • If you break these clips, the controller will still work.

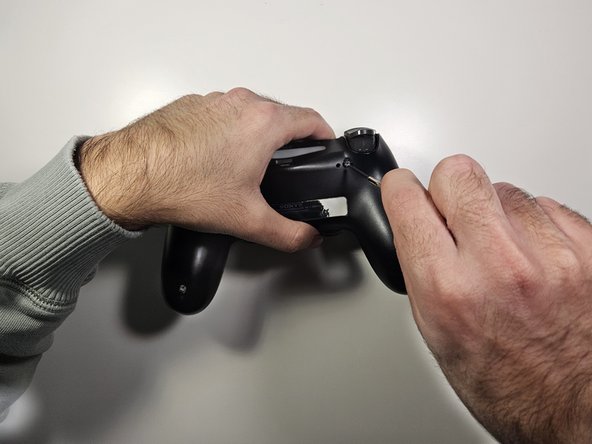
    • Insert the tip of an opening tool or spudger into the seam of the device and gently release the clips around the perimeter of the controller to separate the front and back sections.

  3. DualShock 4 CUH-ZCT2U D-pad Gasket Replacement: 手順 3、 3の画像 1 DualShock 4 CUH-ZCT2U D-pad Gasket Replacement: 手順 3、 3の画像 2 DualShock 4 CUH-ZCT2U D-pad Gasket Replacement: 手順 3、 3の画像 3
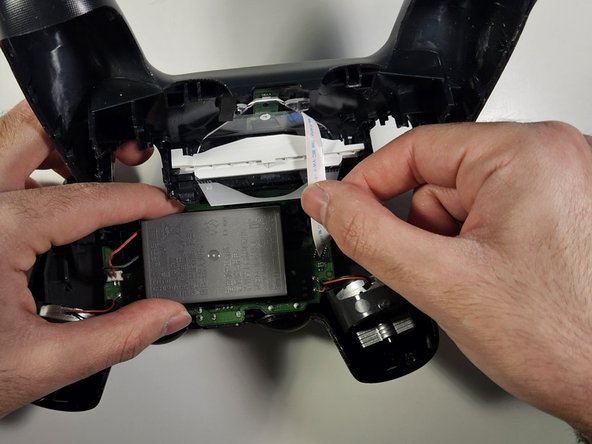
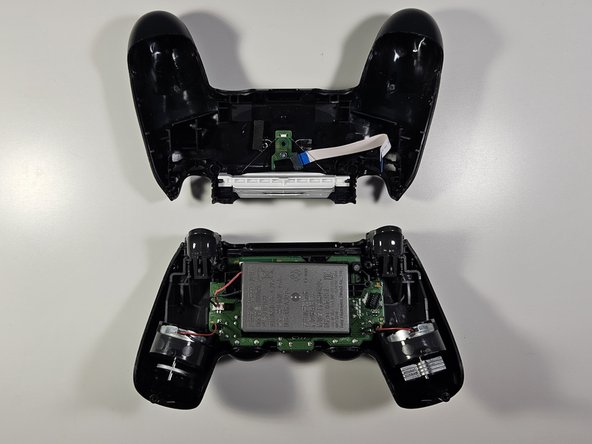
    • Use your fingers to gently pull the ribbon cable straight out of its connector on the motherboard.

    • Since this cable's pull tab is too small to grab with your fingers or tweezers, grab the cable itself. Otherwise utilize pull tabs whenever possible.

    • Do not remove the entire socket from the motherboard, just the ribbon cable. The blue part of the cable should be visible if done correctly.

    • During reassembly, grab the ribbon cable by the blue tab and gently press the cable straight into the connector. Push the blue tab rather than the ribbon cable itself.

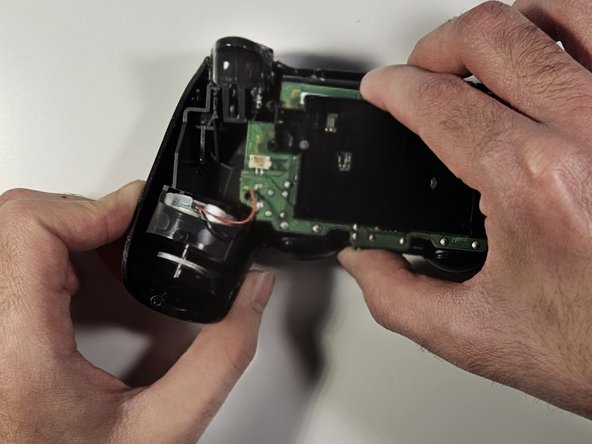
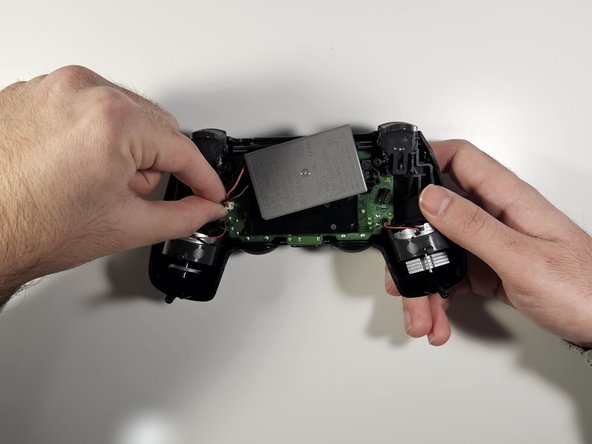
  4. DualShock 4 CUH-ZCT2U D-pad Gasket Replacement: 手順 4、 3の画像 1 DualShock 4 CUH-ZCT2U D-pad Gasket Replacement: 手順 4、 3の画像 2 DualShock 4 CUH-ZCT2U D-pad Gasket Replacement: 手順 4、 3の画像 3
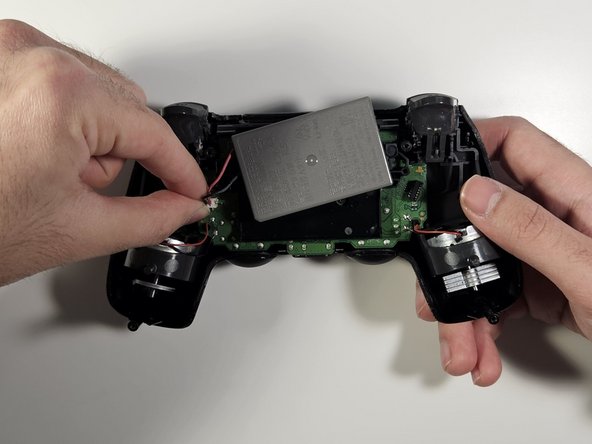
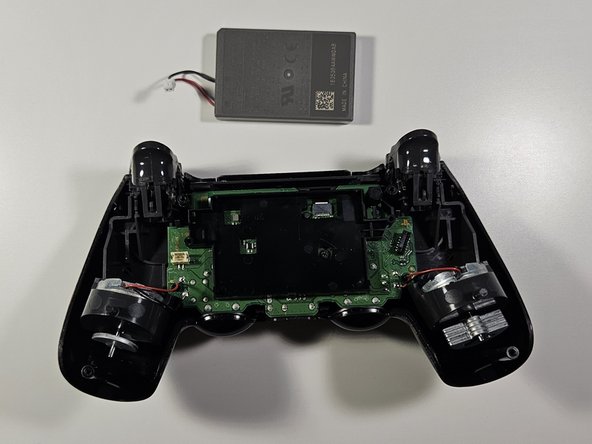
    • Use a pair of tweezers or your fingers to pull the battery's power connector straight up from the motherboard.

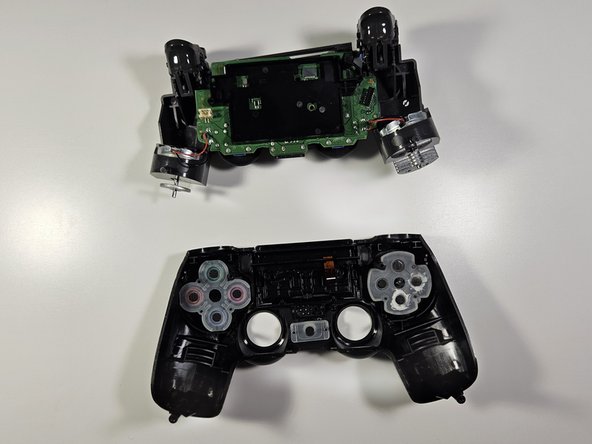
  5. DualShock 4 CUH-ZCT2U D-pad Gasket Replacement: 手順 5、 3の画像 1 DualShock 4 CUH-ZCT2U D-pad Gasket Replacement: 手順 5、 3の画像 2 DualShock 4 CUH-ZCT2U D-pad Gasket Replacement: 手順 5、 3の画像 3
    • Use a spudger to disconnect the red cable from the motherboard under the black plastic the battery was lying on.

    • Carefully pull apart the front of the controller (the part with the silicon Dpad visible) from the back half.

    • Tweezers were used in the image. However, using metal tools on the internals of your controller can damage them so it is best to avoid using them for prying.

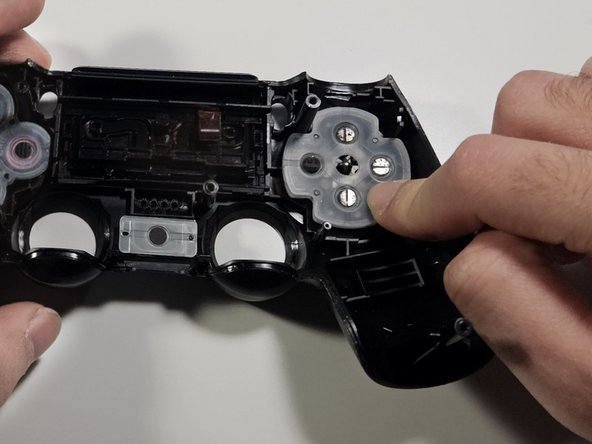
  6. DualShock 4 CUH-ZCT2U D-pad Gasket Replacement: 手順 6、 2の画像 1 DualShock 4 CUH-ZCT2U D-pad Gasket Replacement: 手順 6、 2の画像 2
    • Pull off the old silicone pads.

    • Place the new silicone rubber pads on top of the four arrow keys with the flat side up.

    • The orientation does not matter.

  7. DualShock 4 CUH-ZCT2U D-pad Gasket Replacement: 手順 7、 3の画像 1 DualShock 4 CUH-ZCT2U D-pad Gasket Replacement: 手順 7、 3の画像 2 DualShock 4 CUH-ZCT2U D-pad Gasket Replacement: 手順 7、 3の画像 3
    • To reassemble, follow these instructions in reverse order.

終わりに

To reassemble your device, follow these instructions in reverse order.

ある他の人がこのガイドを完成しました。

作成者

1人の作成者と共同作成されました。

Ryan Zareh

メンバー登録日: 01/09/24

175 ポイント

1ガイドが承認済み

チーム

York University, Team 2-30, O'Regan Winter 2024 York University, Team 2-30, O'Regan Winter 2024人のメンバー

YORK-O'REGAN-W24S2G30

1 メンバー

1のガイドは作成済み

0 件のコメント

コメントを追加

統計データ:

過去 24時間: 4

過去 7 日: 18

過去 30 日: 127

今までの合計 208