メインコンテンツにスキップ

Dreamax DMX-ST7A Motherboard Replacement

必要な工具と部品

  1. Dreamax DMX-ST7A Motherboard Replacement, Back Cover: 手順 1、 1の画像 1
    • Position the tablet so the ports and screws are facing you.

  2. Dreamax DMX-ST7A Motherboard Replacement: 手順 2、 1の画像 1
    • Remove the two 2.5mm screws using the Phillips #00 precision screwdriver.

  3. Dreamax DMX-ST7A Motherboard Replacement: 手順 3、 2の画像 1 Dreamax DMX-ST7A Motherboard Replacement: 手順 3、 2の画像 2
    • Use the plastic opening tool to assist in removing the back cover.

  4. Dreamax DMX-ST7A Motherboard Replacement: 手順 4、 1の画像 1
    • Upon removing the back cover position the tablet as seen in the picture.

  5. Dreamax DMX-ST7A Motherboard Replacement, Motherboard: 手順 5、 2の画像 1 Dreamax DMX-ST7A Motherboard Replacement, Motherboard: 手順 5、 2の画像 2
    • Lift the black bars to expose the data strips.

    • Remove the data strips.

  6. Dreamax DMX-ST7A Motherboard Replacement: 手順 6、 2の画像 1 Dreamax DMX-ST7A Motherboard Replacement: 手順 6、 2の画像 2
    • Remove the three 2.5mm screws using the Phillips #00 precision screwdriver that is holding the motherboard in place.

  7. Dreamax DMX-ST7A Motherboard Replacement: 手順 7、 2の画像 1 Dreamax DMX-ST7A Motherboard Replacement: 手順 7、 2の画像 2
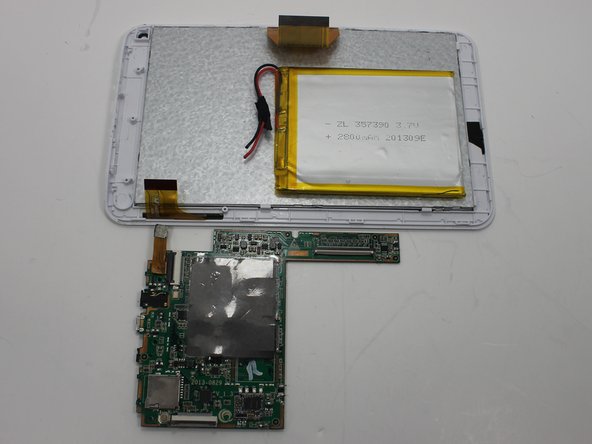
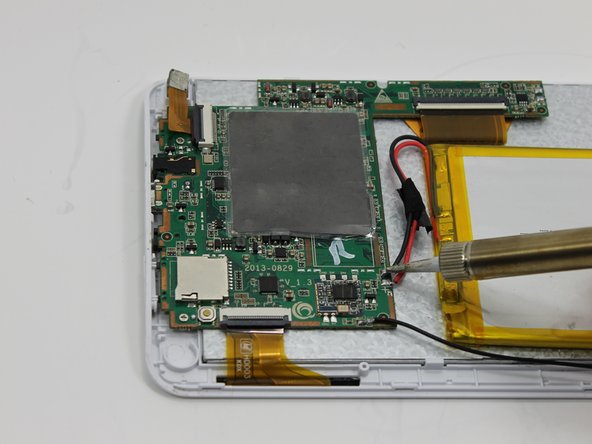
    • Remove the three wires connected to the battery along with the speaker wires from the motherboard. Then remove the motherboard from the tablet.

  8. Dreamax DMX-ST7A Motherboard Replacement: 手順 8、 2の画像 1 Dreamax DMX-ST7A Motherboard Replacement: 手順 8、 2の画像 2
終わりに

To reassemble your device, follow these instructions in reverse order.

ある他の人がこのガイドを完成しました。

作成者

1人の作成者と共同作成されました。

Stacey Mattila

メンバー登録日: 03/18/15

543 ポイント

5のガイドは作成済み

チーム

Michigan Tech, Team 1-4, Lauer Spring 2015 Michigan Tech, Team 1-4, Lauer Spring 2015人のメンバー

MTU-LAUER-S15S1G4

2 メンバー

10のガイドは作成済み

0 件のコメント

コメントを追加

統計データ:

過去 24時間: 0

過去 7 日: 3

過去 30 日: 4

今までの合計 305