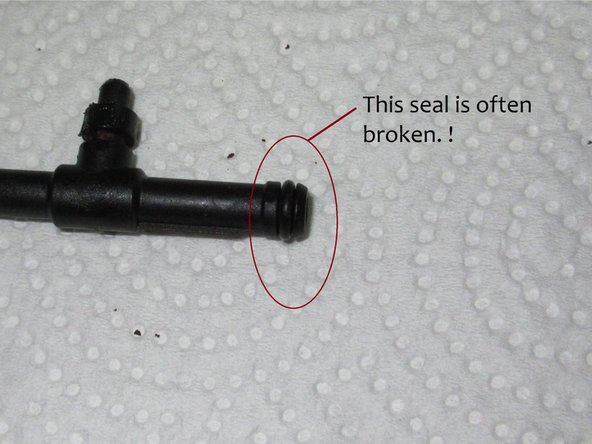
メインコンテンツにスキップ

Dismantling the Jura drainage valve, instructions 2

必要な工具と部品

  1. Dismantling the Jura drainage valve, instructions 2, Jura drainage valve: 手順 1、 3の画像 1 Dismantling the Jura drainage valve, instructions 2, Jura drainage valve: 手順 1、 3の画像 2 Dismantling the Jura drainage valve, instructions 2, Jura drainage valve: 手順 1、 3の画像 3
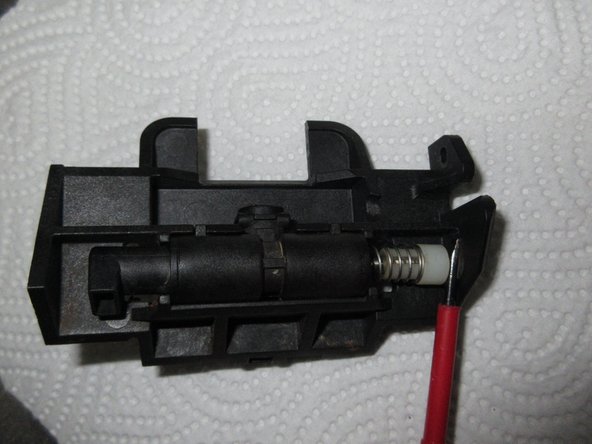
    • The brewing group has already been removed and disassembled. Now it's time for the drainage valve.

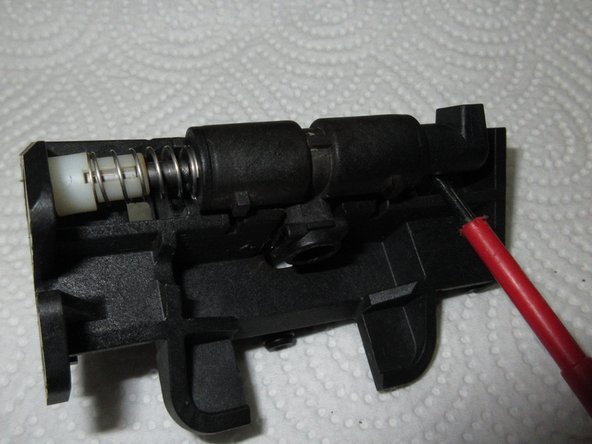
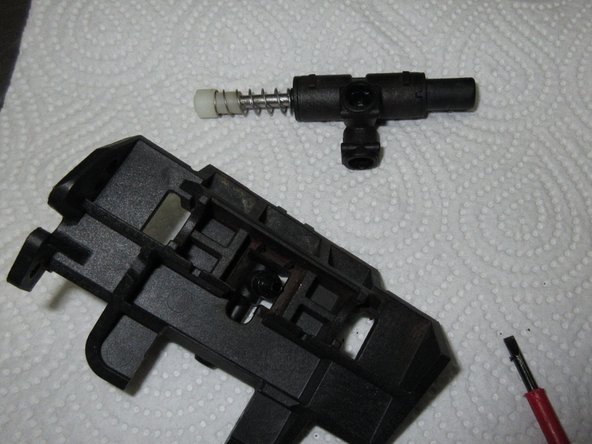
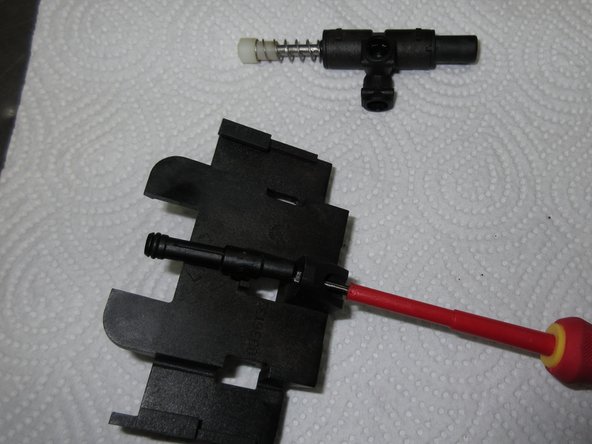
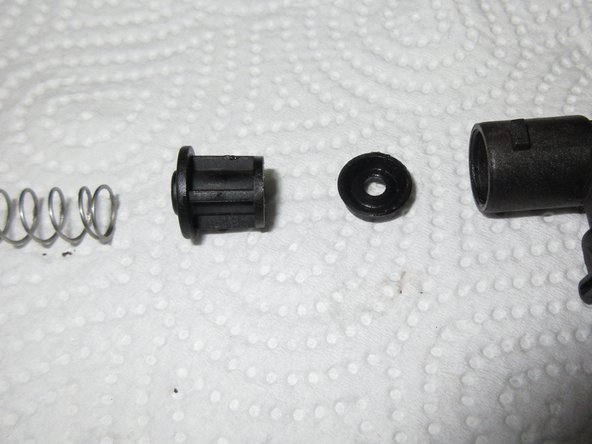
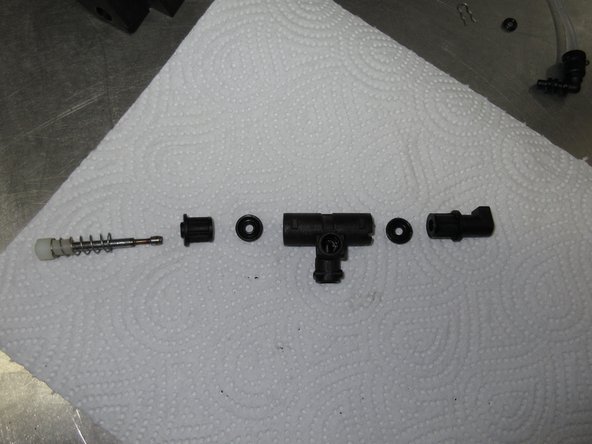
    • There will be many pictures

    • All you need a small flathead screwdriver.

  2. Dismantling the Jura drainage valve, instructions 2: 手順 2、 3の画像 1 Dismantling the Jura drainage valve, instructions 2: 手順 2、 3の画像 2 Dismantling the Jura drainage valve, instructions 2: 手順 2、 3の画像 3
    • Images front and back

  3. Dismantling the Jura drainage valve, instructions 2: 手順 3、 3の画像 1 Dismantling the Jura drainage valve, instructions 2: 手順 3、 3の画像 2 Dismantling the Jura drainage valve, instructions 2: 手順 3、 3の画像 3
    • Pull off the clamp and pull out the inlet hose. At the end there is a seal, it often gets stuck in the drainage valve. Swap them out when reassembling.

    • The angled inlet is not installed on all models. The hose is then plugged in directly. As the installation is somewhat tedious, you can also install the part later.

  4. Dismantling the Jura drainage valve, instructions 2: 手順 4、 3の画像 1 Dismantling the Jura drainage valve, instructions 2: 手順 4、 3の画像 2 Dismantling the Jura drainage valve, instructions 2: 手順 4、 3の画像 3
    • Pull out the clip on the docking tube

    • Pry out the valve body. Make sure the white cap slides out of its hole.

    • Detach the docking nozzle.

    • The seal of the docking connector is subject to heavy loads as it slides into the opening on the brewing piston with every brewing process. It is slightly thinner than all other hose seals. If you accidentally fit the wrong seal, the drain valve will no longer work.

  5. Dismantling the Jura drainage valve, instructions 2: 手順 5、 1の画像 1
    • The white cap holds the valve tappet and pulls it out. If it is cracked, it can no longer grip it properly. It therefore remains in the position that the cap holds open for it at the moment it happens to be in. The drainage valve no longer works.

    • Check whether the cap is still firmly in place. If this is not the case, you will need to replace it with a new cap, preferably made of metal.

    • Of course, you can also get a new drainage valve.

  6. Dismantling the Jura drainage valve, instructions 2: 手順 6、 3の画像 1 Dismantling the Jura drainage valve, instructions 2: 手順 6、 3の画像 2 Dismantling the Jura drainage valve, instructions 2: 手順 6、 3の画像 3
    • Detailed photos.

    • The position of the sealing rings are marked green in picture 3.

    • The sealing ring on the docking socket is marked in red in picture 2. It is especially important. It's a little thinner than the other two.

    • The brackets are marked in red.

  7. Dismantling the Jura drainage valve, instructions 2: 手順 7、 3の画像 1 Dismantling the Jura drainage valve, instructions 2: 手順 7、 3の画像 2 Dismantling the Jura drainage valve, instructions 2: 手順 7、 3の画像 3
    • Here all the parts of the valve.

  8. Dismantling the Jura drainage valve, instructions 2: 手順 8、 1の画像 1
    • Here is the entire valve in one picture

  9. Dismantling the Jura drainage valve, instructions 2: 手順 9、 3の画像 1 Dismantling the Jura drainage valve, instructions 2: 手順 9、 3の画像 2 Dismantling the Jura drainage valve, instructions 2: 手順 9、 3の画像 3
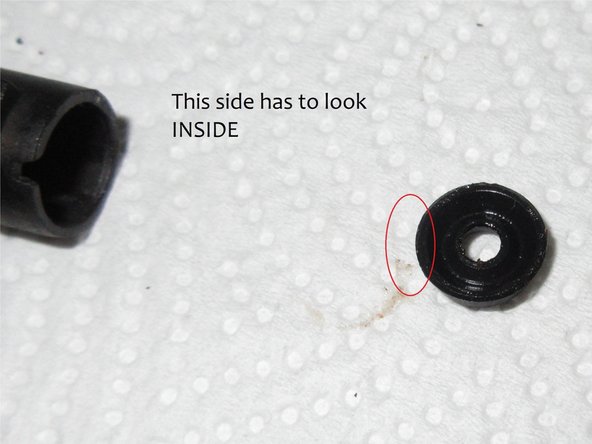
    • When assembling, make sure that the lips of the seals point to the pressure side, i.e. inward, and the flat side outward.

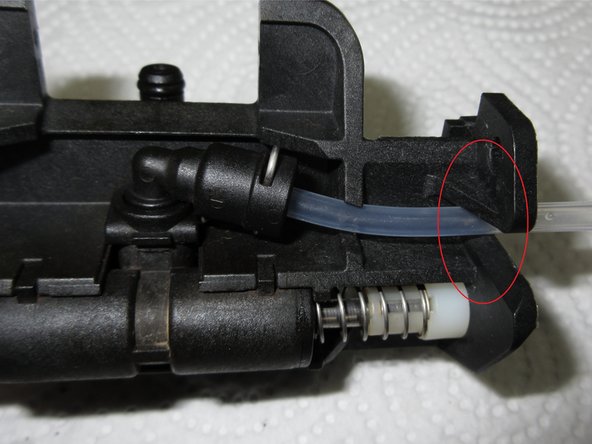
    • When installing, make sure that the pressure hose runs through the slot in the valve carrier.

    • Apply a thin layer of food-safe silicone grease to the seals before installation.

終わりに

Follow the steps in reverse order to reassemble your device.

3 の人々がこのガイドを完成させました。

以下の翻訳者の皆さんにお礼を申し上げます:

de en

100%

これらの翻訳者の方々は世界を修理する私たちのサポートをしてくれています。 あなたも貢献してみませんか?
翻訳を始める ›

作成者

2人の作成者と共同で作成されました。

Schwarzstein

メンバー登録日: 07/15/13

2,847 ポイント

13のガイドは作成済み

0 件のコメント

コメントを追加

統計データ:

過去 24時間: 7

過去 7 日: 39

過去 30 日: 169

今までの合計 8,267